
概覽
自訂 UI 並非必要。如果外掛程式的使用情境需要使用者檢視、比較、編輯、確認或瀏覽結構化資訊,就可以加入 UI。請確保 MCP 工具在沒有元件時也能發揮作用,讓 ChatGPT 和 Codex 即使沒有 UI 也能完成工作流程。
MCP 伺服器會為指定的工具傳回 UI 資源。元件在 ChatGPT 的 iframe 內執行,透過 MCP Apps 橋接介面與主機通訊(以 postMessage 傳送 JSON-RPC 訊息),並與對話一同顯示。開放的 MCP Apps 標準讓同一套 UI 能在不同的相容主機上執行。
從 MCP Apps 開始
對於 MCP 伺服器傳回的 UI,ChatGPT 採用開放的 MCP Apps 標準。MCP Apps 定義了伺服器如何將工具與 UI 資源建立關聯,以及 iframe 如何與主機通訊。
開發新的 UI 時:
- 使用
_meta.ui.resourceUri宣告 UI 資源。 - 使用
ui/*JSON-RPC 橋接介面,透過postMessage處理初始化、通知、工具呼叫、訊息及模型可見的上下文。 - 確保工具在沒有 UI 時仍可使用,讓模型能在不算繪元件的用戶端完成工作流程。
以這項標準為基礎,同一套 UI 就能在 ChatGPT 和其他相容的 MCP Apps 主機上執行。
準備實作時,請參閱 MCP Apps 規格。
如需側邊欄應用程式、檔案檢視器或功能更豐富的表單,請參閱擴充功能。
加入 ChatGPT 擴充功能
確認 MCP Apps 流程能正常運作後,僅針對共通規格未涵蓋的功能使用 window.openai。這些選用的擴充功能可以改善 ChatGPT 中的體驗,而可跨主機使用的 UI 基礎仍可獨立運作。
優先使用共通欄位和方法
只要共通規格涵蓋所需功能,就使用對應的 MCP Apps 欄位或方法:
| 目的 | MCP Apps 標準 | ChatGPT 相容別名 |
|---|---|---|
| 將工具連結至 UI 資源 | _meta.ui.resourceUri |
_meta["openai/outputTemplate"] |
| 接收工具輸入 | ui/initialize + ui/notifications/tool-input |
window.openai.toolInput |
| 接收工具結果 | ui/notifications/tool-result |
window.openai.toolOutput |
| 從 UI 呼叫工具 | tools/call |
window.openai.callTool |
| 傳送後續訊息 | ui/message |
window.openai.sendFollowUpMessage |
現有整合仍可使用相容別名。新的 UI 應使用中間欄的共通欄位和橋接方法。
擴充功能的例子包括:
- 使用
window.openai.requestCheckout提供即時結帳。 - 使用
window.openai.uploadFile、window.openai.selectFiles和window.openai.getFileDownloadUrl處理 ChatGPT 檔案。 - 使用
window.openai.requestModal開啟由主機控制的強制回應對話框。 - 使用
window.openai.widgetState和window.openai.setWidgetState保存小工具狀態。
請逐一偵測主機是否支援各項擴充功能,並在可行時提供替代方案:
const openai = typeof window !== "undefined" ? window.openai : undefined;
if (openai?.requestModal) {
await openai.requestModal({
template: "ui://widget/details.html",
});
} else {
document.body.textContent = "This host does not support modals.";
}避免根據主機或產品名稱決定要執行的程式碼。請直接檢查主機是否支援 UI 所需的功能。
如需擴充功能的方法簽章與範例,請參閱 window.openai 元件橋接介面參考文件。
選用的 OpenAI 元件庫
@openai/apps-sdk-ui 元件庫提供符合 ChatGPT 容器樣式的現成按鈕、卡片、輸入控制項和基本版面配置元件。使用這個元件庫即可維持一致的樣式,省去重新建構基礎元件的工作。
你也可以瀏覽 GitHub 上的 UI 範例程式碼庫。
選擇呈現方式
先從內嵌 UI 開始,只有在工作流程需要時才要求更多空間。選擇足以讓使用者理解結果或完成任務、且占用空間最少的呈現方式。
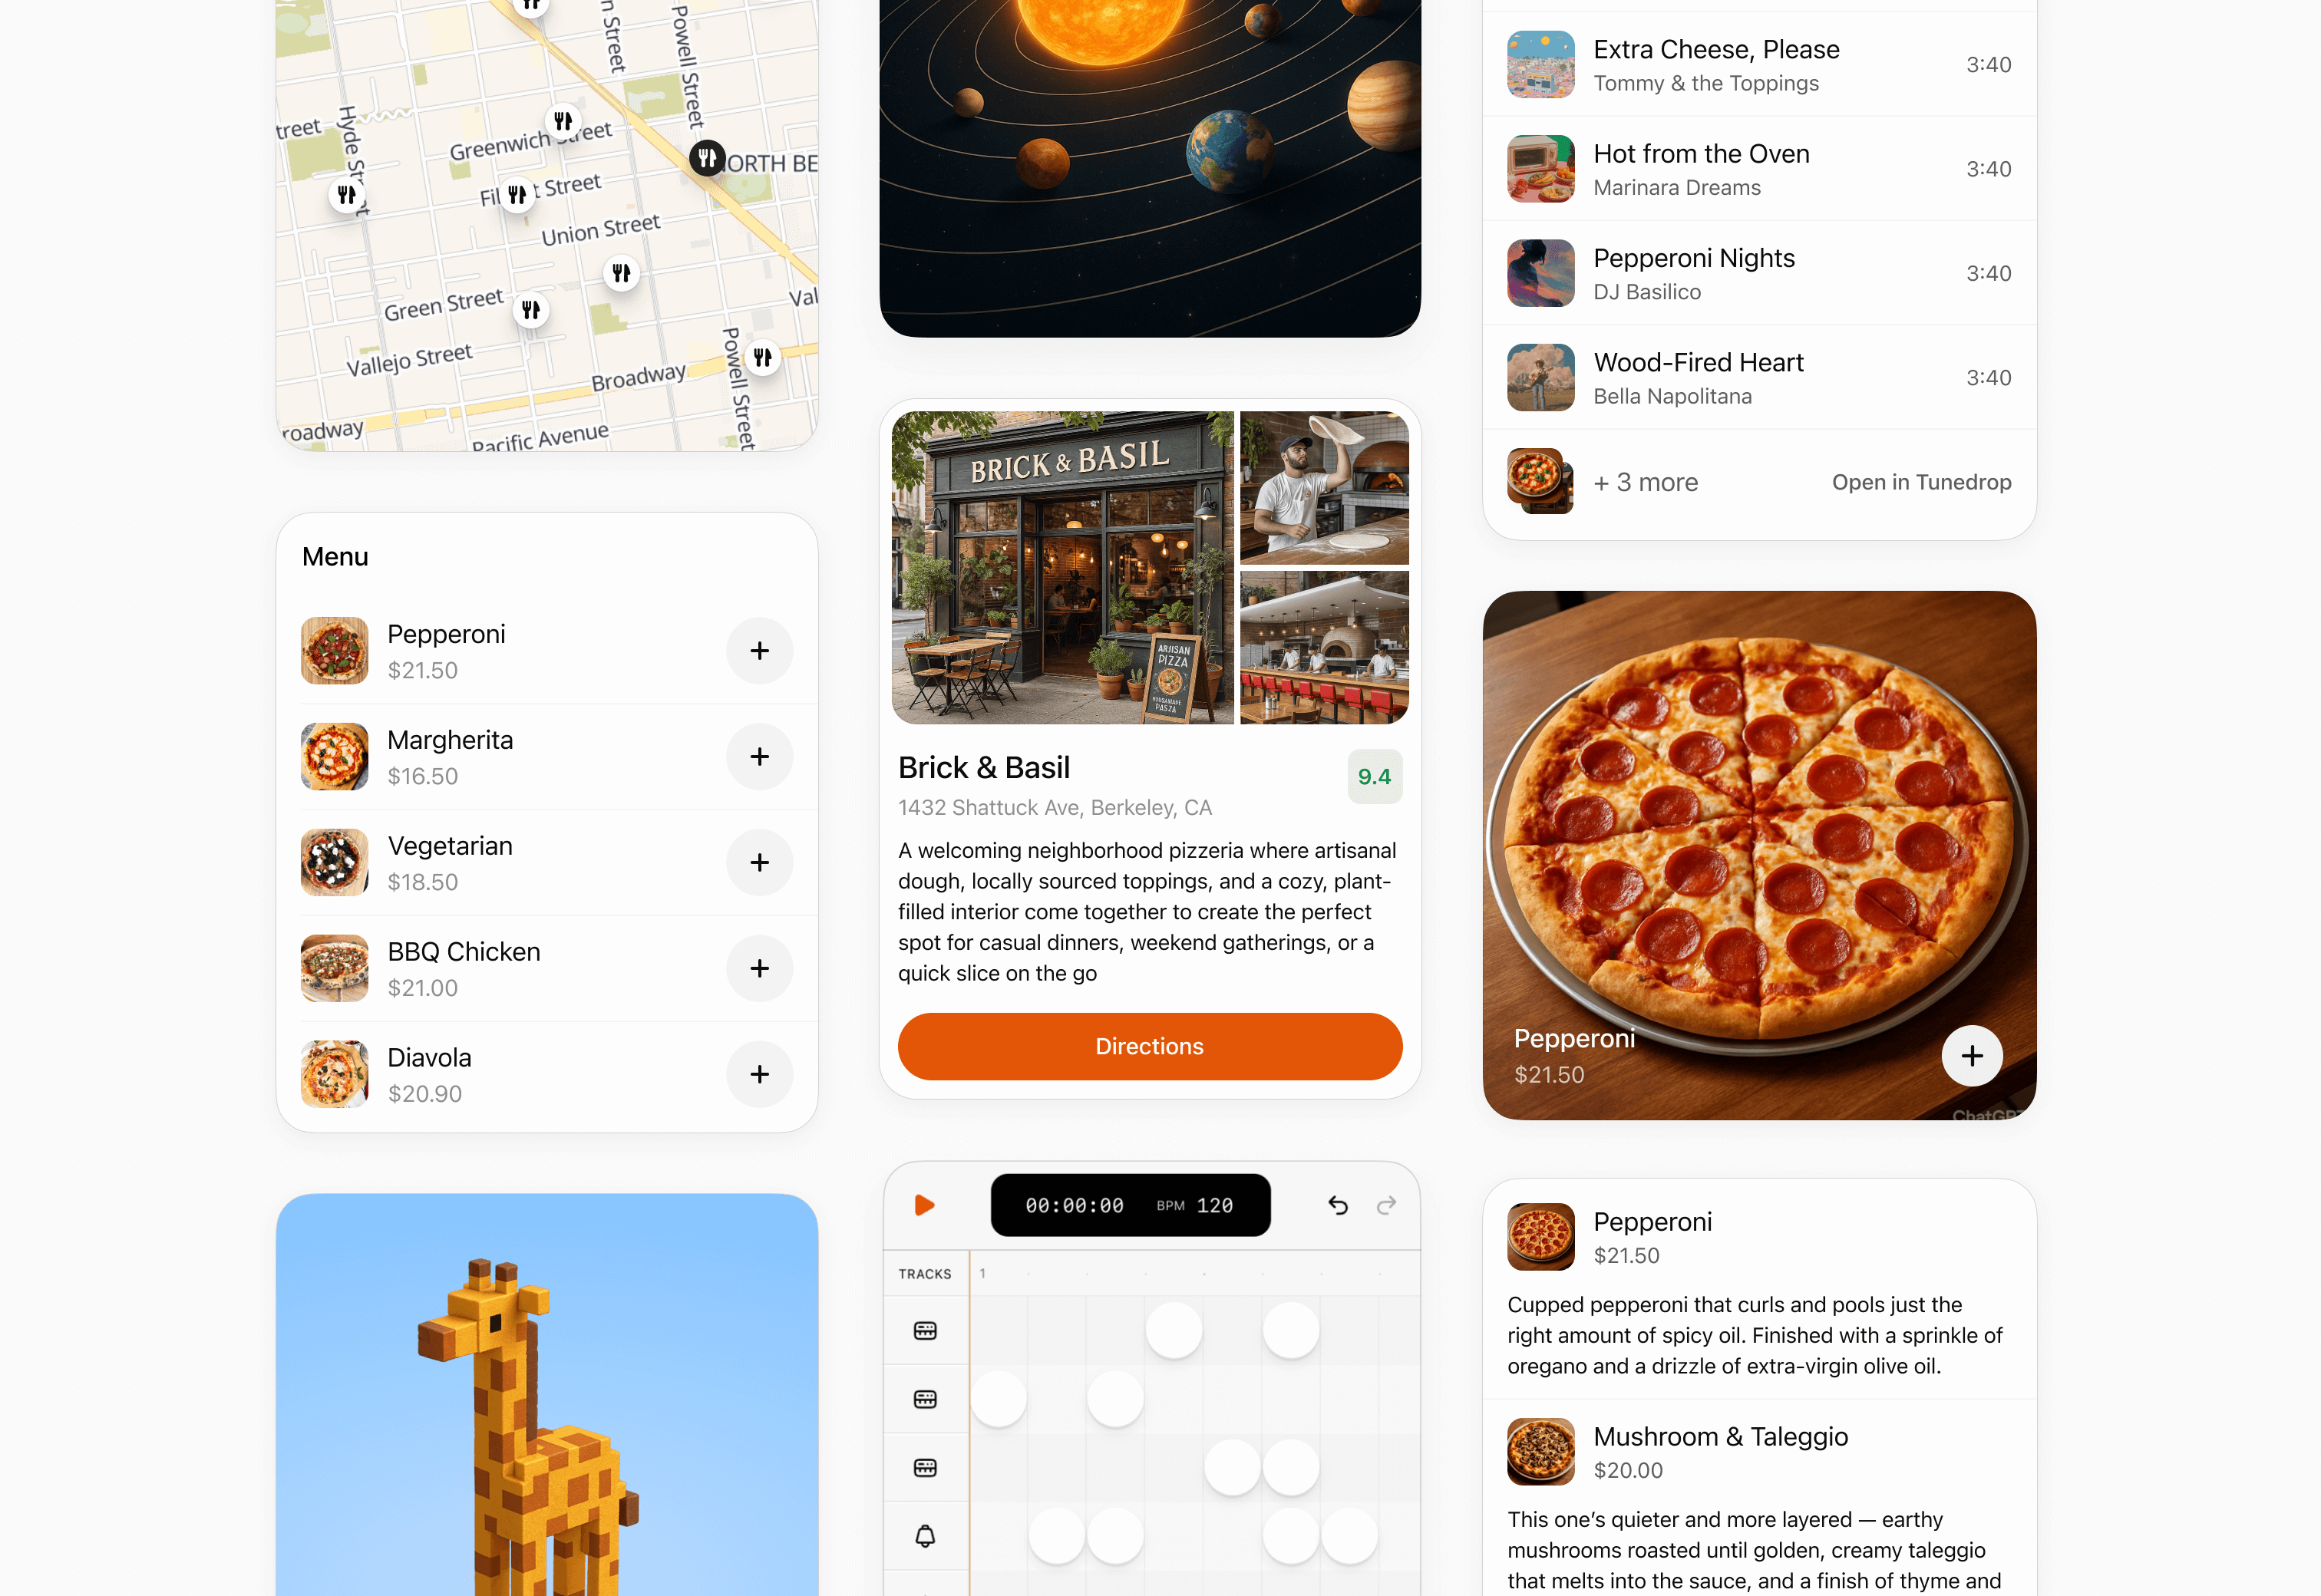
內嵌卡片
如需呈現單一重點結果、讓使用者確認某件事,或提供少數幾個操作選項,請使用內嵌卡片。讓使用者在卡片內就能完成操作,避免多層導覽。
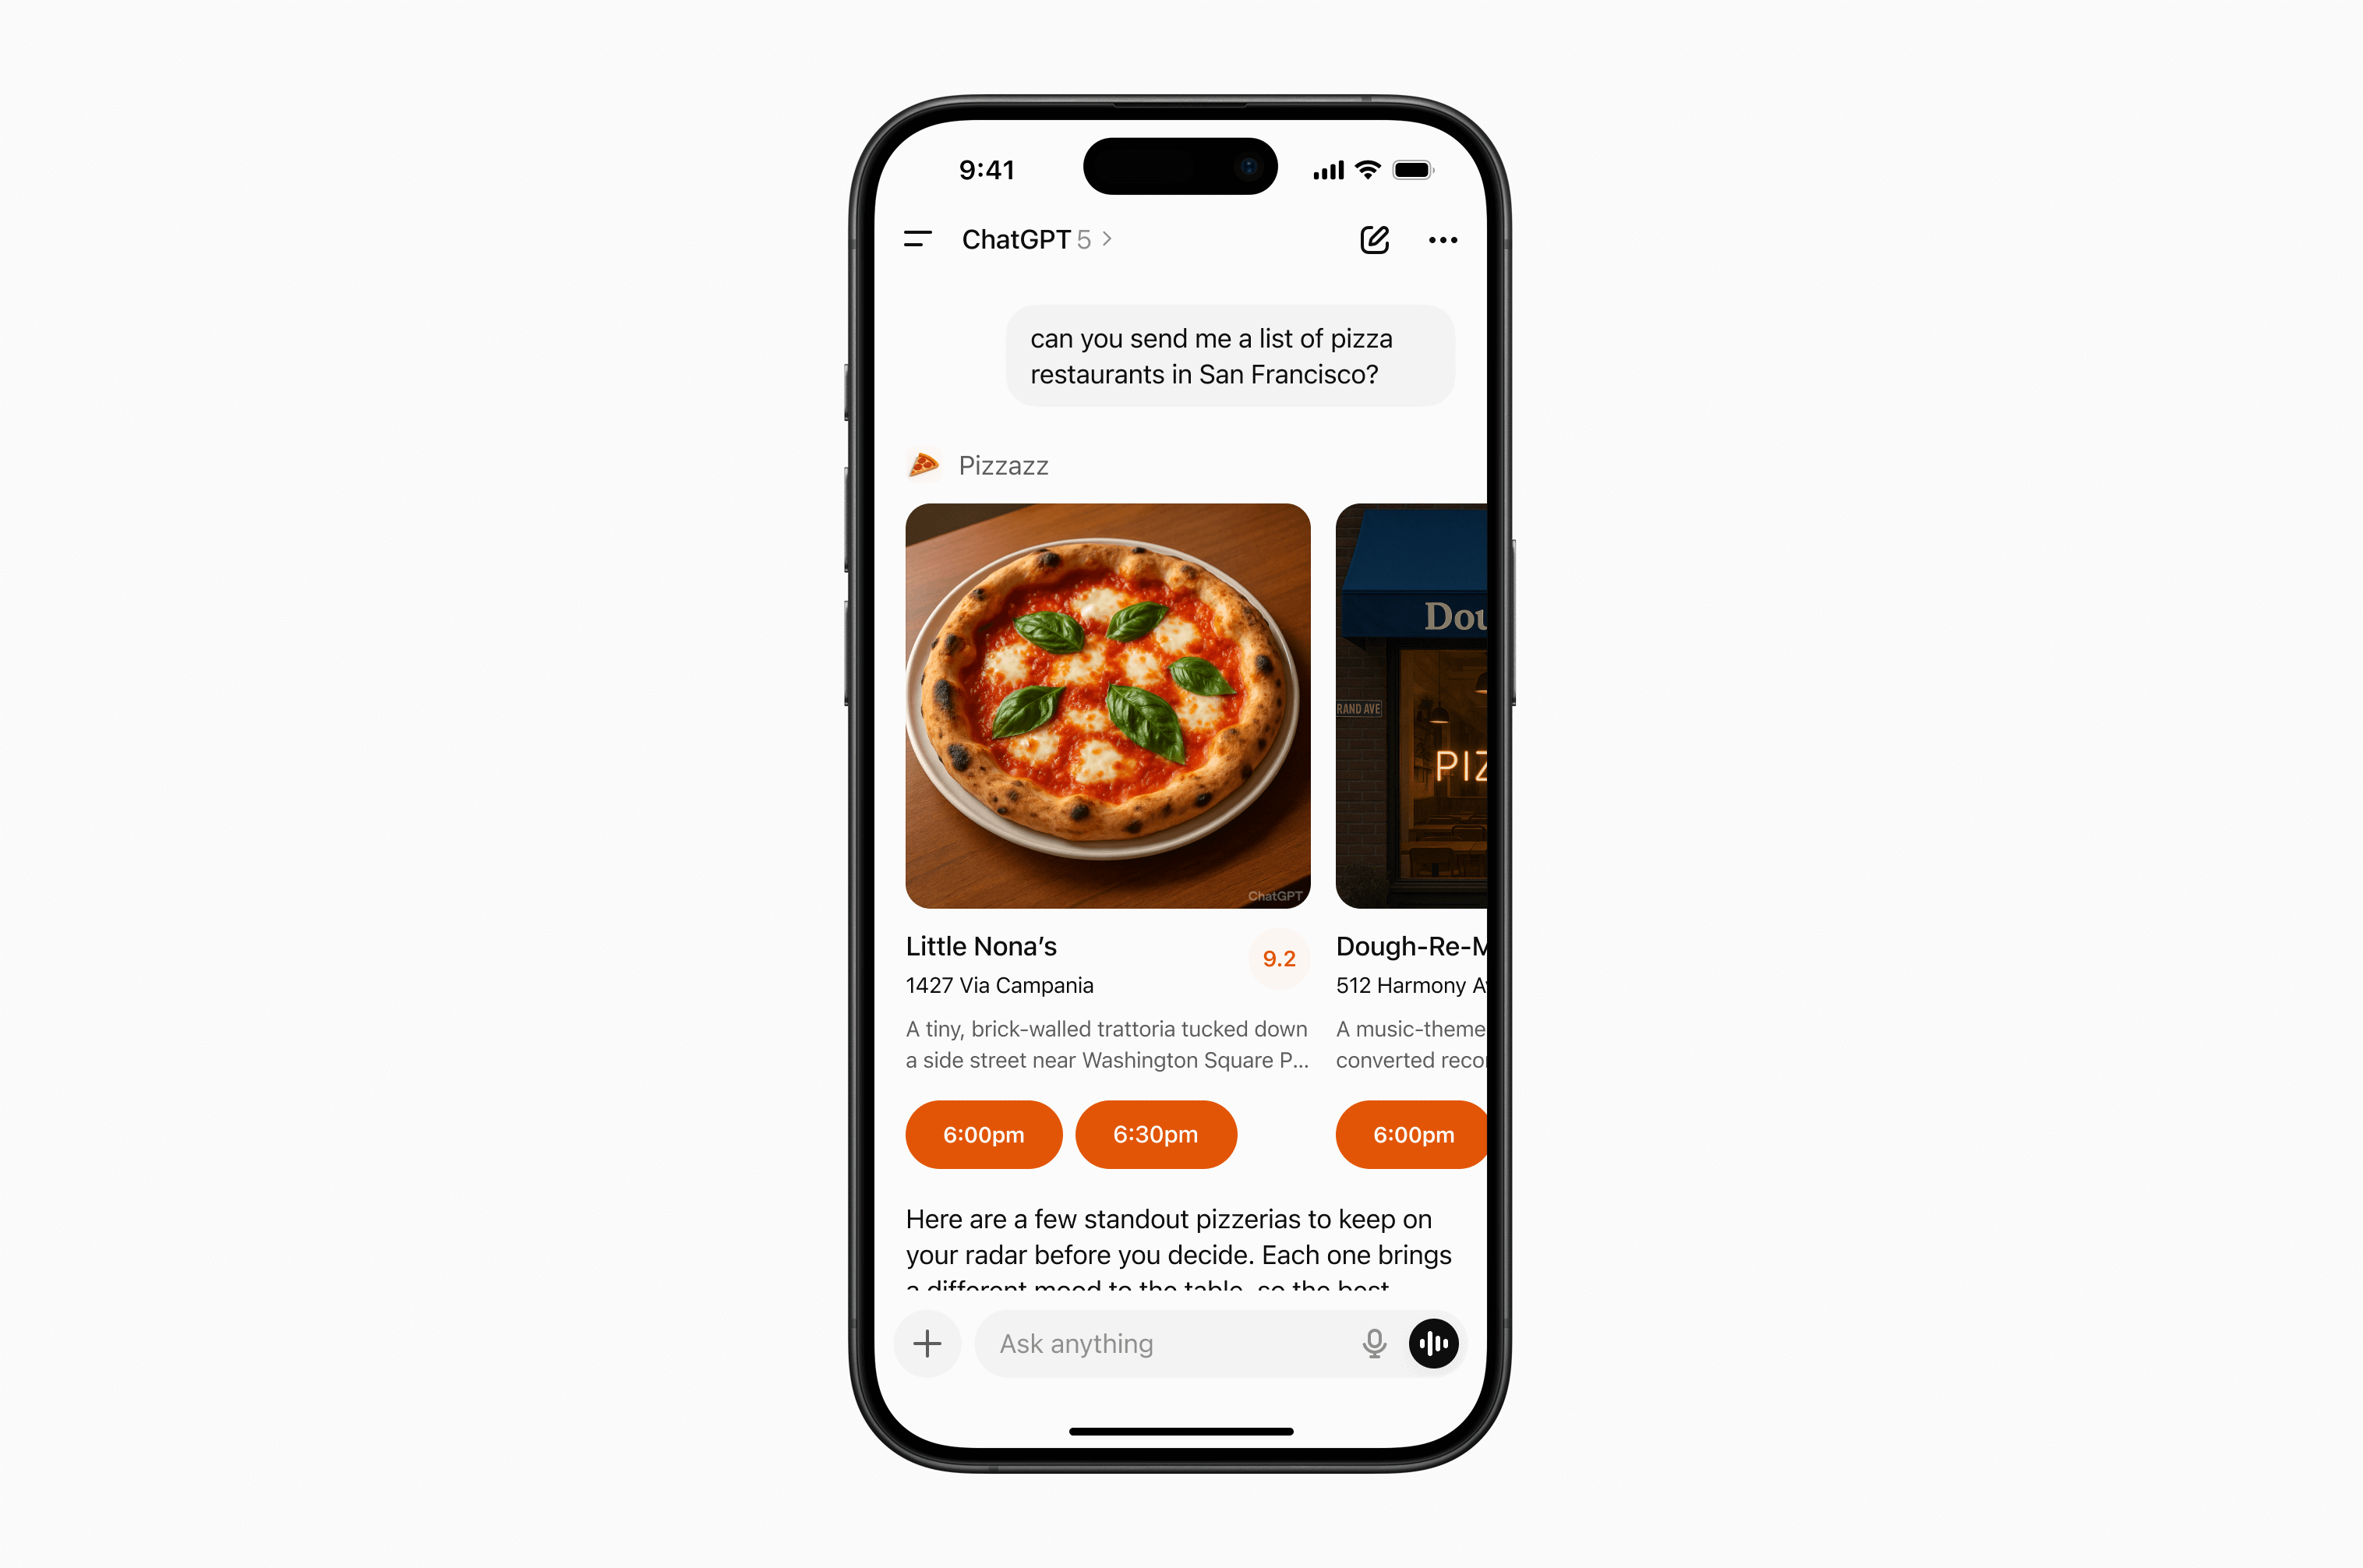
內嵌輪播
如果使用者需要快速瀏覽少量性質相近、以視覺內容為主的選項,並從中選擇,請使用內嵌輪播。
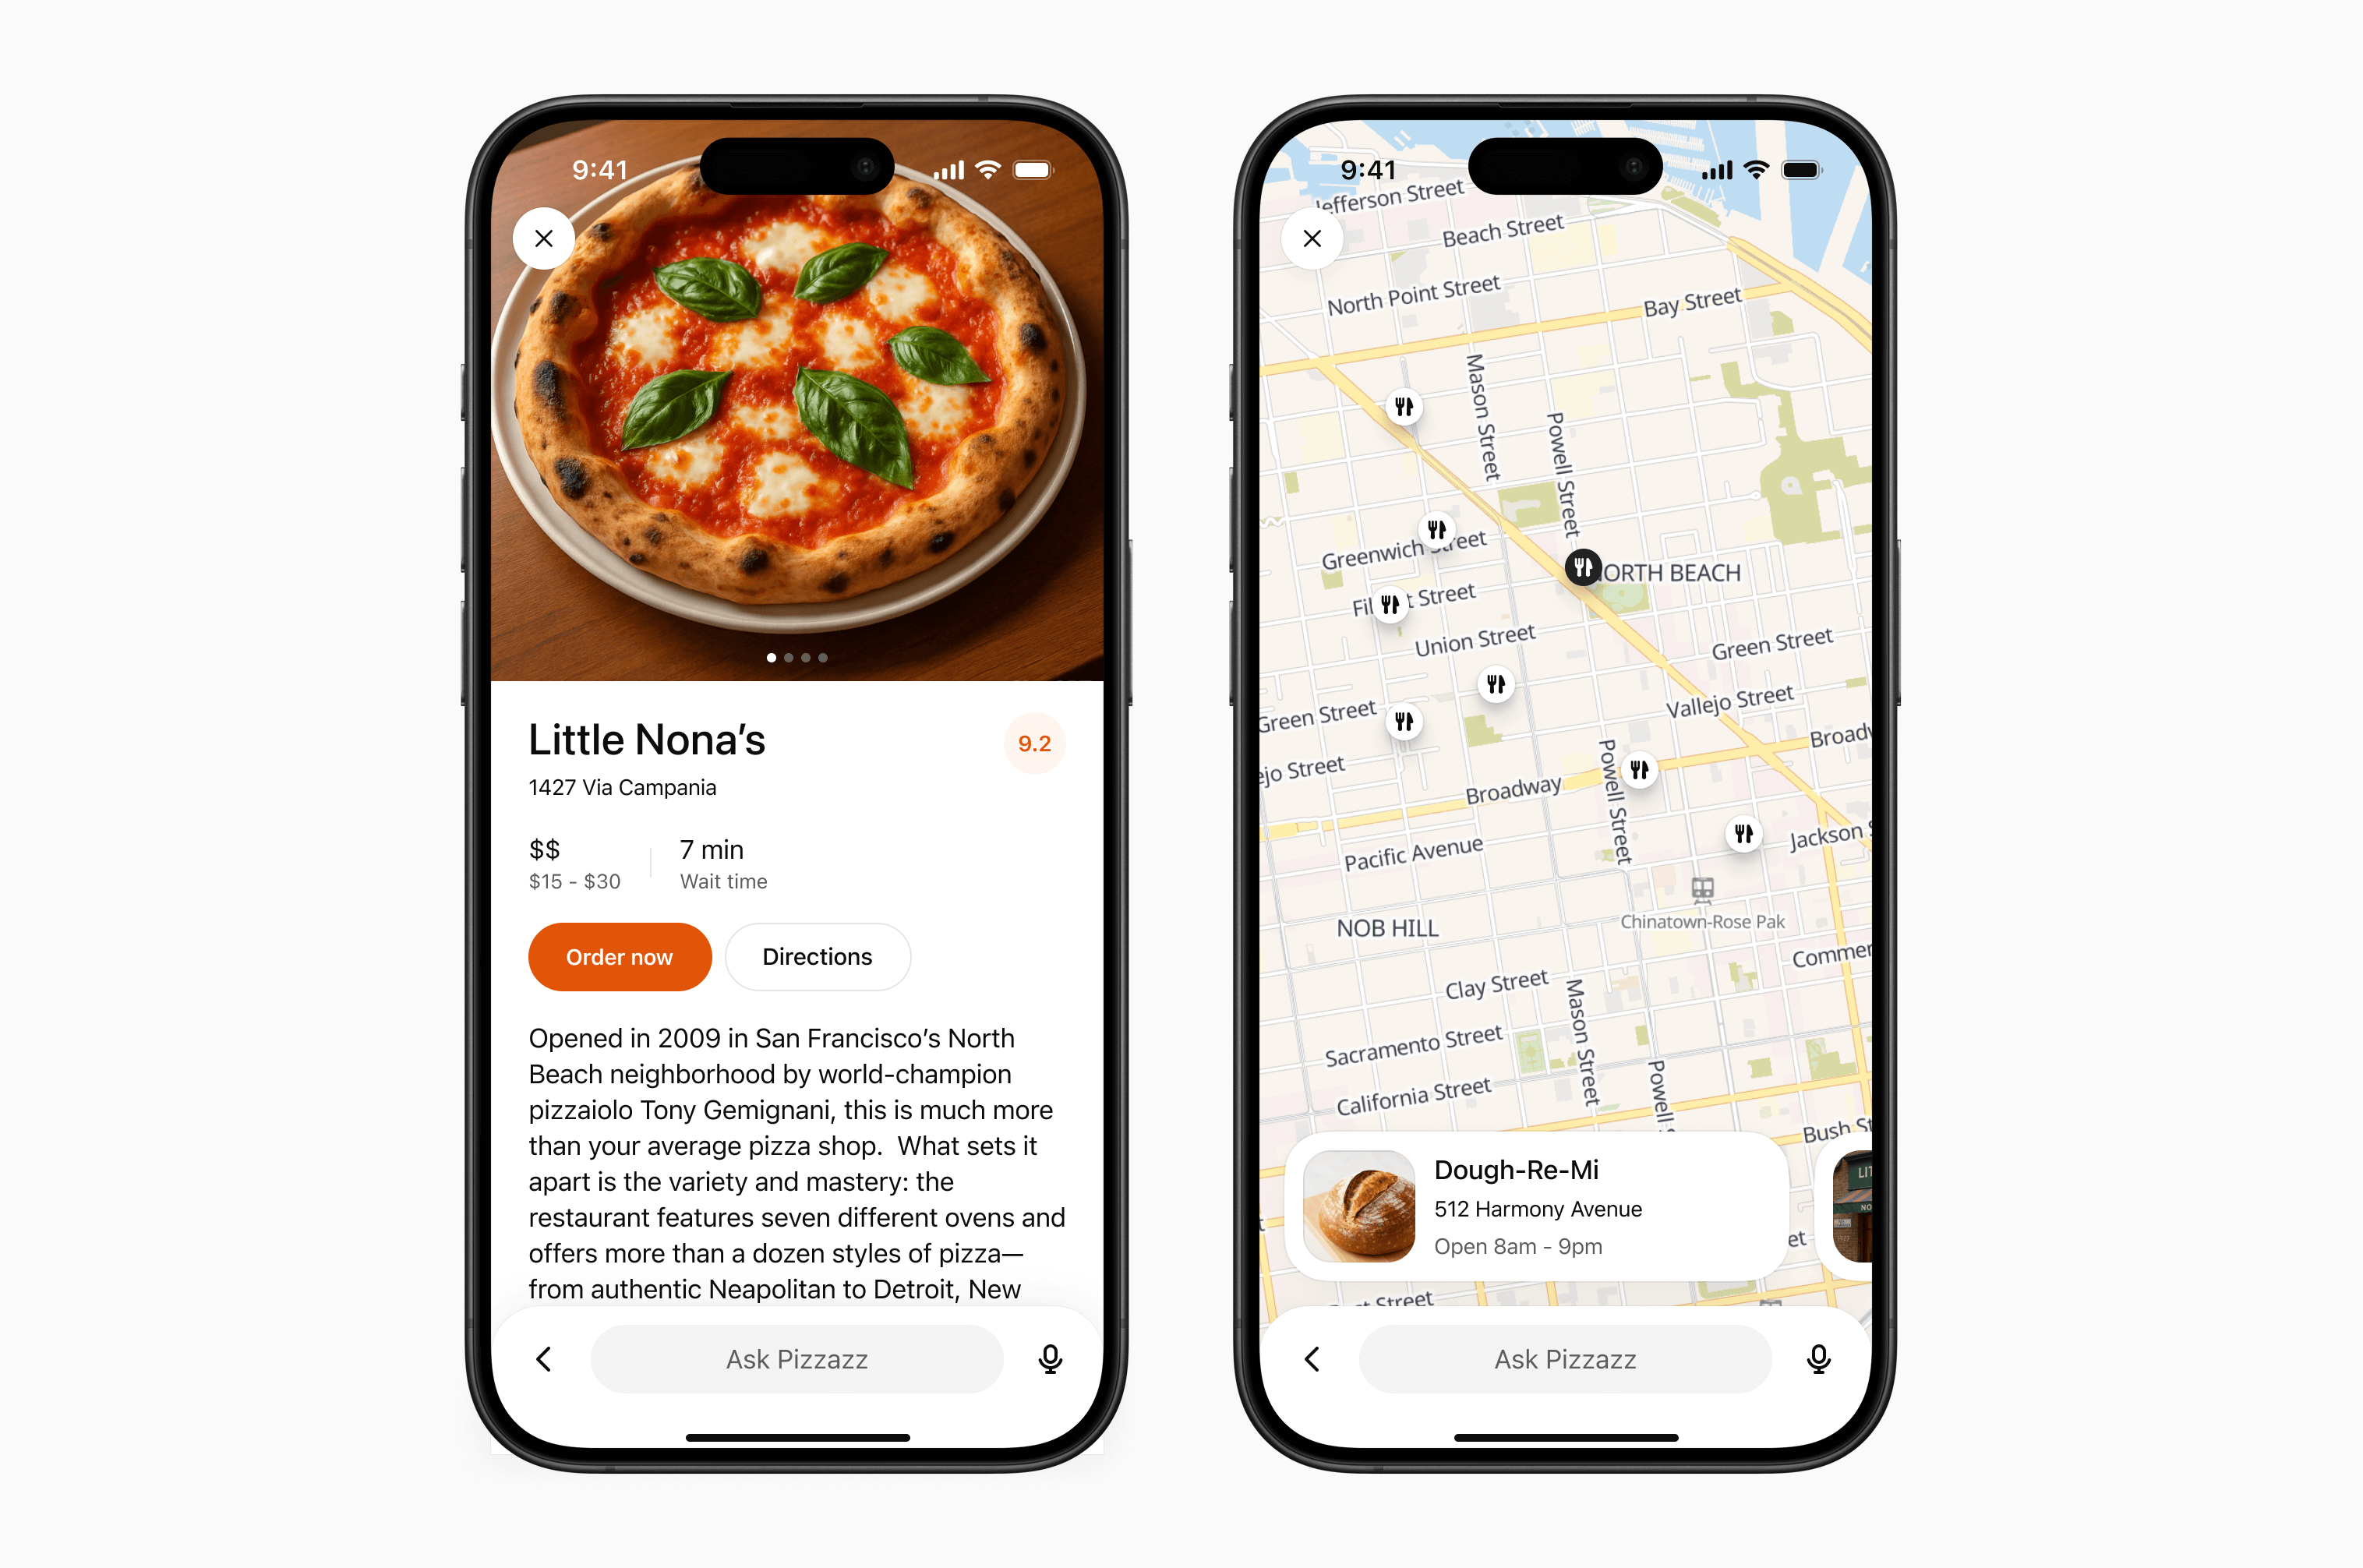
全螢幕
對於需要較大操作空間的任務,例如查看地圖、編輯畫布或瀏覽詳細資訊,請使用全螢幕模式。ChatGPT 的撰寫工具在全螢幕模式下仍可使用,設計時請讓使用者能搭配它操作。
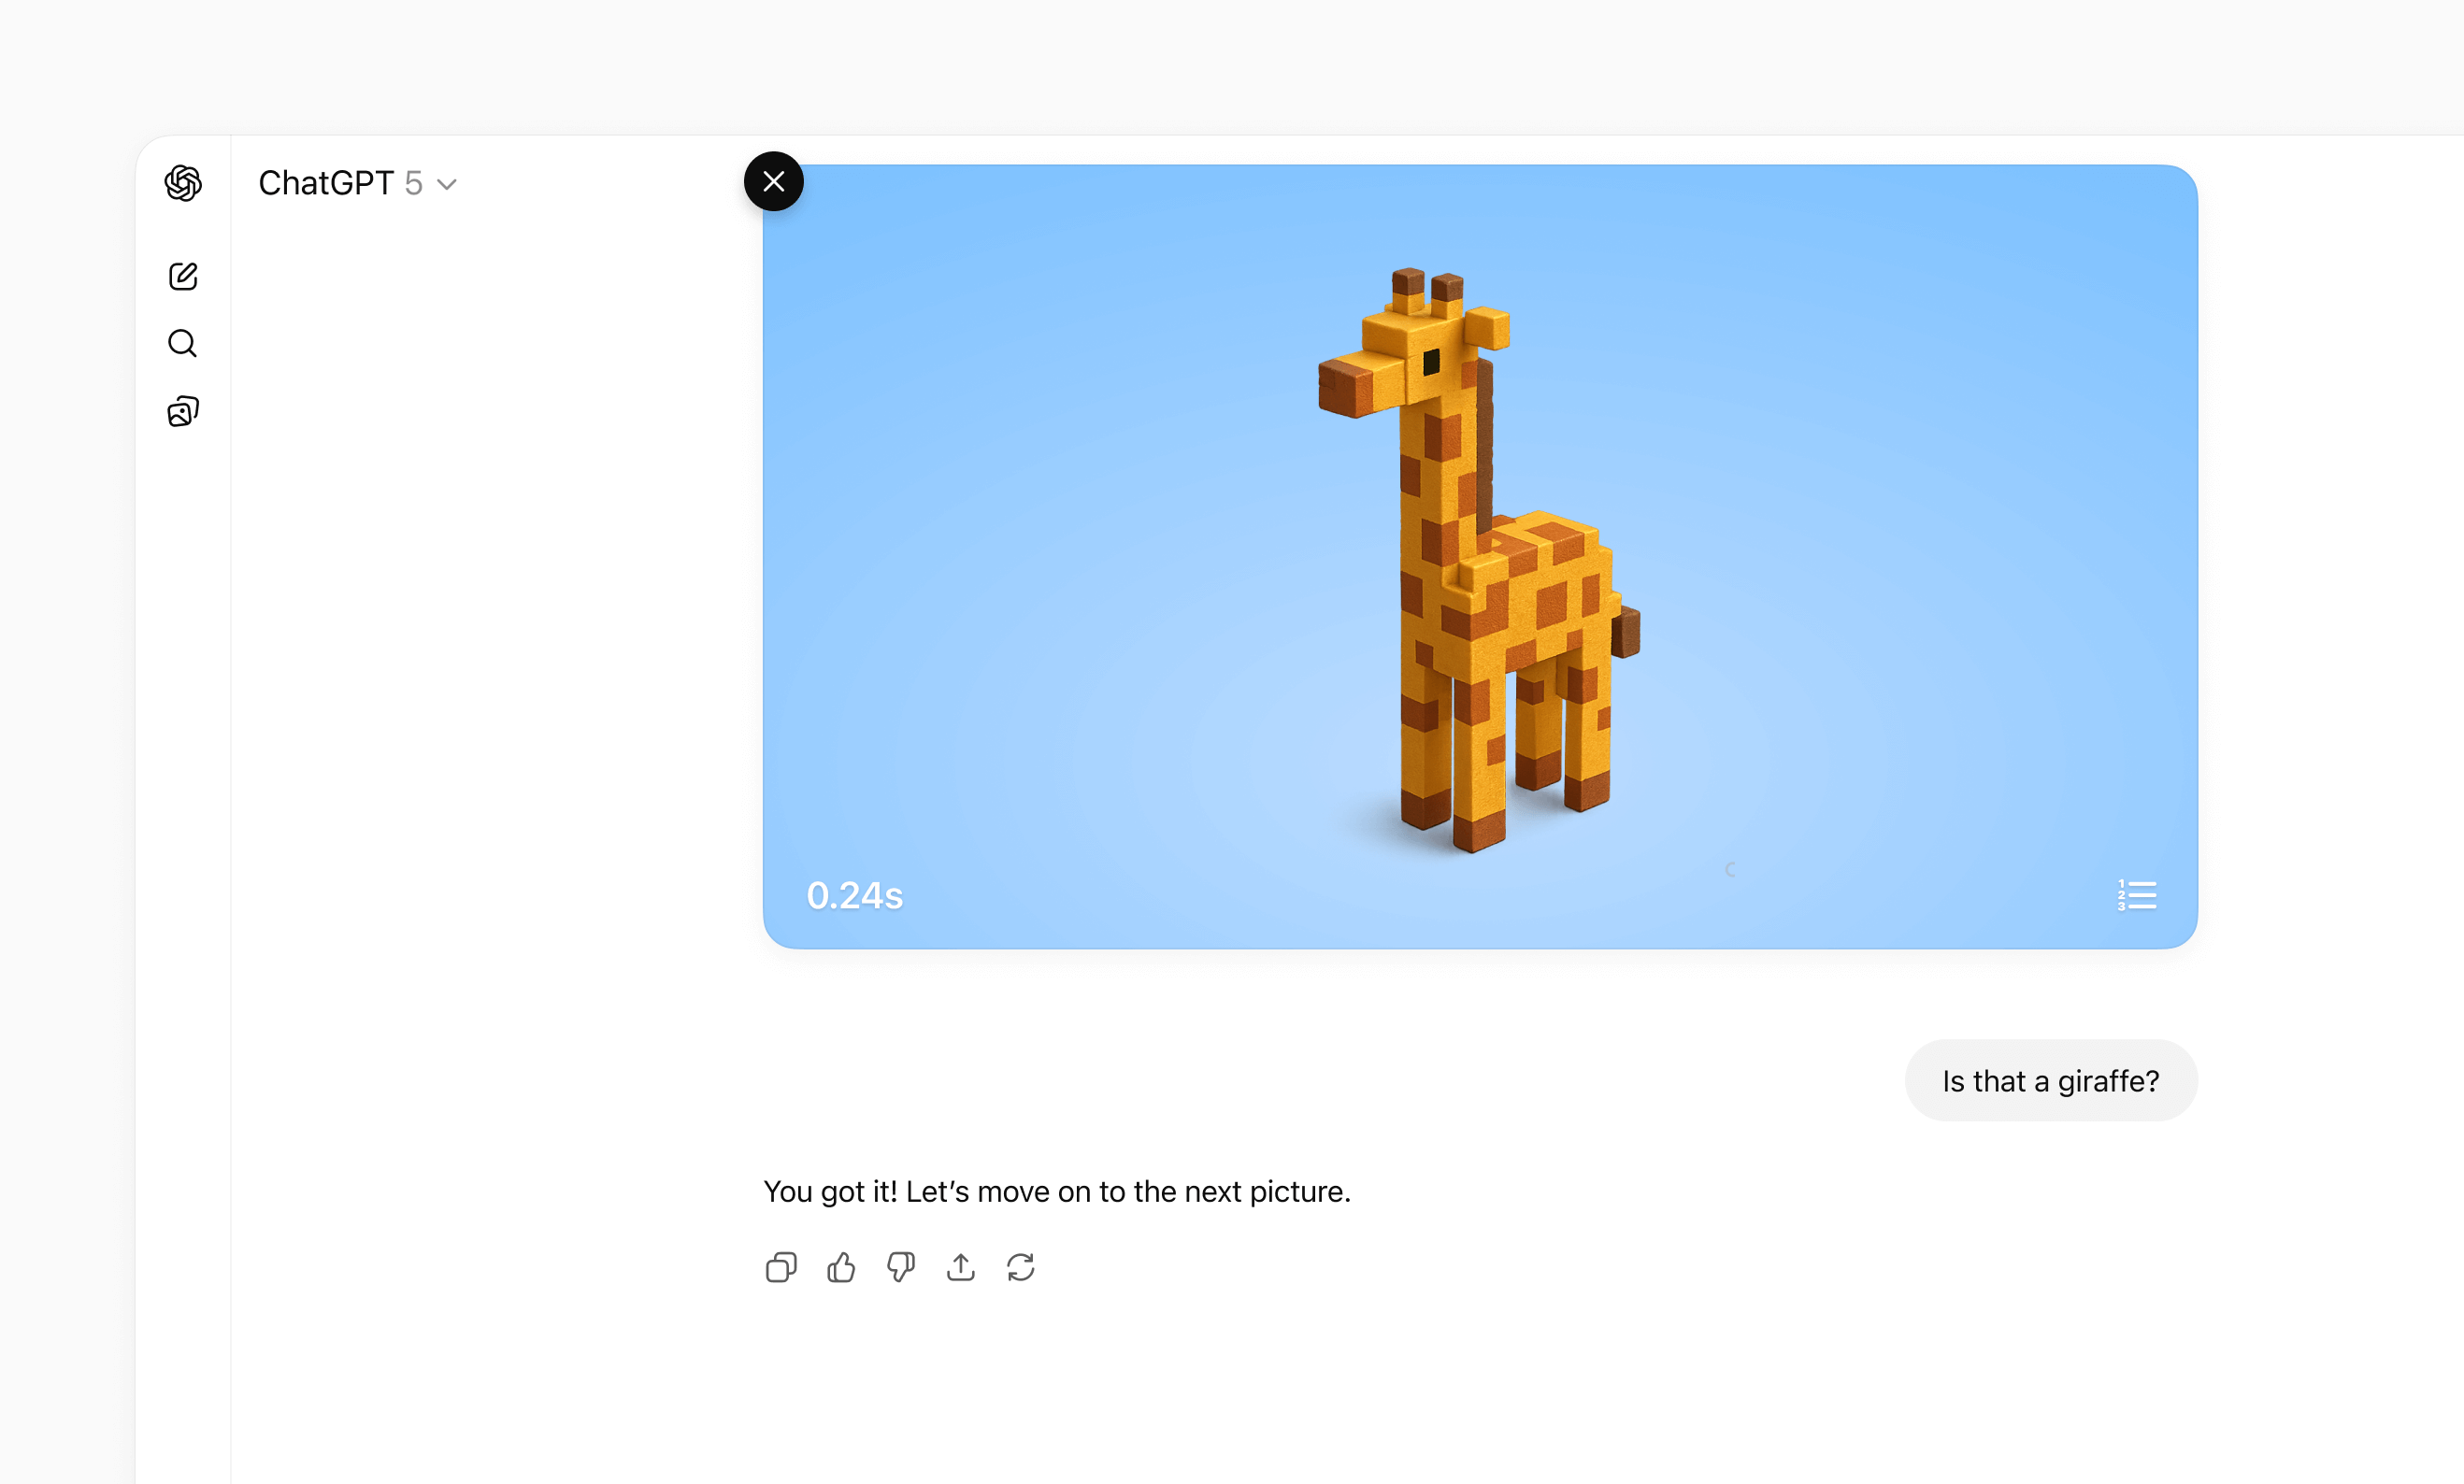
子母畫面
如果使用者繼續對話時仍需看到進行中的活動,例如即時互動、遊戲或影片,請使用子母畫面。
如需版面配置、互動、視覺設計及無障礙設計的詳細指引,請參閱 UI 指南。
將資料處理與 UI 算繪分開
解耦模式
如果每次呼叫工具都附上小工具範本,ChatGPT 可能會過於頻繁地重新算繪 iframe。較好的做法是將資料處理工具與算繪工具分開:
- 資料工具會擷取、計算或修改資料,並只傳回工具結果。
- 算繪工具會接收最終資料並傳回小工具範本。
這樣一來,模型可以先分析取得的資料,再決定是否向使用者顯示 UI,更有可能達成使用者明確提出的具體目標。
這個模式是 MCP Apps 架構的一部分。
實務上,許多 UI 整合採用以下分工:
- 搜尋/擷取工具(資料優先): 傳回 ID 和中繼資料,不附上小工具範本。
- 算繪工具(例如
render_listings_widget): 接收整理好的 ID 清單,並算繪小工具。
只有算繪工具應包含 _meta.ui.resourceUri。
解耦後的呼叫流程
建議的呼叫流程如下:
- 模型呼叫資料工具(例如
roll_dice)。 - 模型從資料工具接收
structuredContent。 - 模型以該資料呼叫算繪工具。
- 小工具使用模型已檢查的最終上下文,只算繪一次。
範例:房源的後續查詢
假設你的外掛程式會顯示房源卡片和地圖,但伺服器端的 search 工具只支援較廣泛的篩選條件(城市、價格、臥室數、衛浴數),無法依學區篩選。
如果使用者問:「這些房源中,哪些位於 Richmond 小學的學區內?」採用解耦模式即可依下列步驟處理:
search先進行廣泛搜尋,傳回候選房源的 ID 和中繼資料。- 模型根據後續問題進一步篩選候選房源。
- 模型呼叫
render_listings_widget,只傳入篩選後的 ID。 - 小工具顯示最終篩選出的房源。
最佳做法:
- 讓資料工具可重複使用。傳回完整的
structuredContent,以便串接後續工具呼叫。 - 讓算繪工具專注於呈現內容。不要將業務邏輯混入算繪處理函式。
- 在算繪工具的說明中寫明相依關係(例如「一律先呼叫
roll_dice」)。 - 只在需要時重新執行。對於「再擲一次」等小工具內的操作,讓 UI 直接呼叫資料工具,無須重新掛載小工具。
解耦範例
以下是將擲骰子與算繪分開的工具範例:
import { McpServer } from "@modelcontextprotocol/sdk/server/mcp.js";
import { z } from "zod/v3";
import { build } from "esbuild";
import { fileURLToPath } from "node:url";
const TEMPLATE_URI = "ui://widget/dice.html";
const server = new McpServer(
{ name: "Decoupled dice", version: "1.0.0" },
{ capabilities: { tools: {} } }
);
// Bundle the same browser source that is type-checked and tested directly.
const widgetBundle = await build({
entryPoints: [fileURLToPath(new URL("./dice-widget.ts", import.meta.url))],
bundle: true,
format: "esm",
platform: "browser",
write: false,
});
const widgetScript = widgetBundle.outputFiles[0].text.replace(
/<\/script/gi,
"<\\/script"
);
const widgetHtml = `<!doctype html><html lang="en"><meta charset="utf-8"><title>Dice widget</title><body><script type="module">${widgetScript}</script></body></html>`;
server.registerResource("dice-widget", TEMPLATE_URI, {}, async () => ({
contents: [
{
uri: TEMPLATE_URI,
mimeType: "text/html;profile=mcp-app",
text: widgetHtml,
_meta: { ui: { prefersBorder: true } },
},
],
}));
// 1) Data tool: no output template, returns chainable structuredContent.
server.registerTool(
"roll_dice",
{
title: "Roll dice",
description: "Roll an N-sided die and return { sides, value }.",
inputSchema: { sides: z.number().int().min(2) },
outputSchema: {
sides: z.number().int().min(2),
value: z.number().int().min(1),
},
_meta: {
"openai/toolInvocation/invoking": "Rolling…",
"openai/toolInvocation/invoked": "Rolled.",
},
},
async ({ sides }) => {
const value = 1 + Math.floor(Math.random() * sides);
return {
structuredContent: { sides, value },
content: [{ type: "text", text: `Rolled ${value} on ${sides} sides.` }],
};
}
);
// 2) Render tool: owns the template and requires data from roll_dice.
server.registerTool(
"render_dice_widget",
{
title: "Render dice widget",
description:
"Render the dice widget from roll data. First call roll_dice, then pass its sides and value to this tool.",
inputSchema: {
sides: z.number().int().min(2),
value: z.number().int().min(1),
},
outputSchema: {
sides: z.number().int().min(2),
value: z.number().int().min(1),
},
_meta: {
ui: { resourceUri: TEMPLATE_URI },
"openai/toolInvocation/invoking": "Rendering…",
"openai/toolInvocation/invoked": "Rendered.",
},
},
async ({ sides, value }) => ({
structuredContent: { sides, value },
content: [
{
type: "text",
text: `Showing a ${sides}-sided roll: ${value}.`,
},
],
})
);
export default server;將 esbuild 與伺服器的相依套件一併安裝,再將以下瀏覽器端程式碼儲存為 dice-widget.ts,放在與伺服器檔案相同的目錄中:
import { App } from "@modelcontextprotocol/ext-apps";
const container = document.createElement("div");
container.style.cssText = "font-family: system-ui; padding: 8px;";
const resultLine = document.createElement("div");
resultLine.style.cssText = "font-size: 20px; margin-bottom: 6px;";
const output = document.createElement("span");
output.id = "out";
output.textContent = "—";
resultLine.append("Result: ", output);
const rerollButton = document.createElement("button");
rerollButton.id = "reroll";
rerollButton.textContent = "Re-roll";
rerollButton.disabled = true;
container.append(resultLine, rerollButton);
document.body.append(container);
const app = new App({ name: "Dice widget", version: "1.0.0" });
let latestInput: Record<string, unknown> = {};
let latestOutput: Record<string, unknown> = {};
function render(result: Record<string, unknown>) {
latestOutput = result;
output.textContent = String(result.value ?? "—");
}
app.ontoolinput = ({ arguments: input }) => {
latestInput = input ?? {};
};
app.ontoolresult = (result) => {
render(result.structuredContent ?? {});
};
// Call the data tool without remounting the widget.
rerollButton.onclick = async () => {
const candidate = latestOutput.sides ?? latestInput.sides;
const sides =
typeof candidate === "number" &&
Number.isInteger(candidate) &&
candidate >= 2
? candidate
: 6;
const next = await app.callServerTool({
name: "roll_dice",
arguments: { sides },
});
if (next.structuredContent) render(next.structuredContent);
};
await app.connect();
rerollButton.disabled = false;管理狀態
MCP 伺服器提供的 UI 會用到三種狀態:
| 狀態類型 | 管理者 | 存續期間 | 範例 |
|---|---|---|---|
| 業務資料(權威來源) | MCP 伺服器或外部服務 | 長期 | 任務、工單、文件 |
| UI 狀態(暫時) | UI 執行個體 | UI 執行個體作用期間 | 選取的資料列、展開的面板、排序方式 |
| 跨工作階段狀態(持久) | 你掌控的儲存空間 | 跨工作階段與對話 | 已儲存的篩選條件、檢視模式、工作區 |
每個值都應保存在負責管理它的系統中。UI 應根據工具結果中的權威資料算繪畫面,再套用暫時的呈現狀態。
MCP server or external service
│
├── Authoritative business data
│
▼
UI
│
├── Ephemeral presentation state
│
└── Rendered view = business data + UI state
將業務資料保存在伺服器上
業務資料是判定實際狀態的依據。不要只將業務資料儲存在 UI 中。使用者執行操作時:
- UI 呼叫 MCP 工具。
- 伺服器驗證請求並更新資料。
- 伺服器傳回更新後的權威資料快照。
- UI 根據快照算繪畫面,同時保留仍適用的呈現狀態。
請傳回足夠的結構化內容,讓模型與 UI 都能理解新狀態。這樣即使 UI 無法載入,使用者也能透過對話繼續操作。
將暫時的 UI 狀態保留在 UI 中
對於只影響呈現方式的值,例如選取的項目、開啟的面板或尚未套用的篩選條件,請使用框架的狀態管理機制。每個已算繪的 UI 執行個體都有自己的狀態。
如果模型需要知道使用者選取了什麼,或有哪些尚未套用的編輯,請透過 ui/update-model-context 傳送這些資訊。這是 MCP Apps 用來更新模型可見上下文的機制,可跨主機使用。
ChatGPT 也提供選用的狀態保存機制,範圍限於個別小工具:
- 從
window.openai.widgetState讀取目前的快照。 - 使用
window.openai.setWidgetState(state)寫入新快照。
setWidgetState 是同步方法。每次 UI 狀態有實質變更後就呼叫它,無須使用 await。
import { useState } from "react";
export function TaskList({
tasks,
}: {
tasks: { id: string; title: string }[];
}) {
const [state, setState] = useState(
window.openai?.widgetState ?? { selectedId: null }
);
function selectTask(selectedId: string) {
const nextState = { ...state, selectedId };
setState(nextState);
window.openai?.setWidgetState?.(nextState);
}
return (
<ul>
{tasks.map((task) => (
<li key={task.id}>
<button
type="button"
aria-pressed={state.selectedId === task.id}
onClick={() => selectTask(task.id)}
>
{task.title}
</button>
</li>
))}
</ul>
);
}小工具狀態只屬於單一已算繪的 UI 執行個體。不要將它當成業務資料的權威來源,也不要用來長期儲存資料。
讓模型能看到圖片
如果 UI 會處理圖片,請使用以下結構來設定小工具狀態:
modelContent:模型應能看到的文字或 JSON。privateContent:僅供 UI 使用、模型不應看到的狀態。imageIds:模型應在後續對話回合中收到的檔案 ID。
const selectedFiles = await window.openai.selectFiles();
window.openai.setWidgetState({
modelContent: "Review the currently selected images.",
privateContent: {
currentView: "image-viewer",
filters: ["crop", "sharpen"],
},
imageIds: selectedFiles.map((file) => file.fileId),
});只可納入以下來源的檔案 ID:以 window.openai.uploadFile 上傳的檔案、以 window.openai.selectFiles 選取的檔案、透過工具輸入的檔案參數收到的檔案,或透過工具結果中的檔案參照傳回的檔案。
將跨工作階段的狀態儲存在伺服器上
如果偏好設定和資料需要跨對話、裝置或工作階段保留,請將它們保存在你掌控的儲存空間。請驗證使用者身分,讓 MCP 伺服器能將每個請求對應到正確的帳戶。
加入持久性儲存機制時:
- 將延遲控制在足以維持 UI 互動流暢的範圍。
- 透過伺服器端的授權機制保護私密資料。
- 將資料駐留與法規遵循要求納入規劃。
- 對重試或多個 UI 執行個體同時運作所產生的流量實施速率限制。
- 為儲存的物件標記版本,以便日後遷移資料時,現有對話仍能正常運作。
避免使用 localStorage 儲存核心狀態。UI 在隔離的 iframe 中執行,瀏覽器儲存空間無法可靠地跨裝置或工作階段提供資料。
建立元件專案骨架
了解 MCP Apps 橋接介面及選用的 ChatGPT 擴充功能後,就可以開始建立元件專案骨架。
建議將元件程式碼與伺服器邏輯分開。常見的目錄結構如下:
plugin-ui/
  server/            # MCP server (Python or Node)
  web/               # Component bundle source
    package.json
    tsconfig.json
    src/component.tsx
    dist/component.js   # Build output
建立專案並安裝相依套件(建議使用 Node 18 以上版本):
cd plugin-ui/web
npm init -y
npm install react@^19 react-dom@^19
npm install -D typescript esbuild
如果元件需要拖放、圖表或其他程式庫,請在這個階段加入。只安裝必要的相依套件,以縮小打包後的檔案。
撰寫 React 元件
進入點檔案應將元件掛載到 root 元素,並根據 MCP Apps 橋接介面送來的最新工具結果算繪畫面(例如透過 ui/notifications/tool-result 接收結果)。
範例頁面提供多種 UI 範例,例如 Pizzaz 的披薩餐廳清單。
瀏覽 Pizzaz 元件範例集
UI 範例提供多種元件,可作為設計自己 UI 的參考:
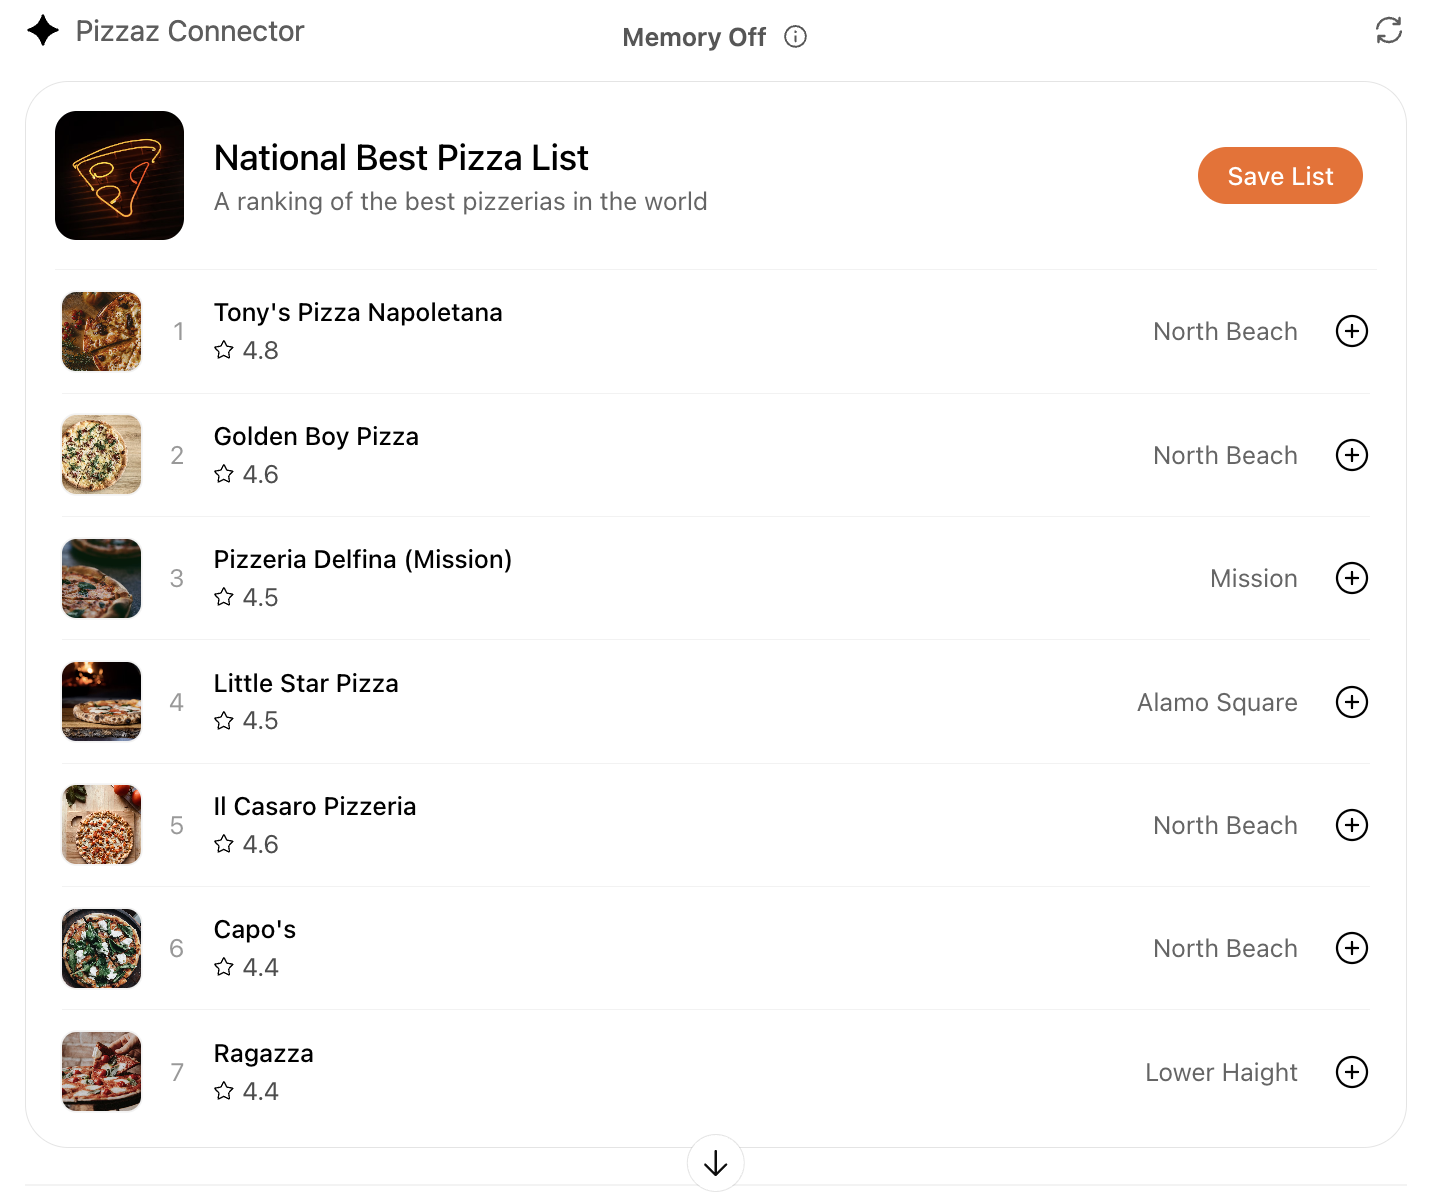
- Pizzaz 清單: 依排名顯示卡片,提供收藏功能和引導使用者採取行動的按鈕。
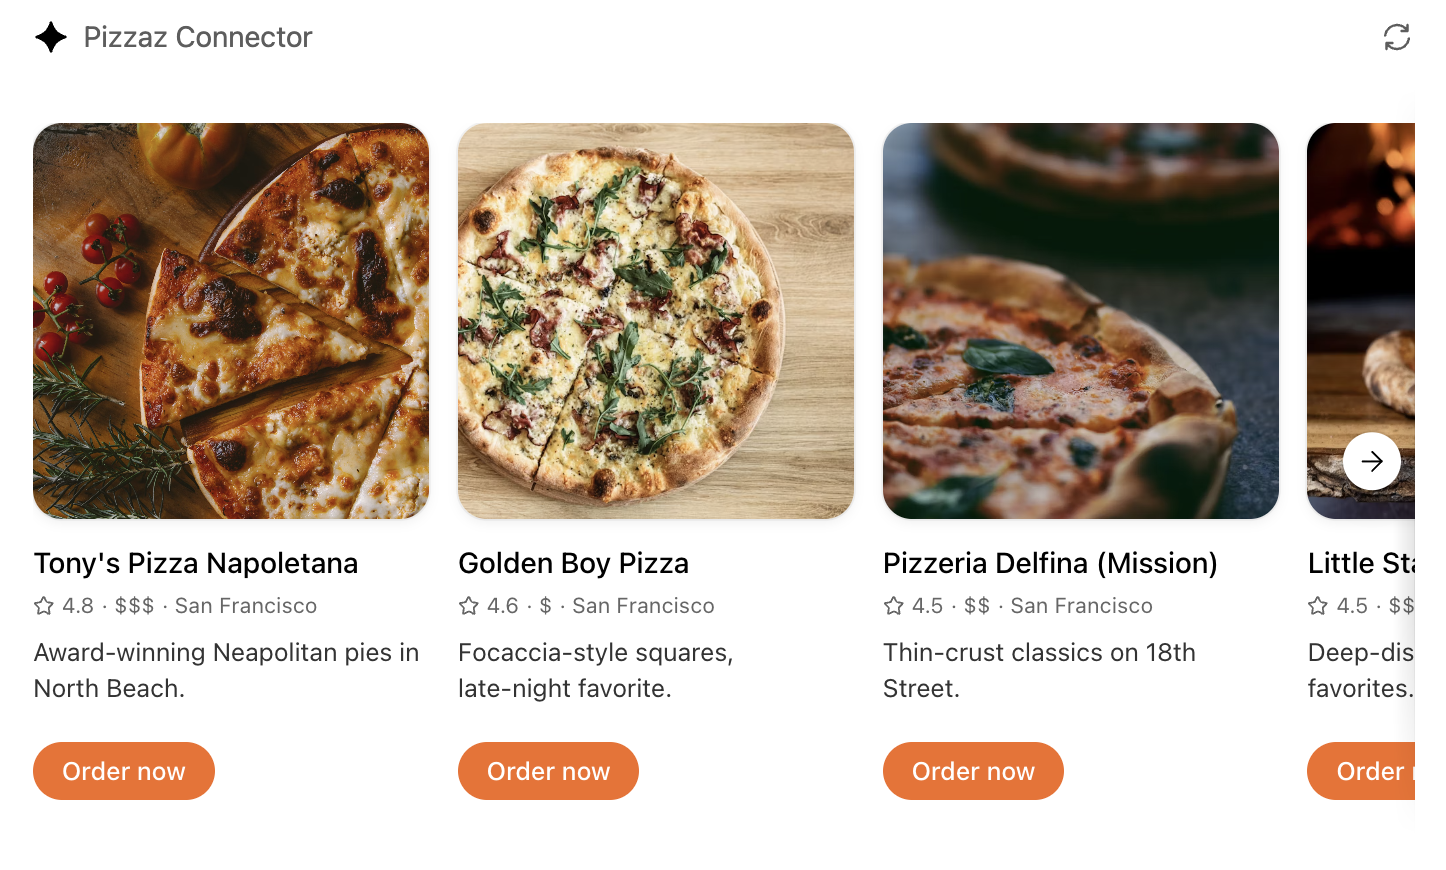
- Pizzaz 輪播: 使用 Embla 建立的水平捲動元件,示範如何安排以媒體內容為主的版面。
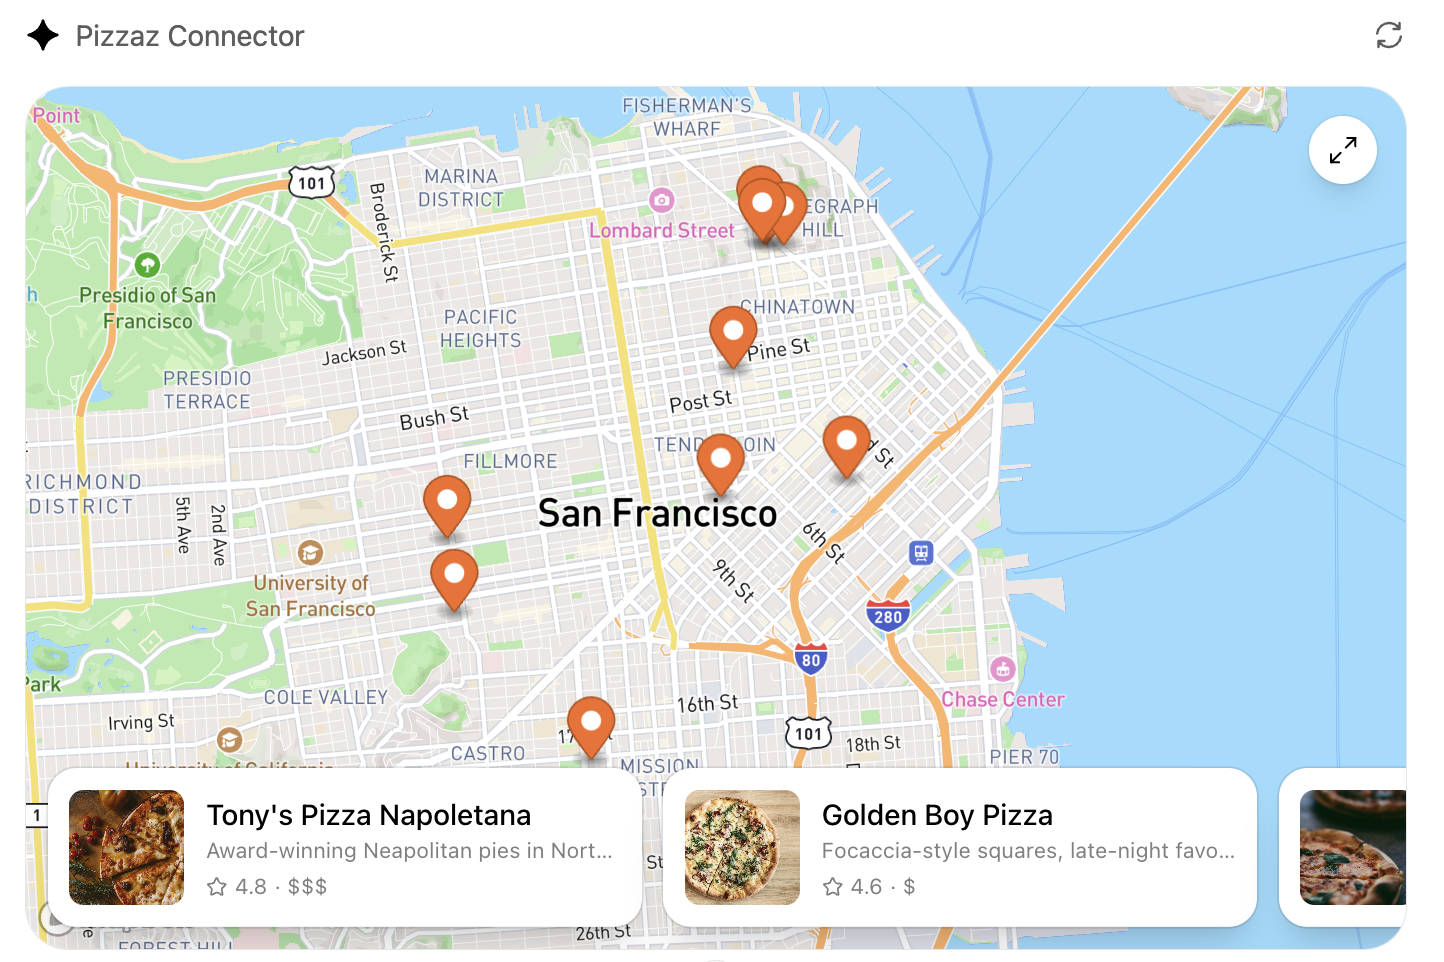
- Pizzaz 地圖: 整合 Mapbox,提供全螢幕檢視器,並與主機同步狀態。
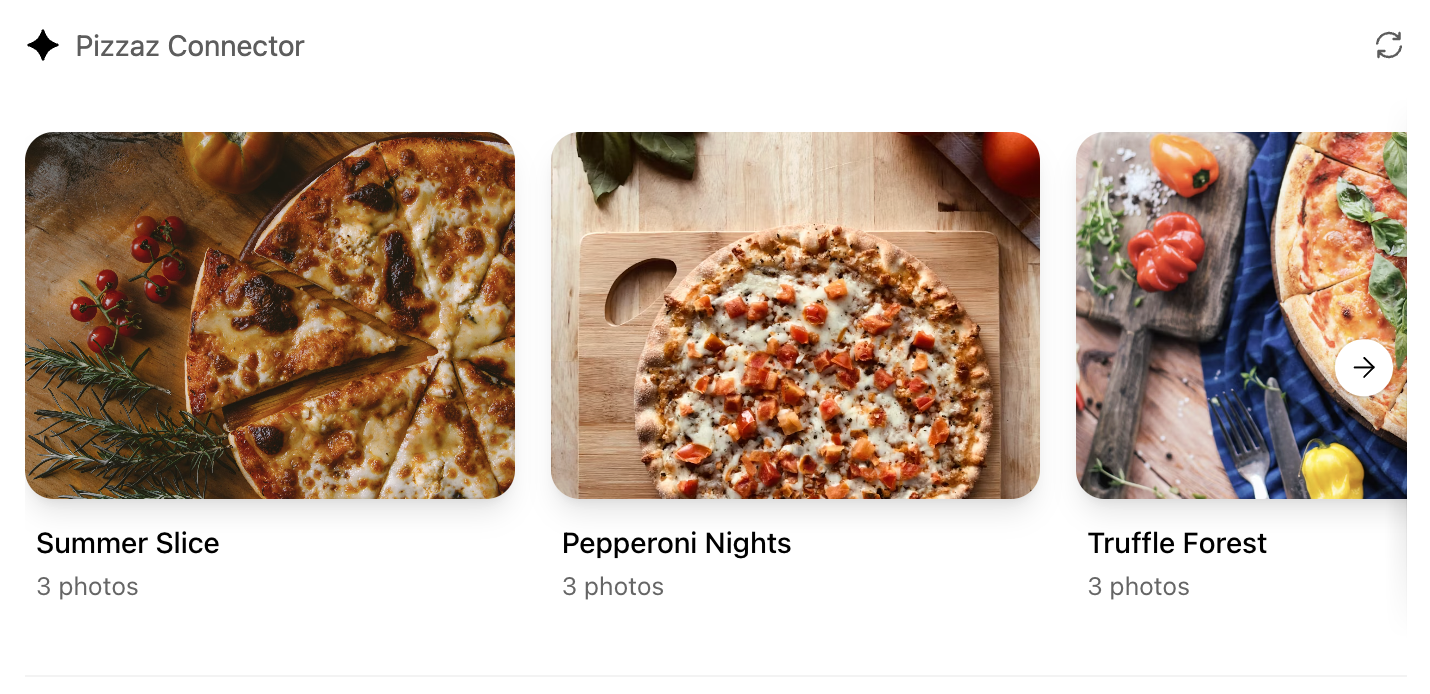
- Pizzaz 相簿: 採用堆疊式圖庫,方便使用者深入探索單一地點。
- Pizzaz 影片: 由指令碼控制的播放器,提供疊加圖層和全螢幕控制項。
每個範例都示範如何打包資源、串接主機 API,以及如何為實際對話設計狀態結構。請複製最接近你使用情境的範例,再調整資料層以配合工具的回應。
React 輔助 Hook
以下輔助 Hook 可用來訂閱 ui/notifications/tool-result:
import { useEffect, useState } from "react";
type ToolResult = { structuredContent?: unknown } | null;
export function useToolResult() {
const [toolResult, setToolResult] = useState<ToolResult>(null);
useEffect(() => {
const onMessage = (event: MessageEvent) => {
if (event.source !== window.parent) return;
const message = event.data;
if (!message || message.jsonrpc !== "2.0") return;
if (message.method !== "ui/notifications/tool-result") return;
setToolResult(message.params ?? null);
};
window.addEventListener("message", onMessage, { passive: true });
return () => window.removeEventListener("message", onMessage);
}, []);
return toolResult;
}請根據 toolResult?.structuredContent 算繪畫面,並將這份資料視為不受信任的輸入。
小工具在地化
主機會將目前的語言地區代碼同步至 document.documentElement.lang。請依據該代碼載入翻譯,並設定日期與數字的格式。使用以下範例前,請先執行 npm install react-intl,執行時的工作目錄應為 web/:
import { IntlProvider, FormattedMessage } from "react-intl";
const messages: Record<string, Record<string, string>> = {
"en-US": { greeting: "Hello" },
"es-ES": { greeting: "Hola" },
};
export function PluginUI() {
const locale = document.documentElement.lang || "en-US";
return (
<IntlProvider
locale={locale}
messages={messages[locale] ?? messages["en-US"]}
>
<FormattedMessage id="greeting" defaultMessage="Hello" />
</IntlProvider>
);
}為 iframe 打包元件
寫好 React 元件後,可以將它打包成單一 JavaScript 模組,讓伺服器直接嵌入:
// package.json
{
  "scripts": {
    "build": "esbuild src/component.tsx --bundle --format=esm --jsx=automatic --outfile=dist/component.js"
  }
}
執行 npm run build 以產生 dist/component.js。如果 esbuild 回報缺少相依套件,請確認執行 npm install 時所在的目錄是 web/,並檢查匯入名稱是否與已安裝的套件名稱相符(例如,注意 @react-dnd/html5-server-side 與 react-dnd-html5-server-side 的差異)。
在伺服器回應中嵌入元件
將元件以 MCP 資源的形式提供,並使用 MCP Apps UI 的 MIME 類型(text/html;profile=mcp-app)。如果使用 @modelcontextprotocol/ext-apps/server,請優先使用 RESOURCE_MIME_TYPE,避免直接寫入字串:
import {
registerAppResource,
RESOURCE_MIME_TYPE,
} from "@modelcontextprotocol/ext-apps/server";
import { readFileSync } from "node:fs";
const component = readFileSync("web/dist/component.js", "utf8");
registerAppResource(
server,
"project-board",
"ui://project-board/v1.html",
{},
async () => ({
contents: [
{
uri: "ui://project-board/v1.html",
mimeType: RESOURCE_MIME_TYPE,
text: `<div id="root"></div><script type="module">${component}</script>`,
_meta: {
ui: {
prefersBorder: true,
domain: "https://example.com",
csp: {
connectDomains: ["https://api.example.com"],
resourceDomains: ["https://static.example.com"],
},
},
},
},
],
})
);只將資源 URI 與應算繪該元件的工具建立關聯。為了相容於更多 MCP Apps 主機,請使用 _meta.ui.resourceUri。ChatGPT 也支援相容別名 _meta["openai/outputTemplate"]。
請將資源 URI 視為快取鍵。如果 HTML、JavaScript 或 CSS 的變更會破壞回溯相容性,請發布新的 URI,並更新所有參照該資源的工具。
內容安全政策(CSP)
明確列出元件會連線的網域,以及元件會從哪些網域載入資源:
connectDomains用於 API 請求。resourceDomains用於指令碼、樣式、圖片及其他資源。frameDomains僅在元件必須嵌入特定來源的 iframe 時使用。
預設會封鎖巢狀框架。每份允許清單都應盡可能只列入必要項目。外掛程式審查流程會核對宣告的政策是否與 UI 的實際行為相符。
你可以嵌入與 MCP 伺服器同屬一個可註冊網域的現有編輯器或管理介面。例如,位於 https://api.example.com/mcp 的伺服器可將 https://app.example.com 列入 frameDomains。提交審查時,請依要求說明嵌入的理由,並遵守 iframe 政策,包括共用主機服務的限制與審查要求。
正式環境建議使用元件 UI 範本。
開發期間,每次修改 React 程式碼後,都可以重新打包元件,並讓伺服器熱重新載入。
在 UI 中提供結帳功能
如果要讓使用者透過外掛程式的 UI 流程結帳,請在確認前使用元件呈現商品、價格、條款和付款選項。確保底層的商品目錄和訂單工具在沒有 UI 時也能使用,再選擇外部結帳流程,或在可用時採用內嵌付款選項。
預設使用外部結帳
外部結帳是建議採用且已普遍開放的方式。請在元件中加入連結,導向商家在自有網域上提供的結帳流程,並在該流程中處理:
- 定價與收款。
- 稅金、折扣與費用。
- 配送與訂單履行。
- 退款、支援與法規遵循。
目前只核准用於購買實體商品的外掛程式。除非 OpenAI 已明確為你的外掛程式啟用其他交易類別,否則請勿提供這些類別的交易。
使用已儲存的付款方式
對於符合資格的實體商品交易,你可以選擇提供 UI,讓顧客選取先前在你的服務中儲存的付款方式。此流程可以顯示符合資格的已儲存付款方式,但不得收集新的付款憑證。MCP 伺服器負責處理購買交易,並傳回作為最終依據的訂單結果。
使用 ChatGPT 付款面板
透過 ChatGPT 付款面板進行內嵌結帳的功能目前處於非公開 Beta 測試階段,僅開放給特定市集,尚未向所有開發者或使用者開放。
如果你的整合已啟用此功能,window.openai.requestCheckout 會開啟 ChatGPT 付款面板:
const order = await window.openai.requestCheckout(checkoutSession);結帳流程分成四個步驟:
- MCP 工具在
structuredContent中傳回結帳工作階段。 - 元件顯示訂單明細、總額、條款與訂單履行選項。
- 使用者選擇付款後,元件呼叫
requestCheckout(checkoutSession)。 - ChatGPT 將選定的付款權杖傳送給 MCP 伺服器的
complete_checkout工具。該工具透過對應的付款方式收款,並傳回已完成的訂單。
結帳工作階段必須包含:
- 唯一的工作階段 ID。
- 訂單明細與數量。
- 以最小貨幣單位表示的整數總額。
- 付款服務供應商與商家的中繼資料。
- 必要的法律、隱私權、退款與支援連結。
價格和訂單狀態應以伺服器資料為準。請驗證付款權杖,確保重複執行同一操作也只會產生一次效果,持久保存訂單,並傳回可作為正式依據的收據。切勿信任僅由元件計算的總額。
使用 payment_mode: "test" 可在不實際移轉資金的情況下測試端對端流程。請在元件中處理取消交易、付款遭拒,以及付款服務供應商傳回的錯誤。
如需完整的結帳工作階段欄位、付款服務供應商的行為、complete_checkout 的結果結構,以及委派付款的要求,請參閱結帳 API 參考文件。