
Use a Codex Security scan for your first review and for most routine repository or component assessments. It runs the complete scan workflow once.
Once you’re satisfied with the results, run a deep scan for a more comprehensive assessment. Deep scans take longer, but they’re more thorough.
Choose the scan area
Scan the whole repository when you need broad coverage and the repository is a reasonable review unit:
Use $codex-security:security-scan to scan this repository for security vulnerabilities.Scan a folder when a monorepo is too large or one service, package, or component has a clear owner and security boundary:
Use $codex-security:security-scan to scan this repository for security vulnerabilities, focusing on the services/billing component.For a large monorepo, start with one meaningful product or service boundary.
Configure the scan
- Confirm Scan type is
Codebaseand leave Deep scan off. - Confirm the Codebase, Current branch, and Last commit.
- Set Scan area to
Entire codebaseor enter one repository-relative folder. - Add threat-model guidance only when it changes the review. Useful guidance names attacker-controlled inputs, trust boundaries, sensitive actions, or a specific area to prioritize.
- Select Start scan.
Repository-specific guidance in AGENTS.md can also establish the product
surfaces, trust boundaries, supported validation commands, and out-of-scope
areas. Prefer concrete repository context over a generic planning step before
the scan.
Let the phases complete
A scan runs these phases in order:
- Threat modeling identifies assets, entry points, trust boundaries, and security invariants.
- Finding discovery reviews the requested code for plausible broken controls and source-to-sink paths.
- Validation tests or otherwise checks each candidate and records evidence or proof gaps.
- Attack-path analysis evaluates realistic reachability, impact, and severity.
- Finalization validates the structured scan contract and generates
report.md.
Codex reports phase and coverage progress as the scan runs. Don’t judge the result from early candidates or stop the scan because one phase takes longer than another.
Review the completed scan
Review the result in this order:
- Confirm the target, revision, and scan area.
- Read reviewed surfaces and every explicit deferred or follow-up area.
- For each finding, inspect the root control or sink, attacker-controlled input, validation method, remaining uncertainty, realistic reachability, severity rationale, and proposed remediation.
- Dismiss findings whose evidence doesn’t support the claimed path or impact.
- Select one accepted finding before starting a fix.
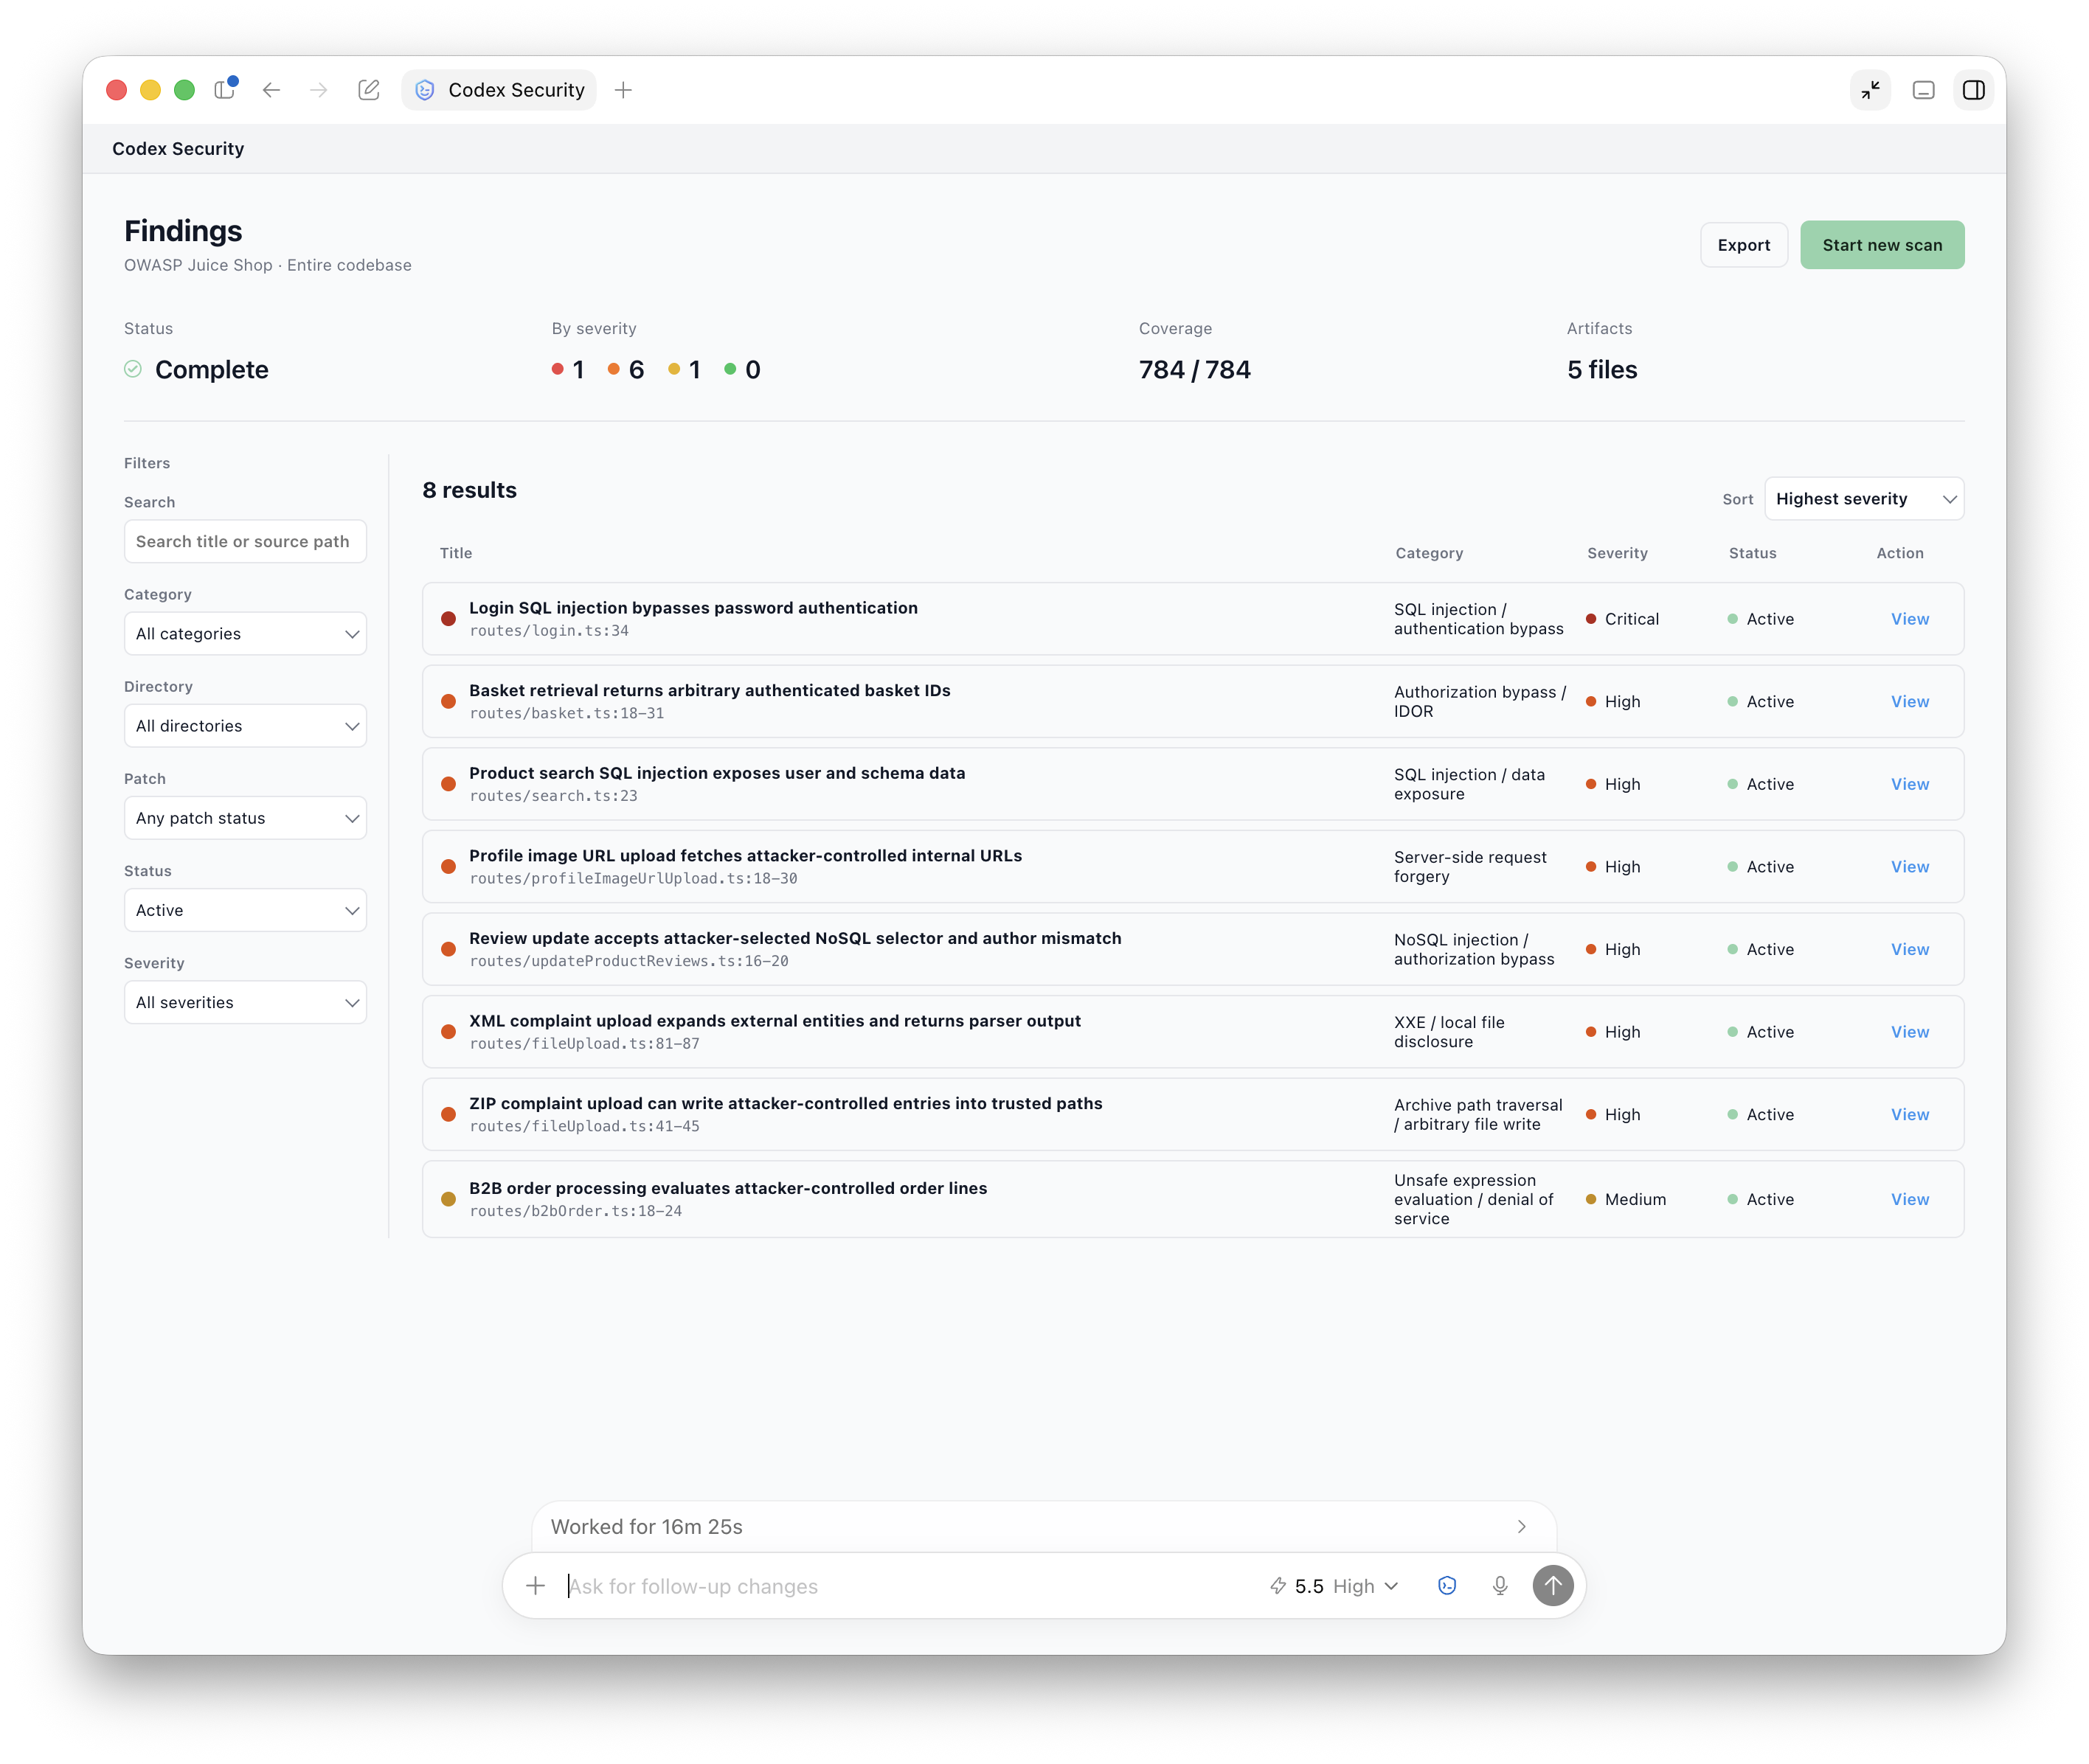
The completed workspace summarizes scan status, coverage, severity, and artifacts before listing the findings.
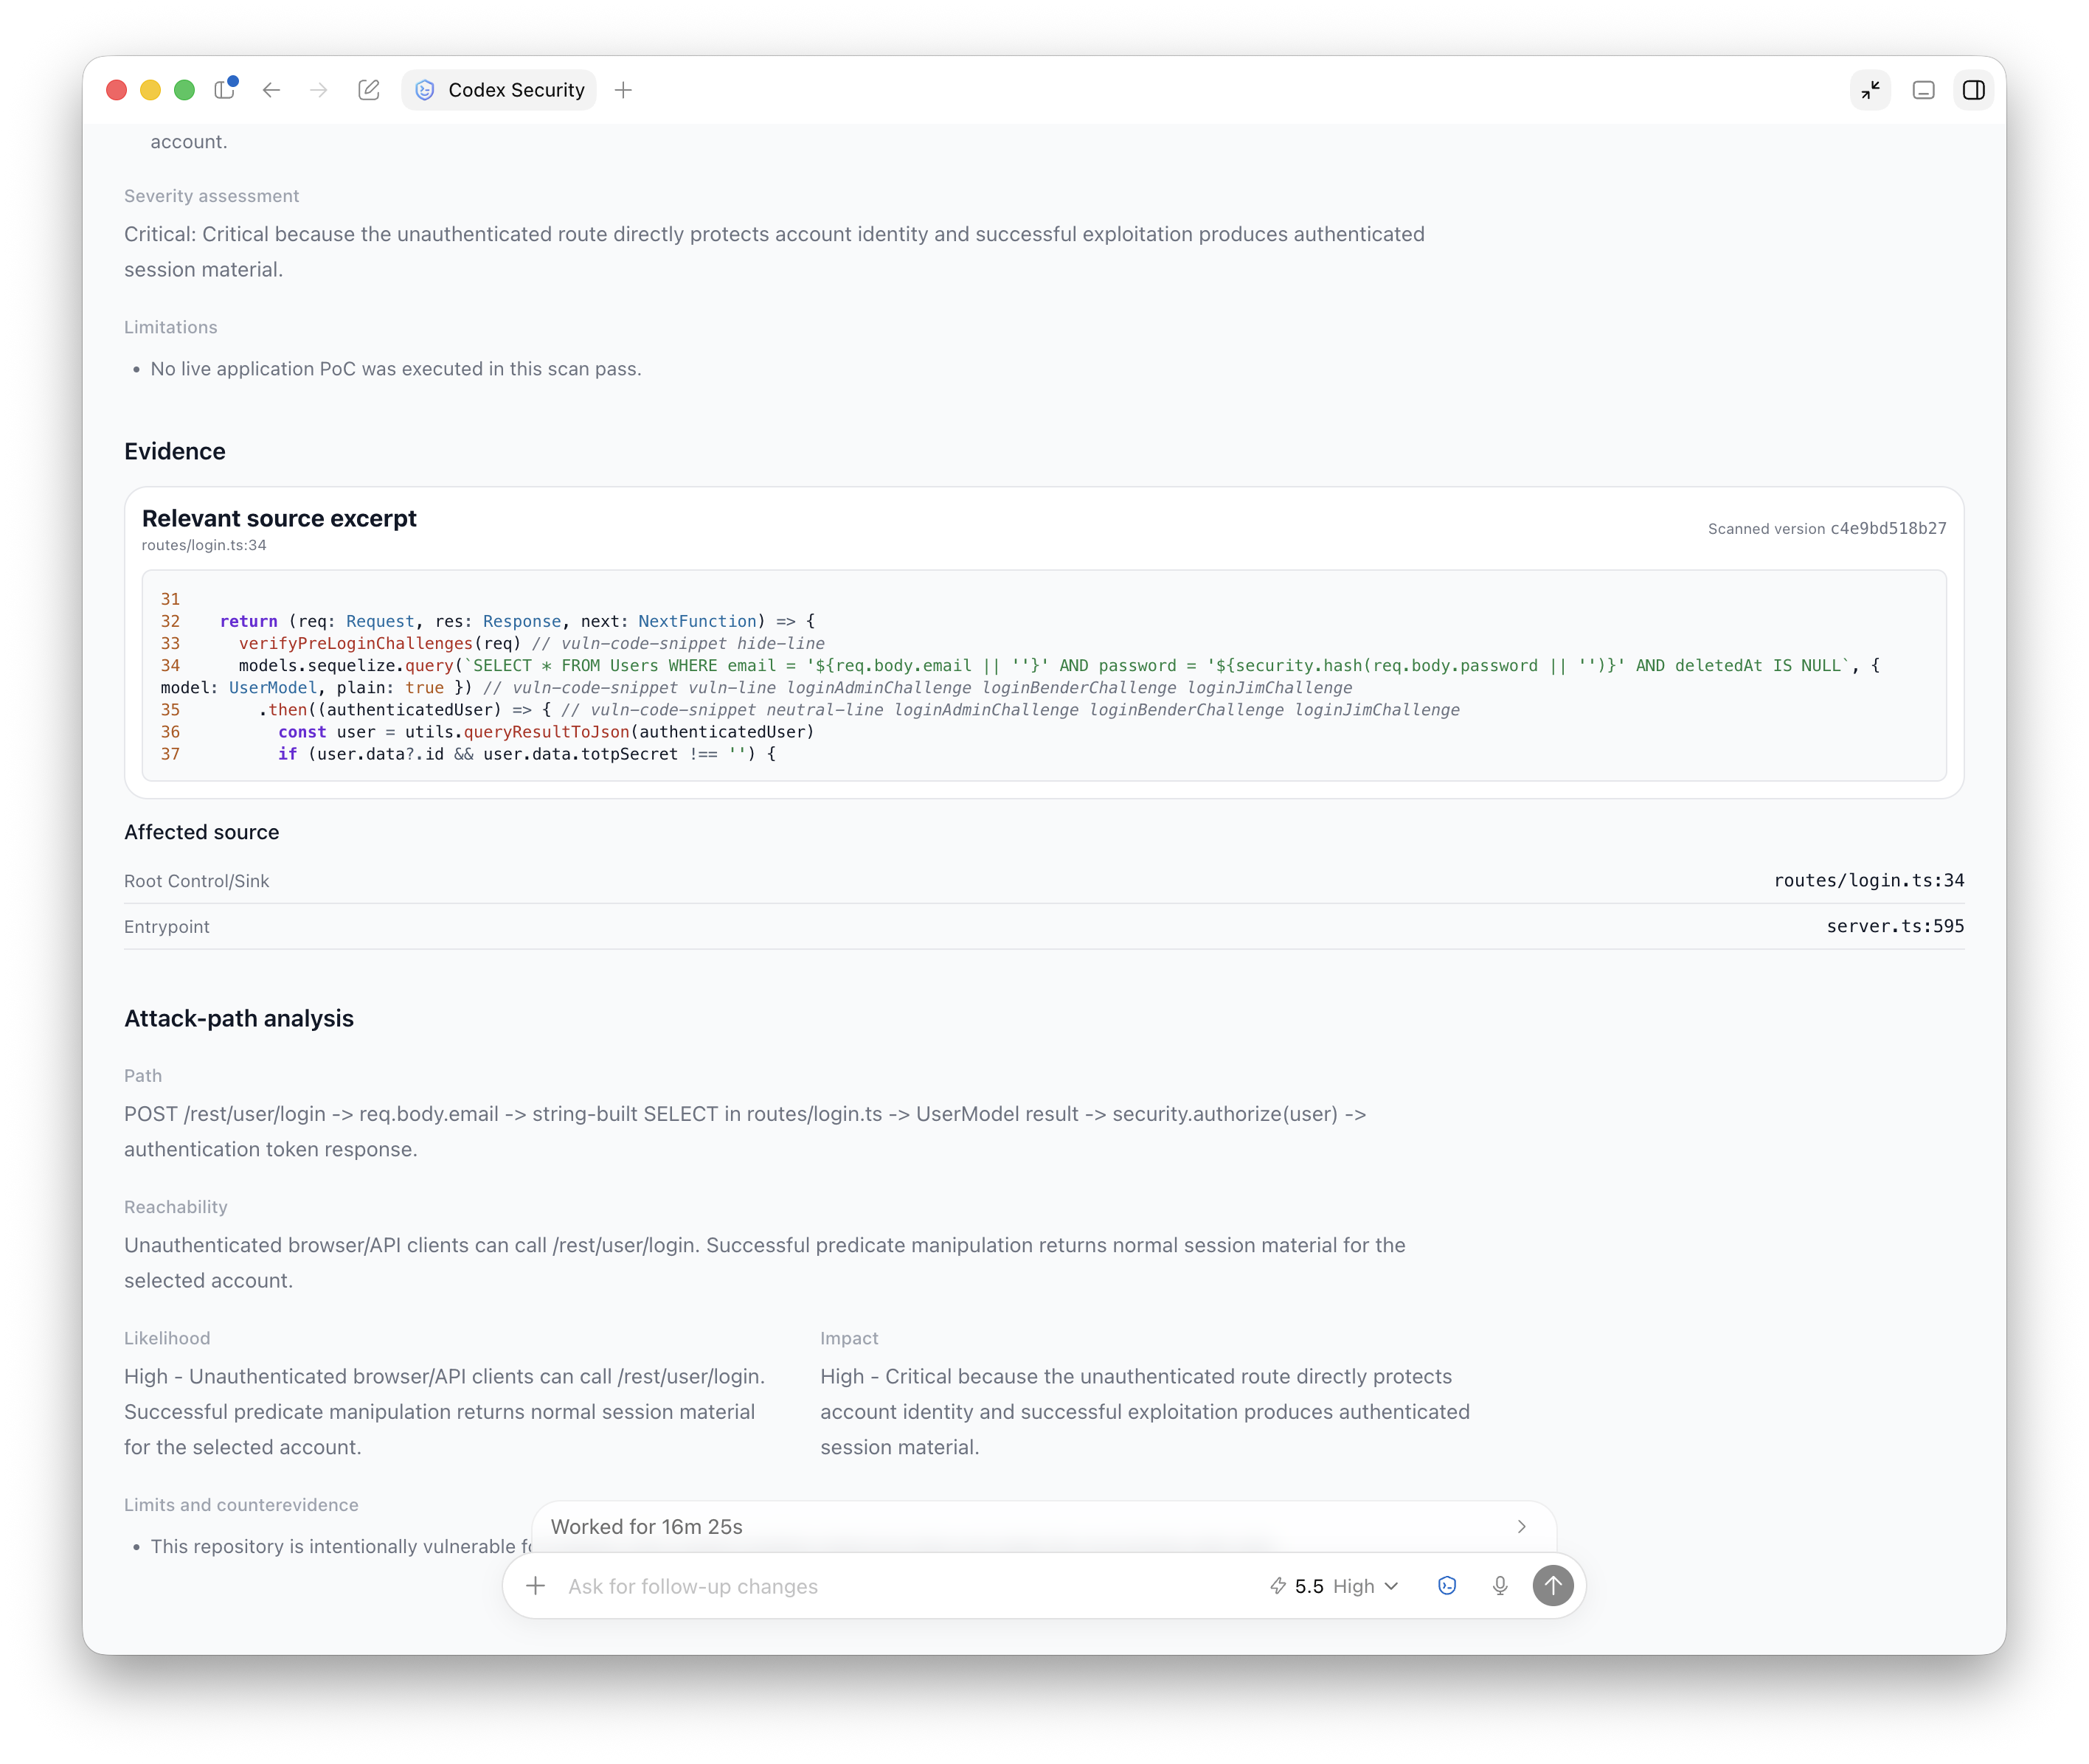
A finding connects the relevant source to its entry point, reachability, likelihood, impact, and any limits or counterevidence.
Use the results
Use the findings workspace for normal review. It presents findings, coverage,
and follow-up areas without requiring you to inspect raw JSON. Open report.md
when you need a complete portable review for sharing or archiving.
Behind the workspace, each scan preserves scan-manifest.json, findings.json,
and coverage.json for automation and integrations. You normally don’t need to
open these files yourself.
The findings workspace can also create portable JSON, CSV, and SARIF files. See Export or track findings.
Next step
After a person accepts a finding, use Fix and verify a finding to generate and review one bounded patch. Don’t ask Codex to fix every finding from a scan in one task.