
Agent Builder is a visual canvas for building multi-step agent workflows.
You can start from templates, drag and drop nodes for each step in your workflow, provide typed inputs and outputs, and preview runs using live data. When you’re ready to deploy, embed the workflow into your site with ChatKit, or download the SDK code to run it yourself.
OpenAI is deprecating Agent Builder. Existing users can continue using it during the transition window, and the product is scheduled to shut down on November 30, 2026. ChatKit remains available. See the deprecations page for the current timeline.
Use this guide to learn the process and parts of building agents.
Agents and workflows
To build useful agents, you create workflows for them. A workflow is a combination of agents, tools, and control-flow logic. A workflow encapsulates all steps and actions involved in handling your tasks or powering your chats, with working code you can deploy when you’re ready.
Open Agent Builder
There are three main steps in building agents to handle tasks:
- Design a workflow in Agent Builder. This defines your agents and how they’ll work.
- Publish your workflow. It’s an object with an ID and versioning.
- Deploy your workflow. Pass the ID into your ChatKit integration, or download the Agents SDK code to deploy your workflow yourself.
Compose with nodes
In Agent Builder, insert and connect nodes to create your workflow. Each connection between nodes becomes a typed edge. Click a node to configure its inputs and outputs, observe the data contract between steps, and ensure downstream nodes receive the properties they expect.
Examples and templates
Agent Builder provides templates for common workflow patterns. Start with a template to see how nodes work together, or start from scratch.
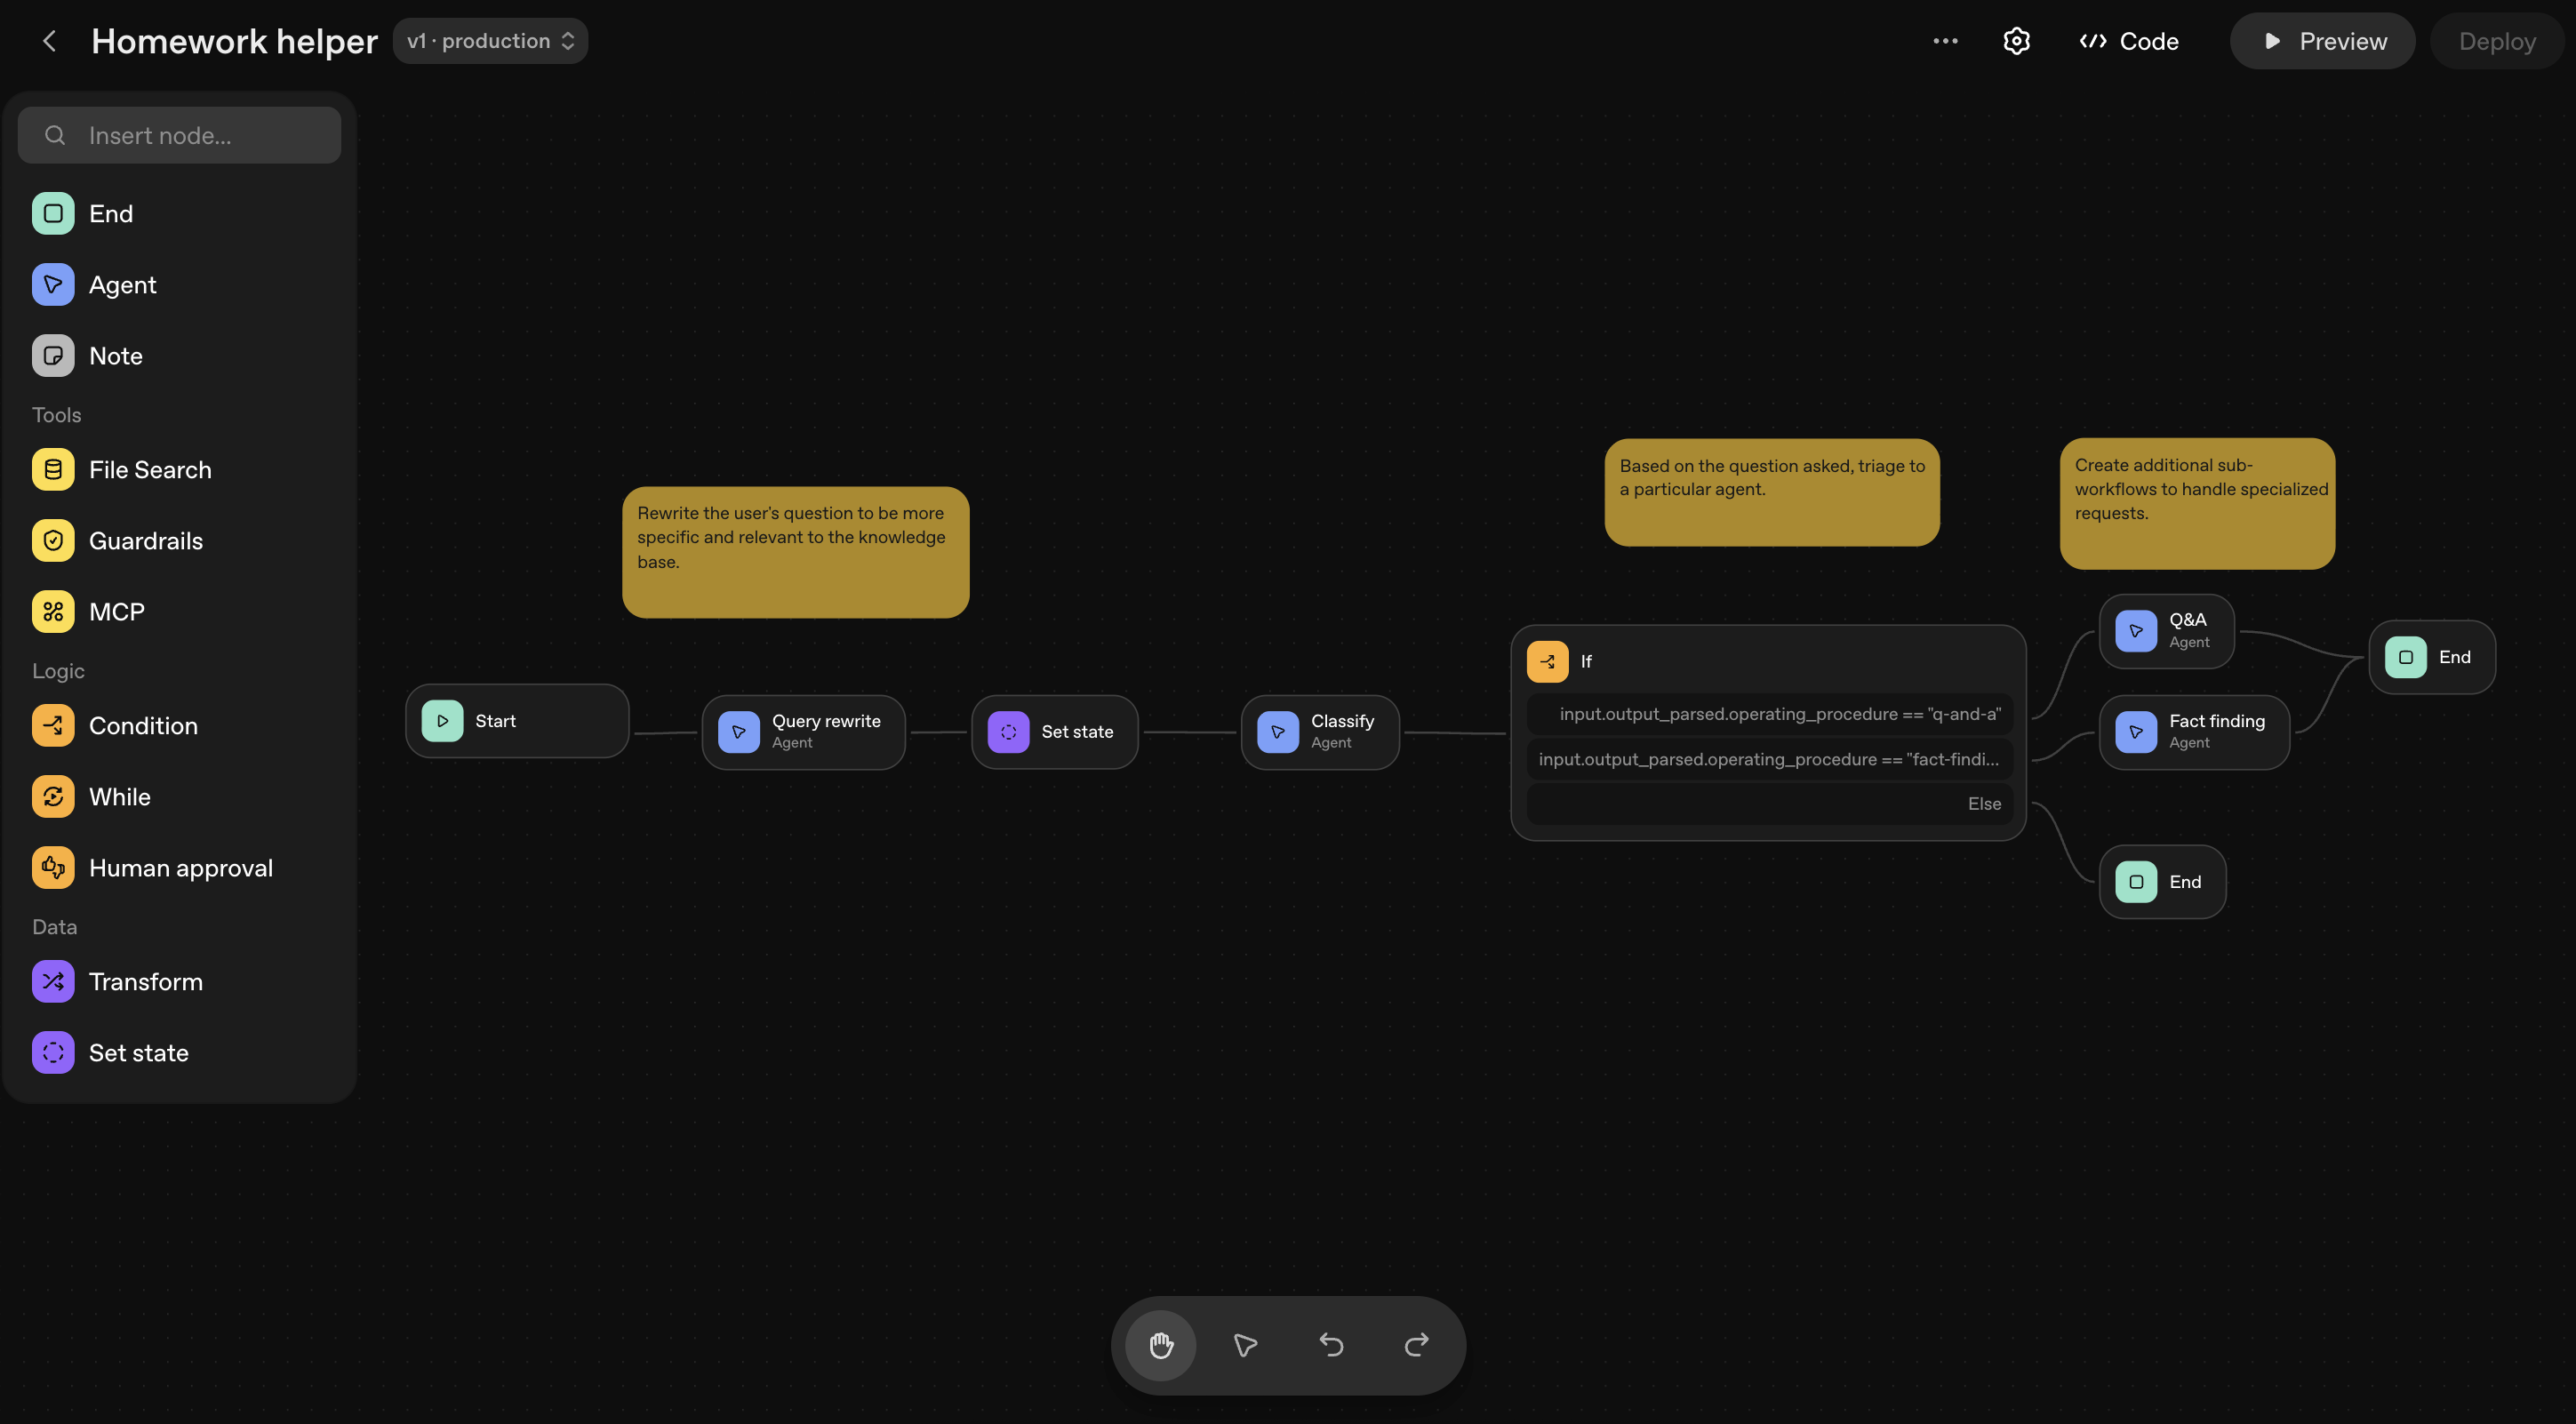
Here’s a homework helper workflow. It uses agents to take questions, reframe them for better answers, route them to other specialized agents, and return an answer.
Available nodes
Nodes are the building blocks for agents. To see all available nodes and their configuration options, see the node reference documentation.
Preview and debug
As you build, you can test your workflow by using the Preview feature. Here, you can interactively run your workflow, attach sample files, and observe the execution of each node.
Safety and risks
Building agent workflows comes with risks, like prompt injection and data leakage. See safety in building agents to learn about and help mitigate the risks of agent workflows.
Evaluate your workflow
Run trace graders inside of Agent Builder. In the top navigation, click Evaluate. Here, you can select a trace (or set of traces) and run custom graders to assess overall workflow performance.
Publish your workflow
Agent Builder autosaves your work as you go. When you’re happy with your workflow, publish it to create a new major version that acts as a snapshot. You can then use your workflow in ChatKit, an OpenAI framework for embedding chat experiences.
You can create new versions or specify an older version in your API calls.
Deploy in your product
When you’re ready to implement the agent workflow you created, click Code in the top navigation. You have two options for implementing your workflow in production:
ChatKit: Follow the ChatKit quickstart and pass in your workflow ID to embed this workflow into your application. If you’re not sure, we recommend this option.
Advanced integration: Copy the workflow code and use it anywhere. You can run ChatKit on your own infrastructure and use the Agents SDK to build and customize agent chat experiences.
Next steps
Now that you’ve created an agent workflow, bring it into your product with ChatKit.