
GPT Image 2.5 prompting guide
Choose a model, write effective prompts, and preserve details across edits.
Overview
Start with the image you need, then describe the subject, composition, style, and constraints. For edits, identify what should change and what must stay the same. Refine one thing at a time and inspect the result.
GPT Image 2.5 includes two model choices. GPT Image 2.5 Flare is the small model, optimized for speed, with image quality comparable to GPT Image 2. GPT Image 2.5 Sunburst is the base model, optimized for quality, with higher image quality than GPT Image 2. Both models offer improvements in precise editing and subject preservation.
For API setup and request examples, see the image generation guide.
Choose a model
For a new workflow, start with GPT Image 2.5 Flare when speed is the priority, or GPT Image 2.5 Sunburst when demanding quality requirements are the priority. Once the output meets your requirements, look for opportunities to reduce latency.
For migrating from a current image model, use your current image quality as the starting point. Both models support image generation, editing, and transparent backgrounds.
| Your current workflow | Start by testing |
|---|---|
| An existing, validated GPT Image 2 workflow already meets your quality requirements | GPT Image 2.5 Flare. Check whether you can retain acceptable quality while reducing latency. |
| A complex use case where GPT Image 2 does not meet your quality requirements | GPT Image 2.5 Sunburst. First establish that it delivers the quality you need. |
If GPT Image 2.5 Sunburst meets your quality requirements, then test GPT Image 2.5 Flare with the same prompts and inputs. Switch to GPT Image 2.5 Flare if it also meets those requirements and improves latency. Keep GPT Image 2.5 Sunburst when its quality advantage is necessary for your workflow.
Measure response time and quality on your own workload. Results depend on your prompts, reference images, output dimensions, and quality settings; a speed improvement on one workload doesn’t establish a fixed improvement on another.
Model parameters
Set API parameters separately from the prompt.
| Parameter | GPT Image 2.5 settings |
|---|---|
model |
gpt-image-2.5-flare (small model) or gpt-image-2.5-sunburst (base model) |
quality |
auto (default), low, medium, high, xhigh, or max |
size |
auto or a custom resolution. Common sizes: 1024x1024 (square), 1536x1024 (landscape), 1024x1536 (portrait), 2048x2048 (2K square), 2048x1152 (2K landscape), 3840x2160 (4K landscape), and 2160x3840 (4K portrait). |
background |
auto, opaque, or transparent |
For a custom resolution, use WIDTHxHEIGHT and follow these constraints:
- Each edge must be no more than 3,840 pixels.
- Both edges must be multiples of 16 pixels.
- The ratio of the longer edge to the shorter edge must not exceed 3:1.
- The total pixel count must be between 655,360 and 8,294,400.
Outputs with more than 3,686,400 total pixels (2560x1440) are experimental.
Choose the model using the workflow above before tuning quality. For the first comparison, keep an explicitly selected quality setting unchanged when both models support it, along with the prompt, reference images, and output dimensions. The same quality label does not imply the same image quality or response time across models.
If the output falls short, test a higher quality setting. Once it meets your requirements, test lower settings to see whether they preserve acceptable quality while reducing latency. Use xhigh or max only when they improve an unmet quality requirement within your latency budget. A higher setting doesn’t guarantee a better result for every prompt.
For transparent assets, explicitly request background="transparent" and use PNG or WebP. Check the decoded image’s alpha channel, including hair, glass, shadows, and object edges. Use output_compression only for JPEG or WebP output, not PNG.
Migrate an existing workflow
- Save a baseline. Collect representative production prompts and reference images, including difficult edits, exact text, faces, product geometry, and transparent assets. Record the current model, request settings, and results.
- Choose the first candidate. If GPT Image 2 already meets your quality requirements, start with GPT Image 2.5 Flare and test for a latency improvement. If GPT Image 2 falls short on a complex use case, start with GPT Image 2.5 Sunburst and first establish that it meets your quality requirements. Keep the prompt, references, dimensions, and output format unchanged for the first comparison.
- Check the complete result. Compare instruction following, identity and product preservation, text accuracy, unwanted changes, and transparency. Repeat requests to measure consistency. For editing workflows, test the complete sequence of edits as well as individual steps.
- Test for a latency gain after quality passes. If you started with GPT Image 2.5 Sunburst and it meets your quality requirements, evaluate GPT Image 2.5 Flare against the same requirements. Switch only if the quality remains acceptable and latency improves; otherwise, keep GPT Image 2.5 Sunburst.
- Tune one setting at a time. Compare quality levels before rewriting the prompt. Measure typical and slow responses, failures, retries, and cost per accepted image. Confirm current pricing rather than assuming the faster model costs less.
- Roll out by workflow. Once the released model passes your acceptance criteria, move a small share of traffic, monitor the same measures, and expand gradually. Keep the previous model available for rollback while it remains supported.
When migrating from GPT Image 1 or 1.5, use the reference tabs to check parameter differences and shutdown dates. Test the candidate model’s supported request settings rather than copying older settings unchanged. For GPT Image 2, keep your existing resolution and transparency requirements in the comparison.
Repeated edits can still change details you intended to preserve. Restate those constraints and inspect each result. If a region must remain pixel-identical, composite the approved edit into the original image instead of relying on prompting alone.
Prompting fundamentals
- Define the result. Name the subject and intended use, such as a product photograph, advertisement, or diagram. Specify the composition, aspect ratio, and important placement constraints. For complex requests, organize the prompt as scene, subject, details, and constraints, using labeled sections.
- Choose a maintainable format. Short prompts, descriptive paragraphs, JSON-like structures, instructions, and tags can all express the same intent. Choose the format that makes the requirements easiest to read and update rather than relying on special syntax.
- Describe visible details. Name materials, lighting, colors, and the visual medium. Request “photorealistic” or “real photograph” explicitly when that is the goal, and describe framing and texture. Treat camera specifications as cues for appearance, not a guarantee of exact physical simulation. For wide, cinematic, low-light, rainy, or neon scenes, specify scale, atmosphere, and color instead of relying on mood words alone.
- Specify people and actions. Describe body framing, relative scale, gaze, and interaction with objects. Instructions such as “full body visible, feet included,” “looking down at the open book,” or “hands naturally gripping the handlebars” make the intended pose and action clearer.
- Specify exact text. Put required wording in quotes and describe its position and typography. Spell unusual words or brand names letter by letter when needed. Ask for no extra text, then check spelling and legibility in the output. Compare medium or high quality for small text, dense information, or multiple fonts.
- Separate changes from constraints. For edits, say “change only X” and list the details to preserve, such as identity, geometry, layout, lighting, or labels. State exclusions such as unwanted text, logos, or watermarks. For precise local edits, also identify saturation, contrast, arrows, camera angle, and surrounding objects that must remain unchanged.
- Assign roles to references. Identify each input by number and purpose: subject, style, clothing, or background. Explain how the inputs should combine and which elements should move where.
- Iterate deliberately. Pass the previous output as the next edit input, request one change, and repeat the details to preserve. References such as “same style as before” can carry context, but restate critical constraints if the result drifts. Compare results before adding more instructions.
The examples below each demonstrate a different technique. Keep their prompts as starting points and adapt them to your own images and requirements.
Generate images
Control style and lighting
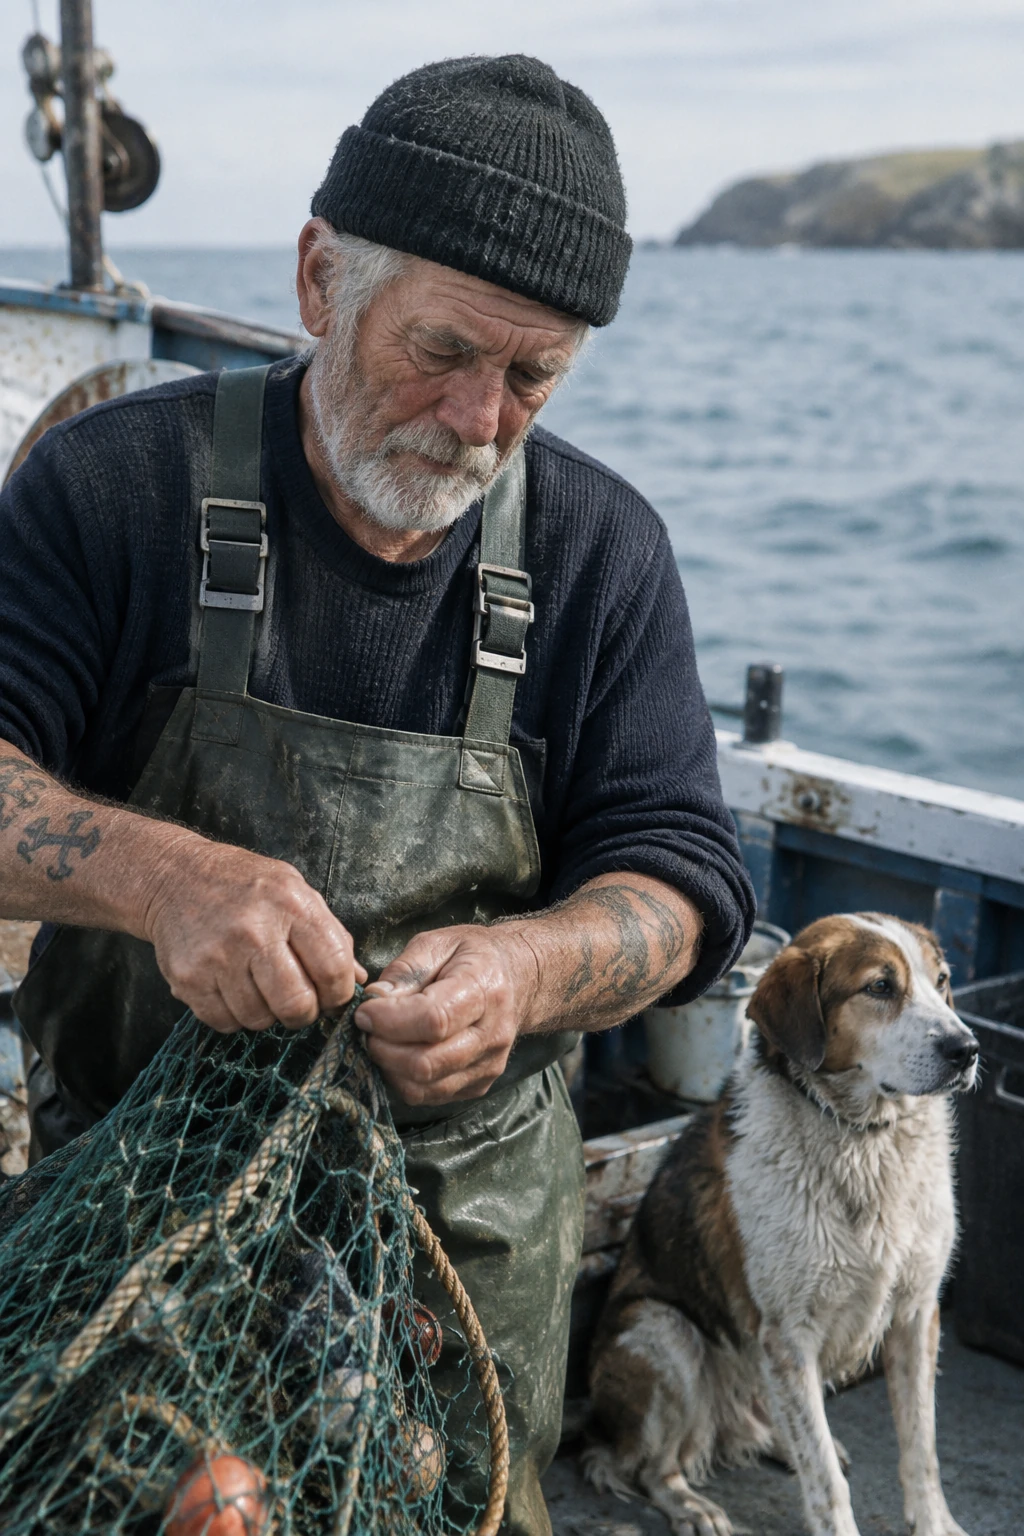
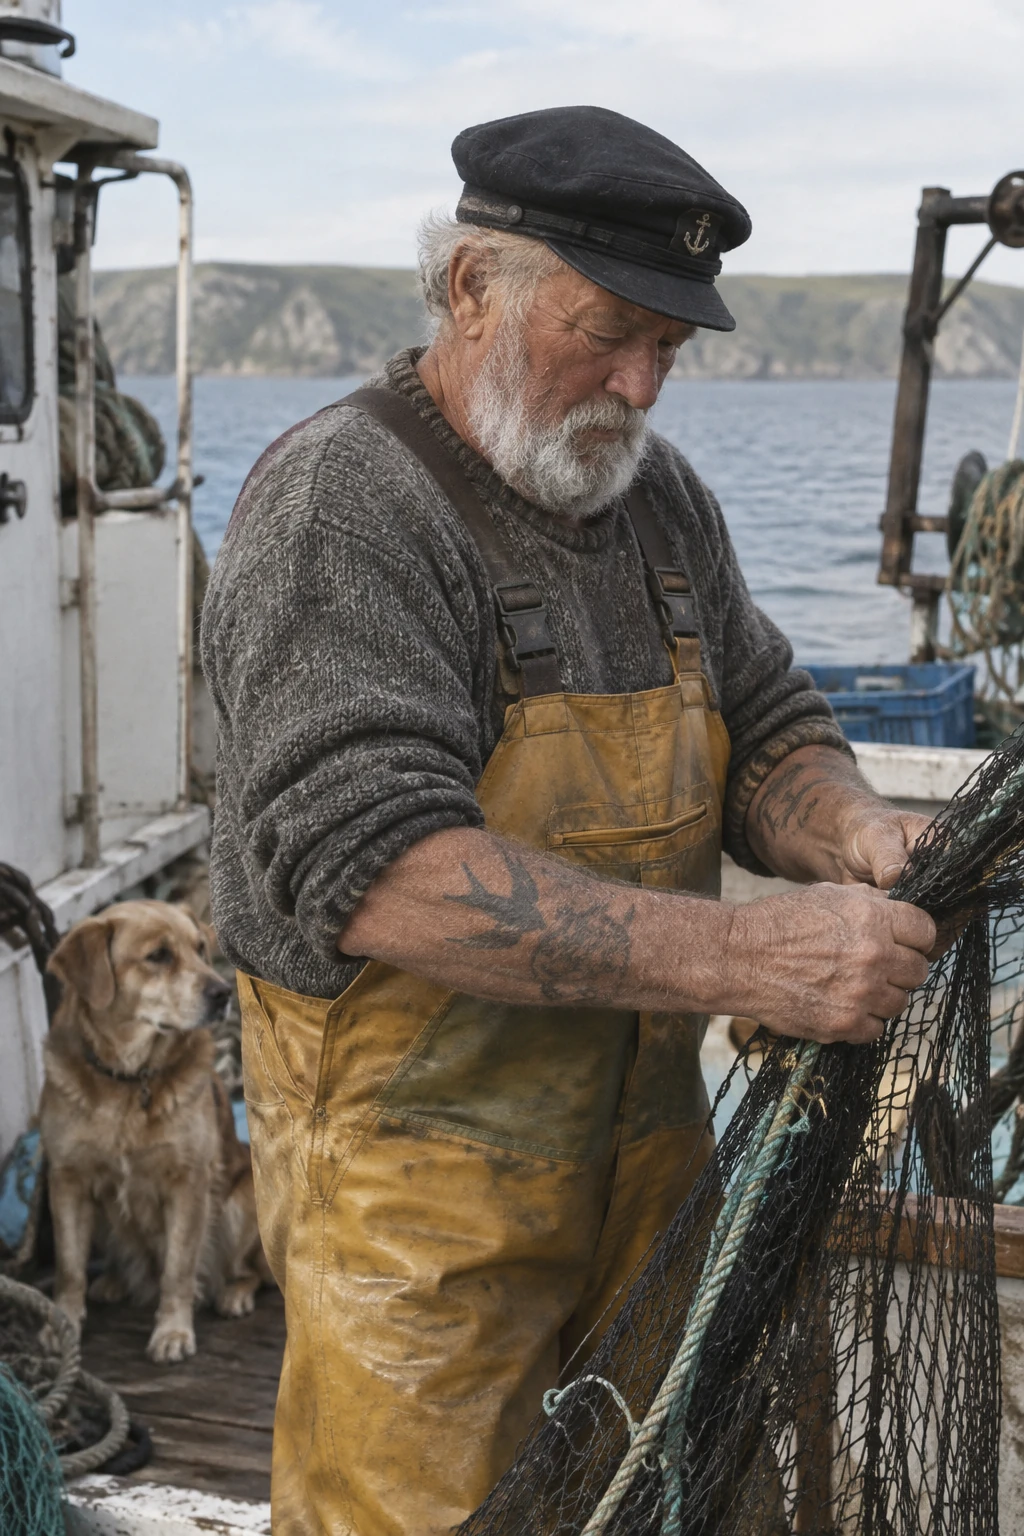
Describe a photograph through its subject, framing, light, and texture. This example specifies a candid composition and explicitly excludes heavy retouching.
Generation settings: size="1024x1536", quality="medium".
Create a photorealistic candid photograph of an elderly sailor standing on a small fishing boat.
He has weathered skin with visible wrinkles, pores, and sun texture, and a few faded traditional sailor tattoos on his arms.
He is calmly adjusting a net while his dog sits nearby on the deck. Shot like a 35mm film photograph, medium close-up at eye level, using a 50mm lens.
Soft coastal daylight, shallow depth of field, subtle film grain, natural color balance.
The image should feel honest and unposed, with real skin texture, worn materials, and everyday detail. No glamorization, no heavy retouching.
Example outputs:
GPT Image 2.5 Flare
GPT Image 2.5 Sunburst
Explain a process visually
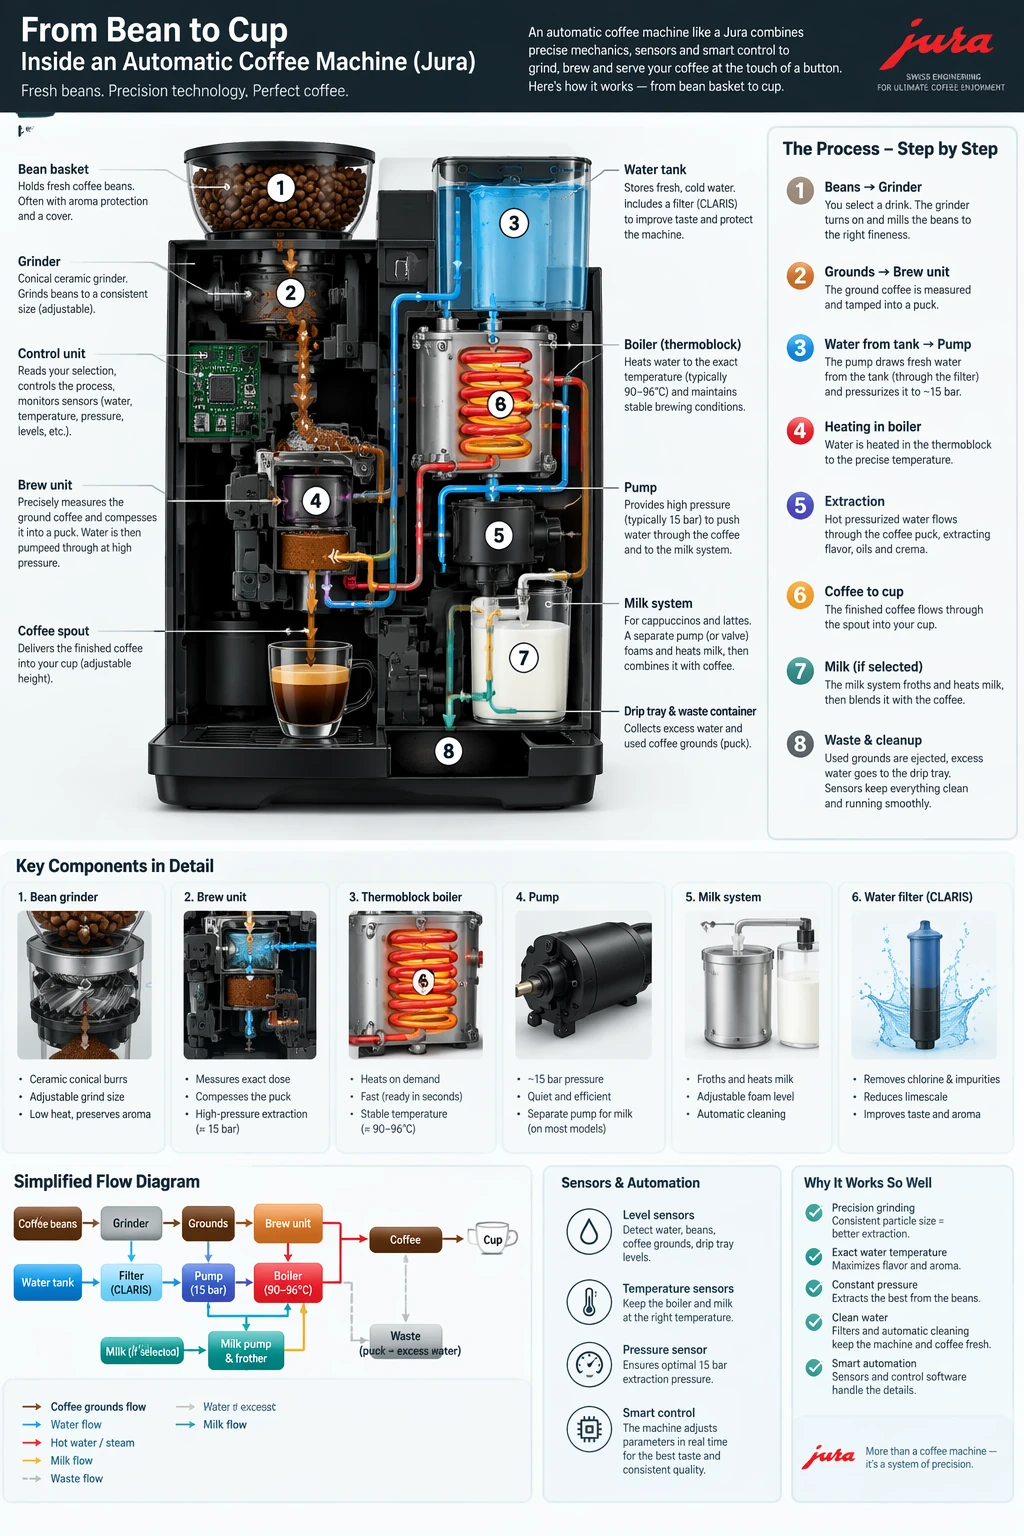
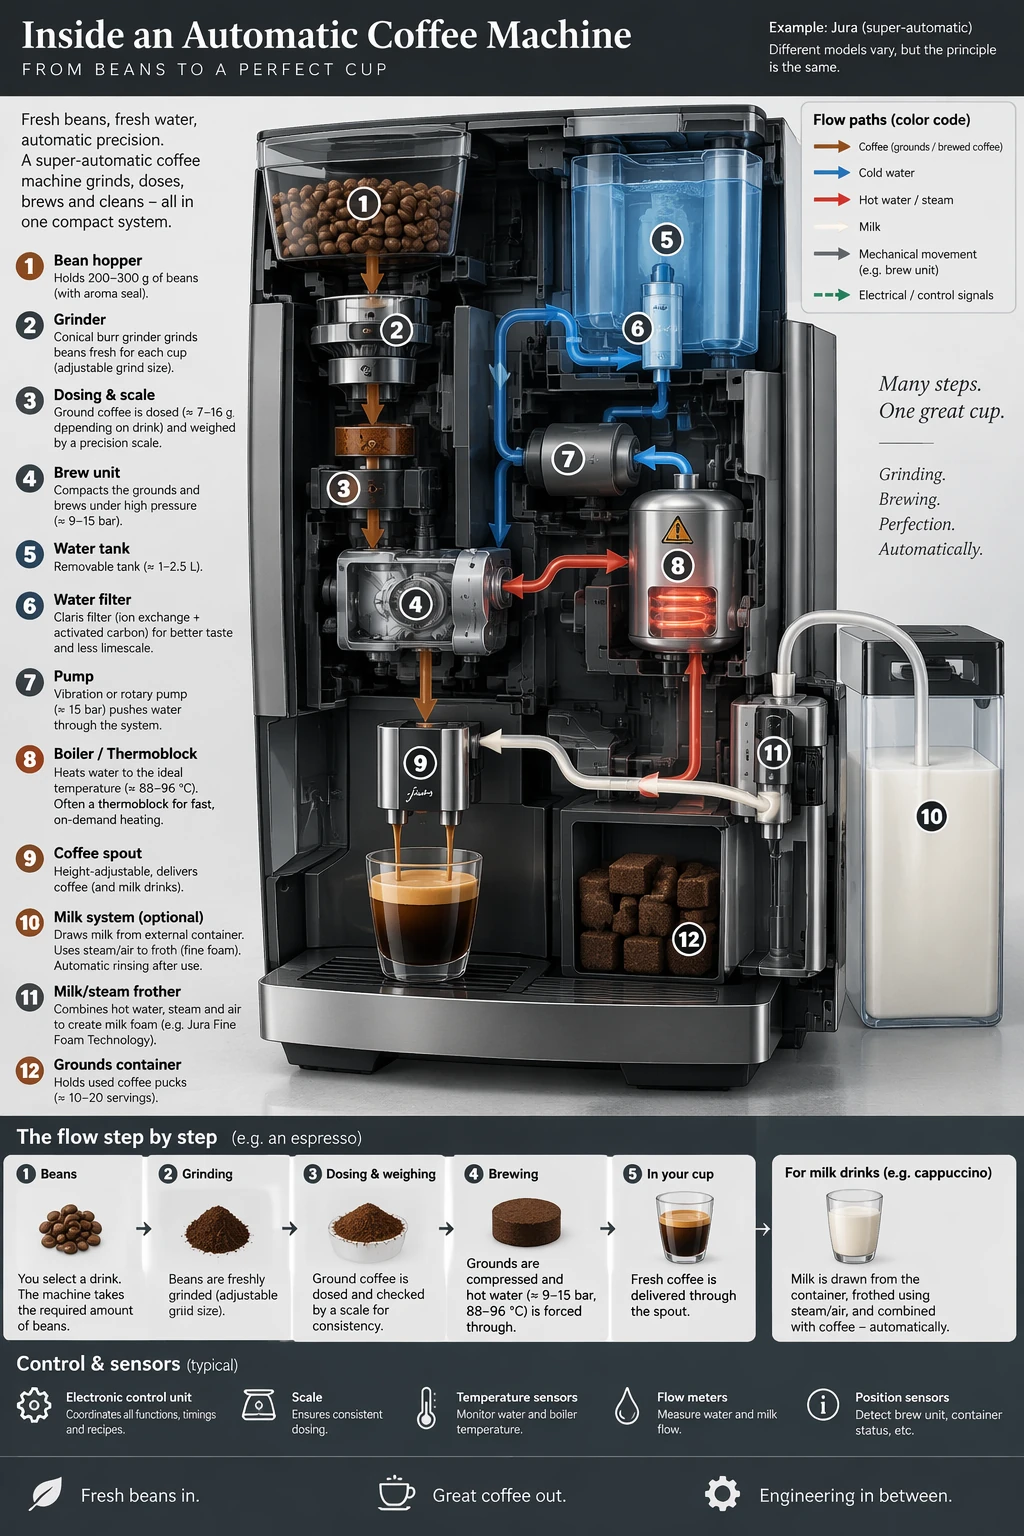
Name the process, audience, and information the image should communicate. For diagrams and information graphics, verify labels and factual relationships as well as appearance.
Generation settings: size="1024x1536", quality="medium".
Create a detailed Infographic of the functioning and flow of an automatic coffee machine like a Jura.
From bean basket, to grinding, to scale, water tank, boiler, etc.
I'd like to understand technically and visually the flow.
Example outputs:
GPT Image 2.5 Flare
GPT Image 2.5 Sunburst
Render exact text
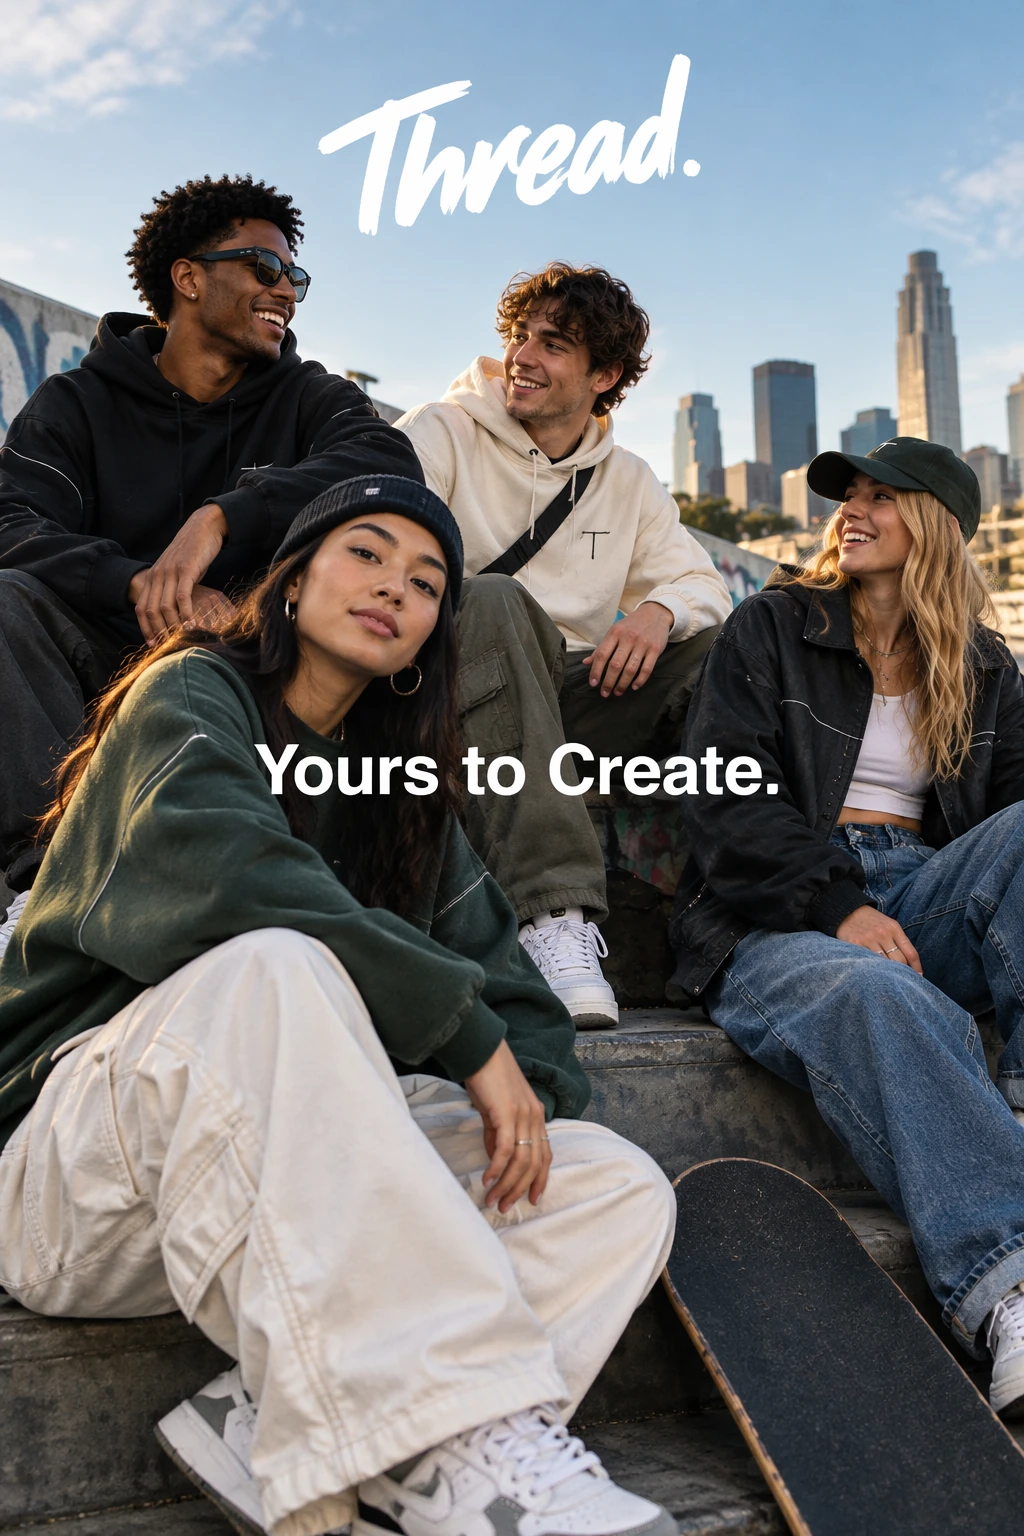
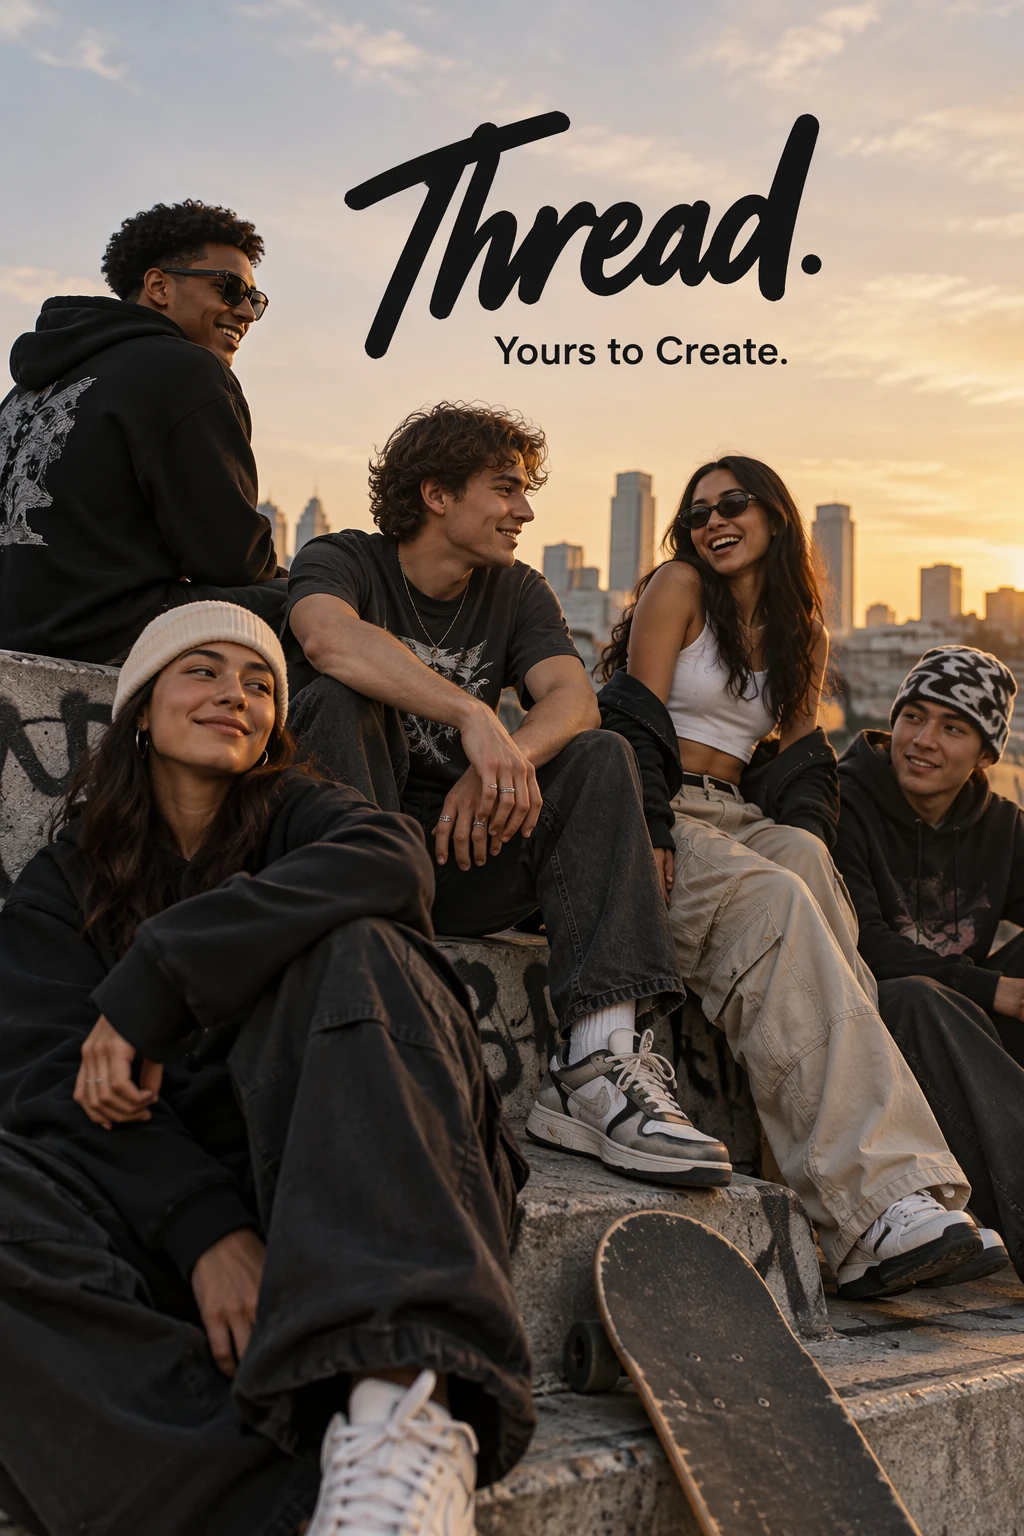
Quote the required copy and tell the model how many times it should appear. Specify the audience and visual treatment without adding unrelated instructions.
Generation settings: size="1024x1536", quality="medium".
Give me a cool in culture ad / fashion shot for a brand called Thread.
It's a hip young street brand. The ad shows a group of friends hanging out together with the tagline "Yours to Create."
Make it feel like a polished campaign image for a youth streetwear audience: stylish, contemporary, energetic, and tasteful.
Use clean composition, strong color direction, natural poses, and premium fashion photography cues.
Render the tagline exactly once, clearly and legibly, integrated into the ad layout.
No extra text, no watermarks, no unrelated logos.
Example outputs:
GPT Image 2.5 Flare
GPT Image 2.5 Sunburst
Design a reusable logo
Describe the brand and the shapes that should define the mark. Specify a clear composition that remains legible at different sizes. Use n to request multiple variations.
Generation settings: size="1024x1536", quality="medium", background="transparent", output_format="png", n=1.
Create an original, non-infringing logo for a company called Field & Flour, a local bakery.
The logo should feel warm, simple, and timeless. Use clean, vector-like shapes, a strong silhouette, and balanced negative space.
Favor simplicity over detail so it reads clearly at small and large sizes. Flat design, minimal strokes, no gradients unless essential.
Fully transparent background. Deliver a single centered logo with generous padding, clean alpha edges, and no solid backdrop, scenery, checkerboard, or watermark.
Each row compares one variation from each model.
Example outputs:
GPT Image 2.5 Flare
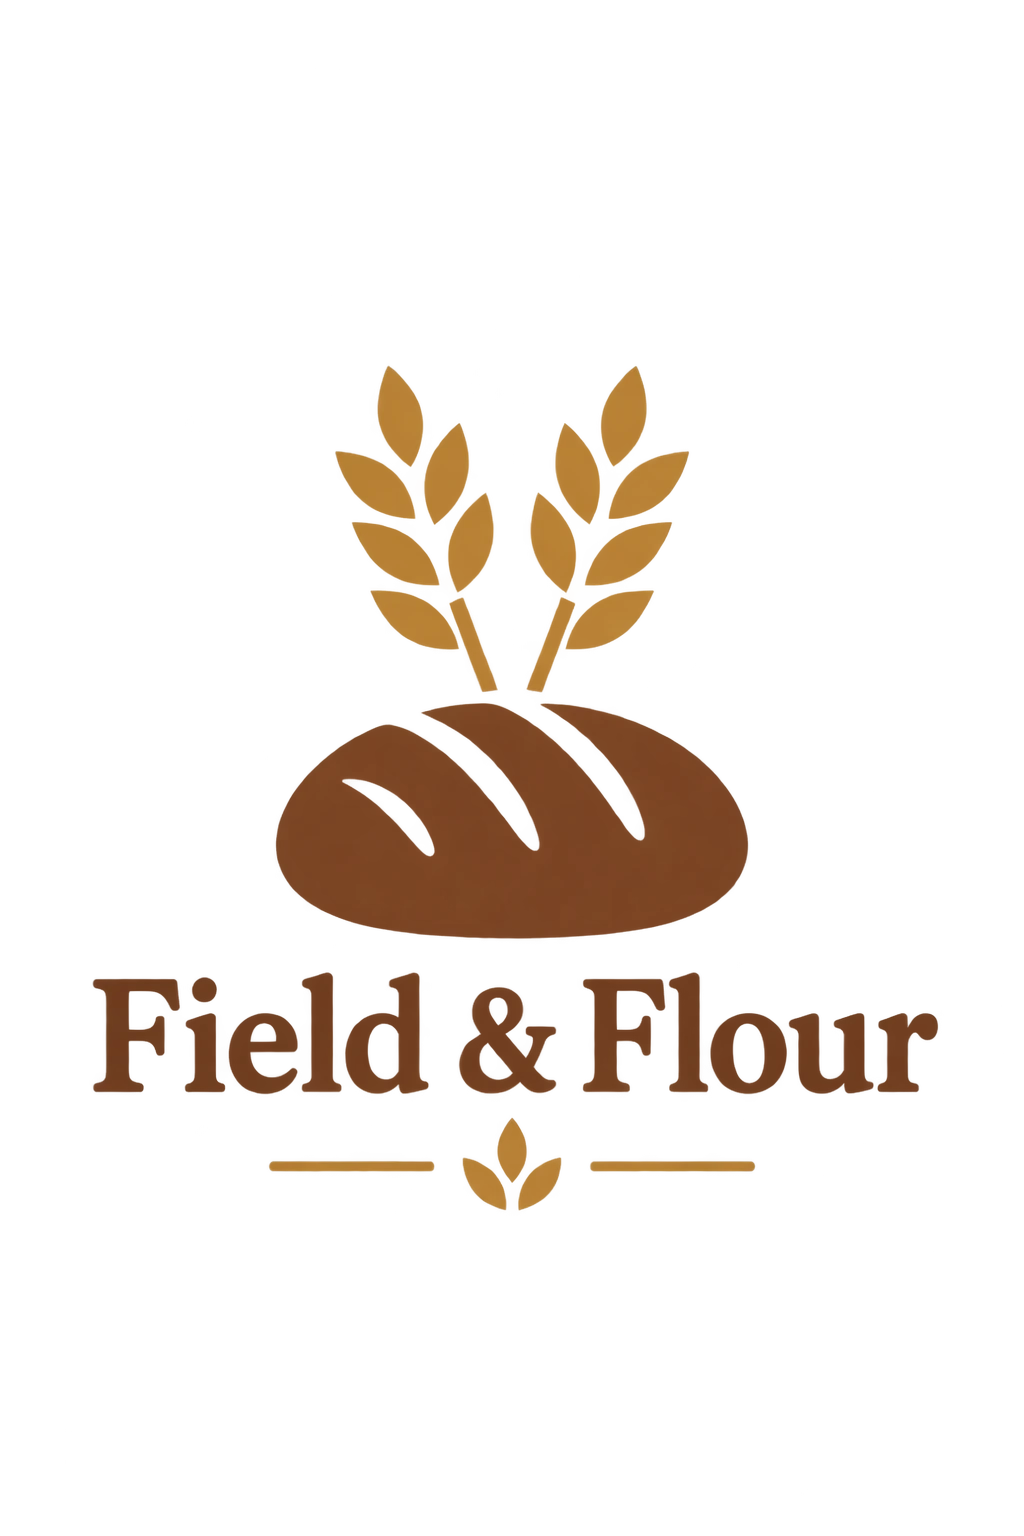
GPT Image 2.5 Sunburst

GPT Image 2.5 Flare

GPT Image 2.5 Sunburst

GPT Image 2.5 Flare

GPT Image 2.5 Sunburst

GPT Image 2.5 Flare

GPT Image 2.5 Sunburst

Use historical and real-world context
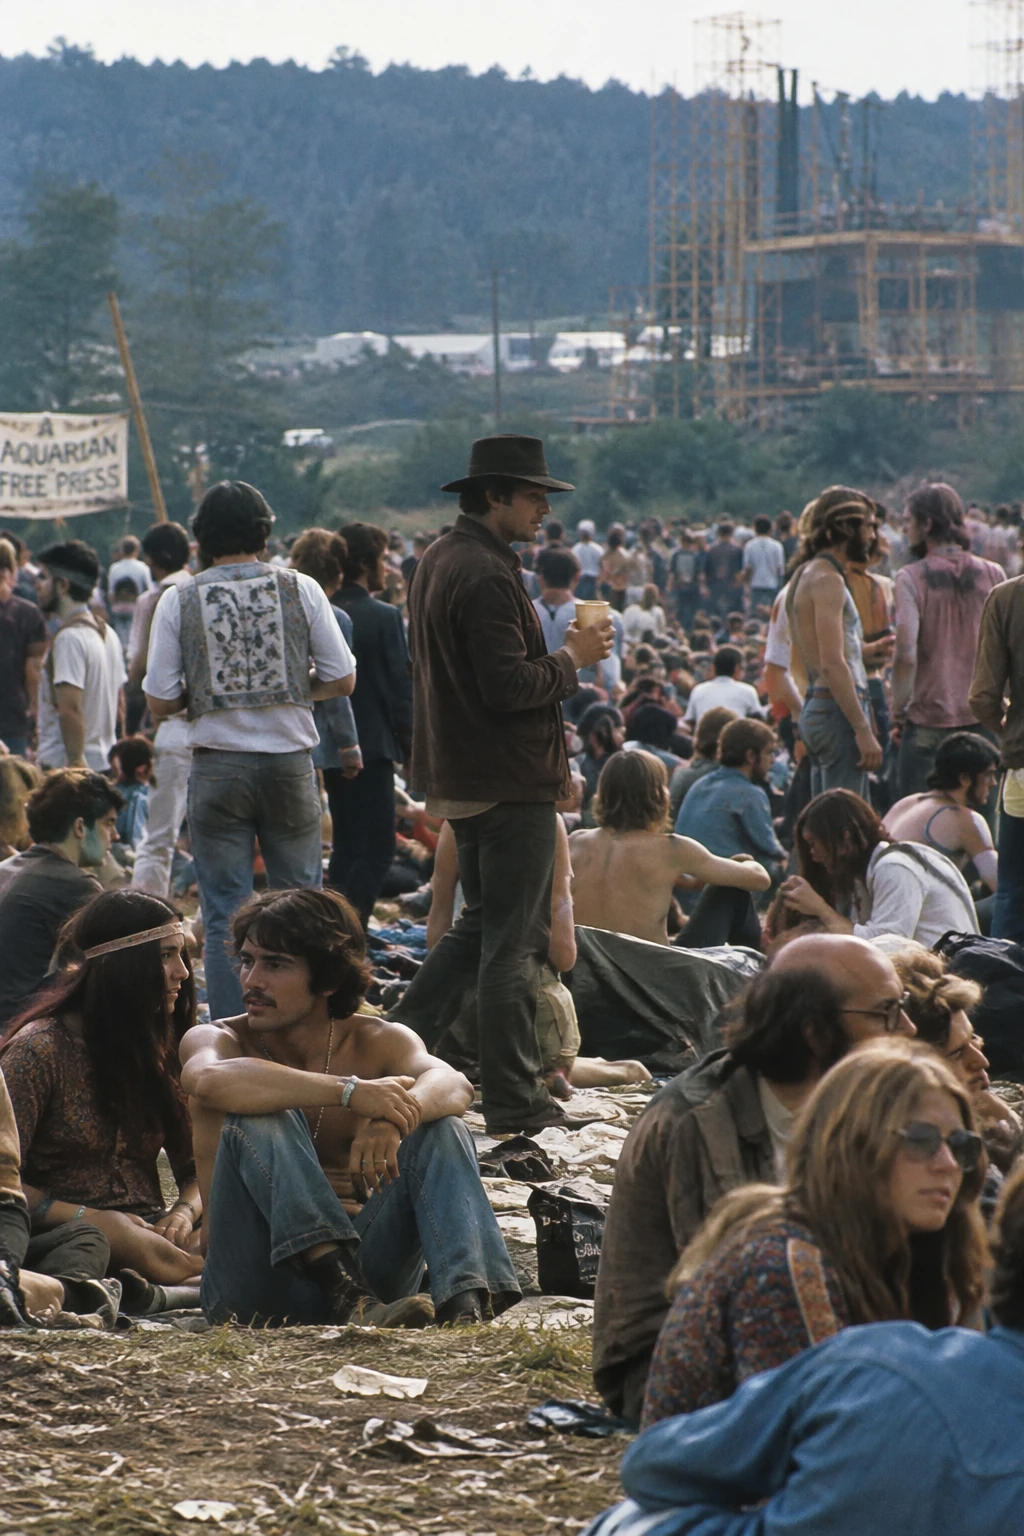
Name the place and date to establish a historical setting. The model can infer contextual details, but inspect clothing, staging, and surroundings for historical accuracy.
Generation settings: size="1024x1536", quality="medium".
Create a realistic outdoor crowd scene in Bethel, New York on August 16, 1969.
Photorealistic, period-accurate clothing, staging, and environment.
Example outputs:
GPT Image 2.5 Flare
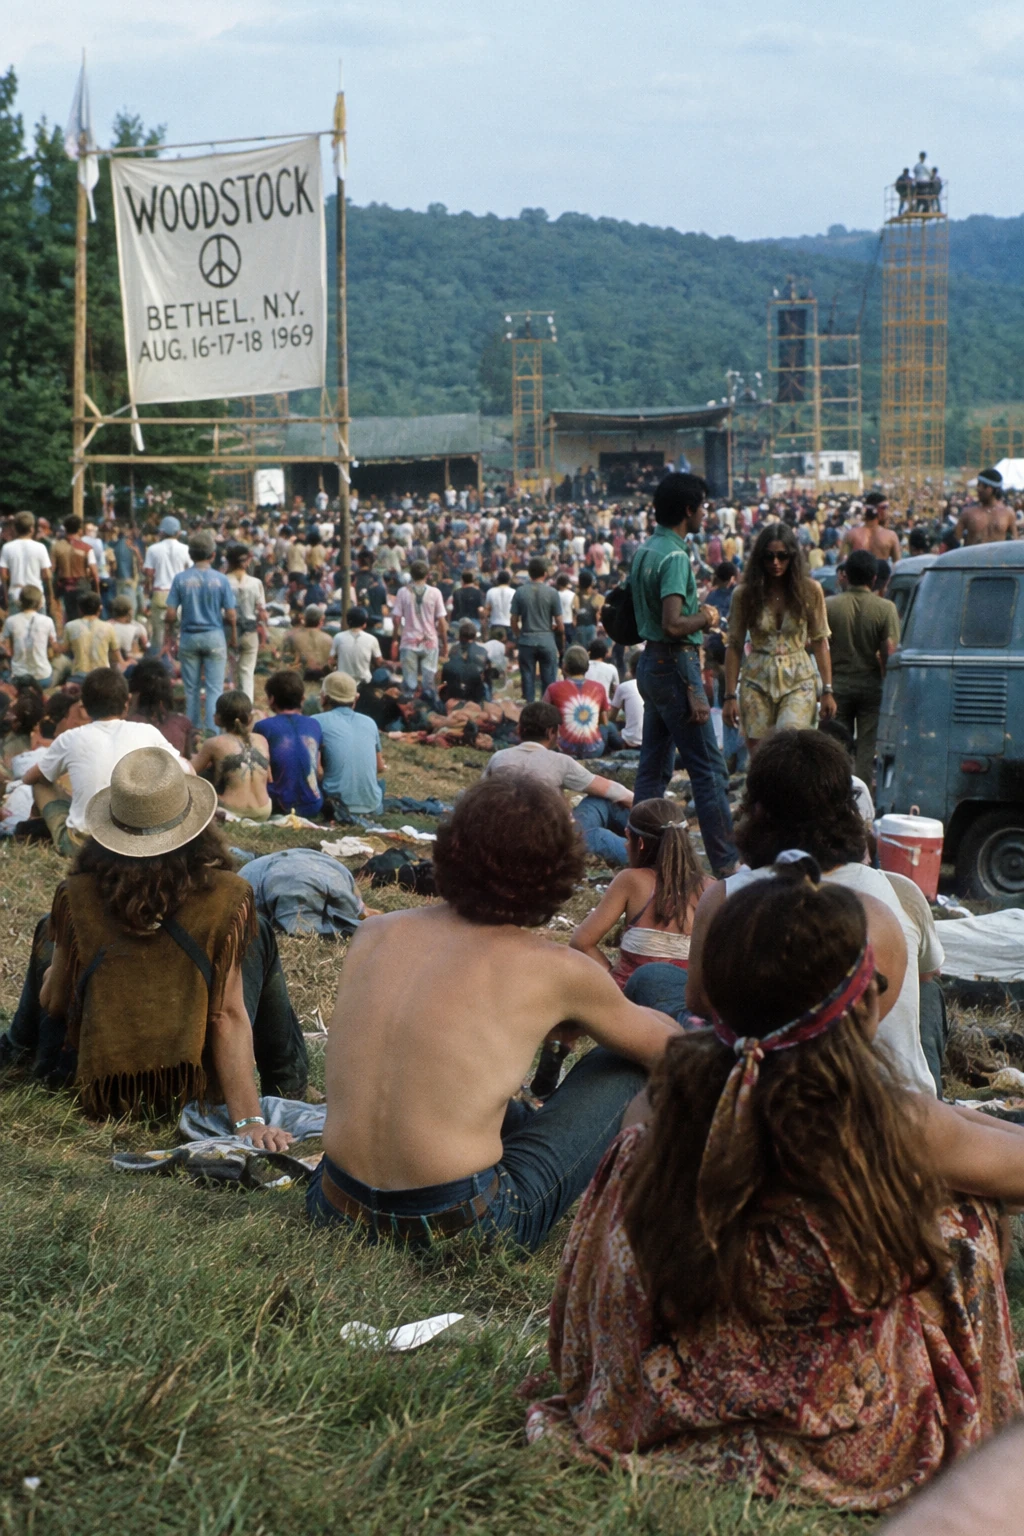
GPT Image 2.5 Sunburst
Turn a story into a comic strip
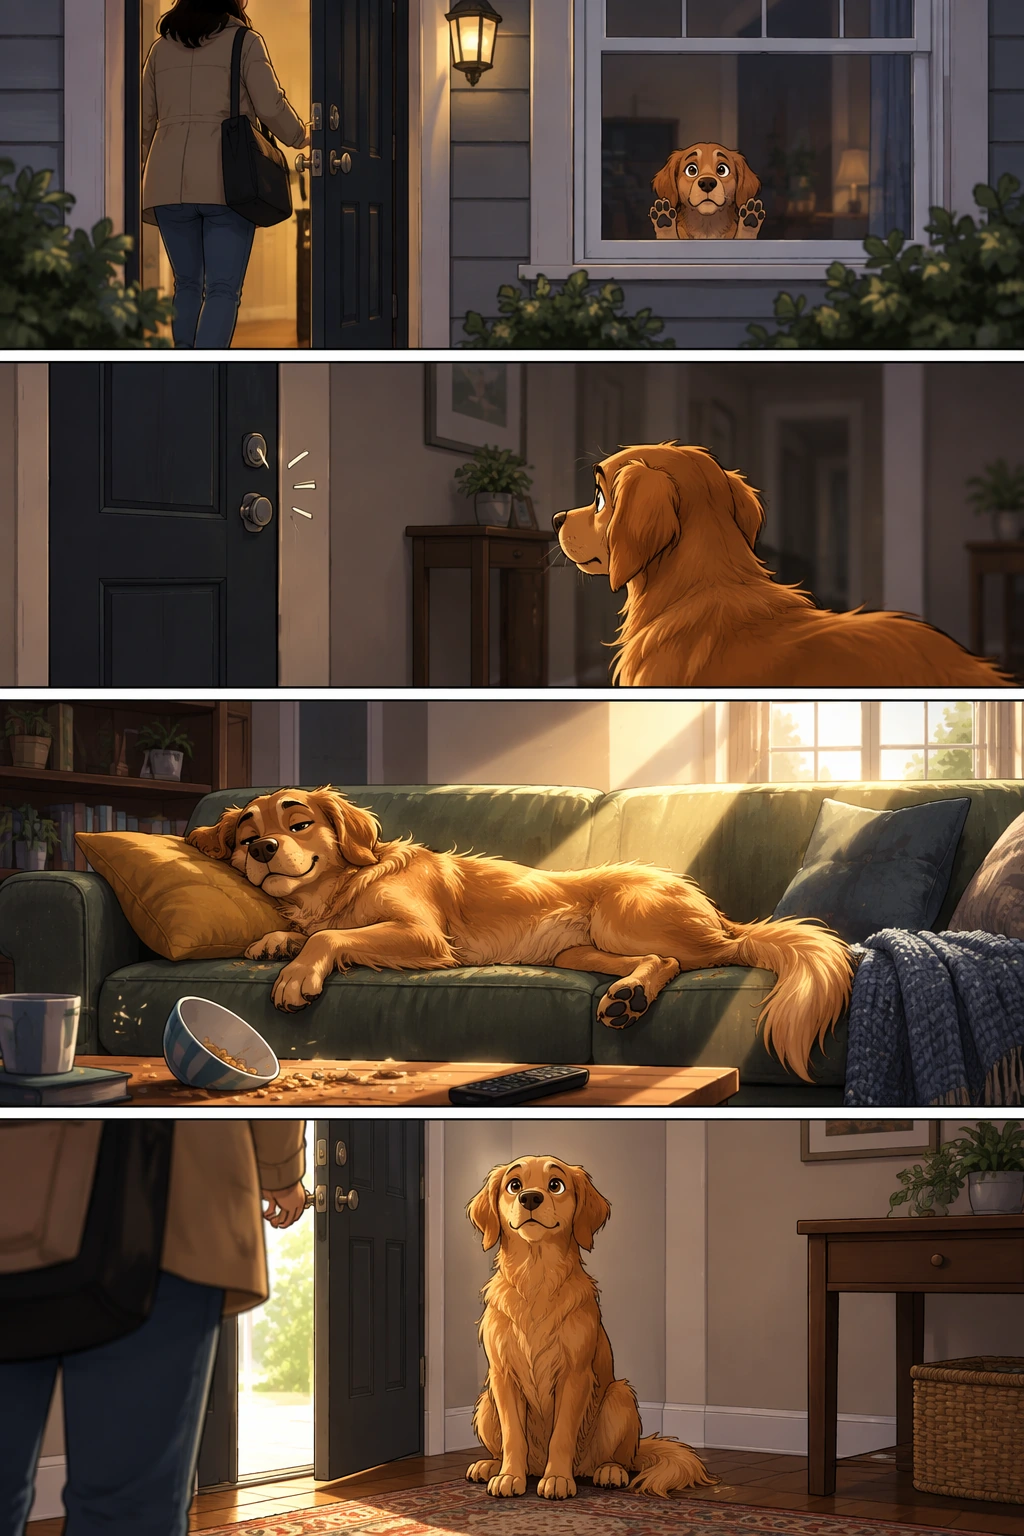
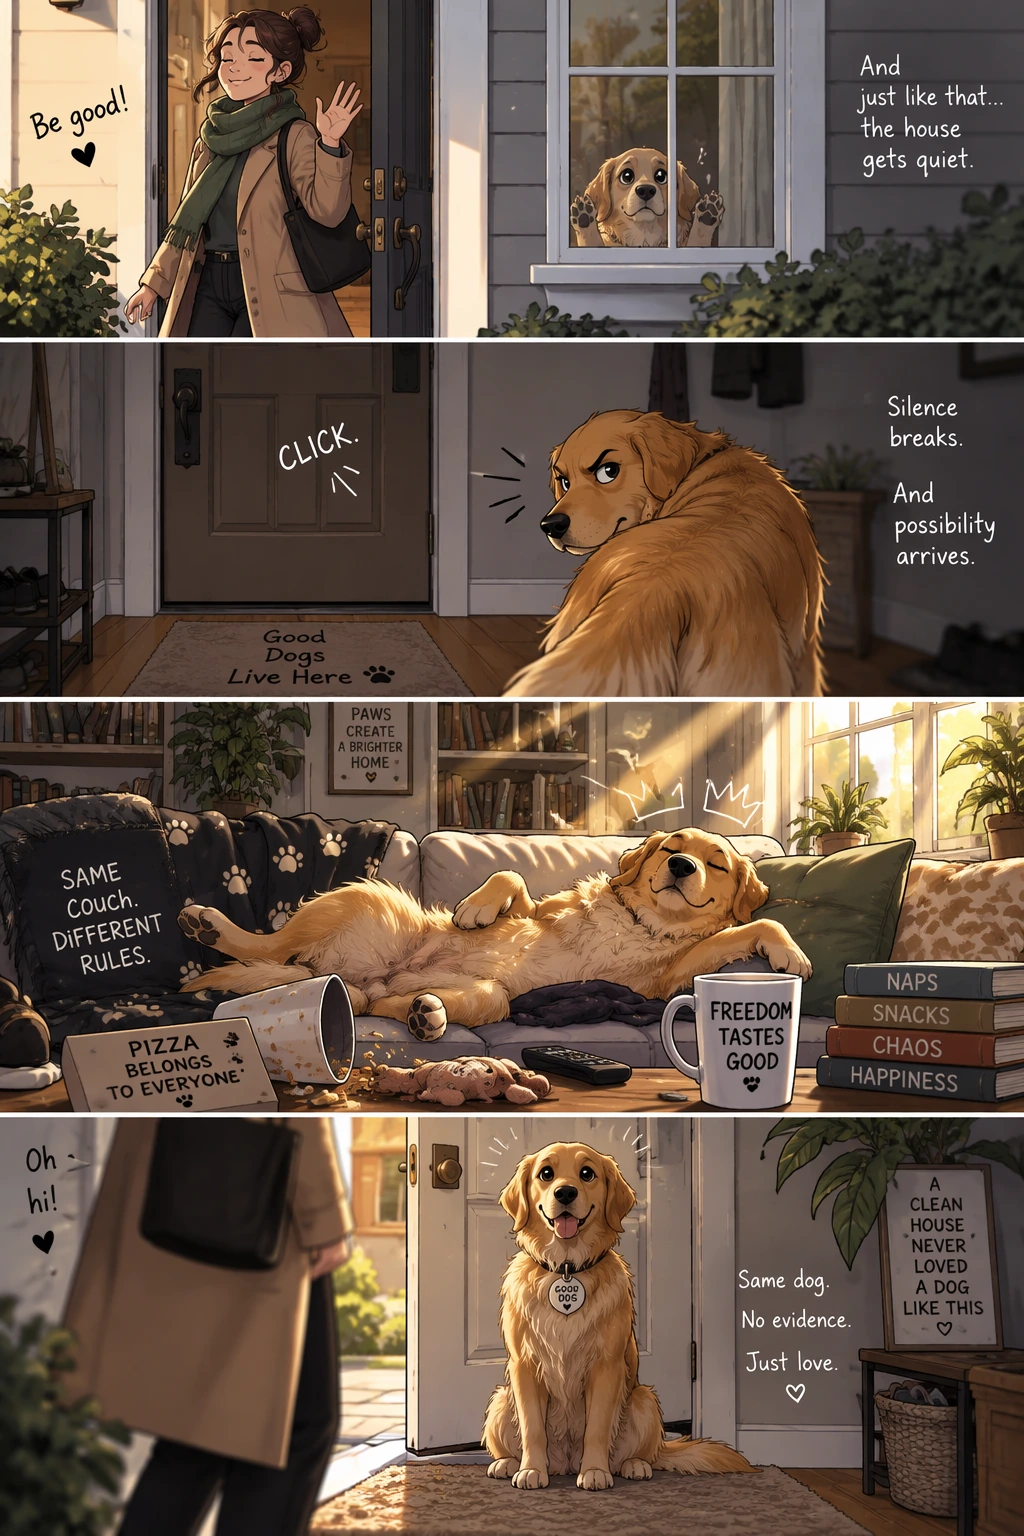
For story-to-comic generation, define the narrative as a sequence of clear visual beats, one per panel. Keep descriptions concrete and action-focused so the model can translate the story into readable, well-paced panels.
Generation settings: size="1024x1536", quality="medium".
Create a short vertical comic-style reel with 4 panels.
Panel 1: The owner leaves through the front door. The pet is framed in the window behind them, small against the glass, eyes wide, paws pressed high, the house suddenly quiet.
Panel 2: The door clicks shut. Silence breaks. The pet slowly turns toward the empty house, posture shifting, eyes sharp with possibility.
Panel 3: The house transformed. The pet sprawls across the couch like it owns the place, crumbs nearby, sunlight cutting across the room like a spotlight.
Panel 4: The door opens. The pet is seated perfectly by the entrance, alert and composed, as if nothing happened.
Example outputs:
GPT Image 2.5 Flare
GPT Image 2.5 Sunburst
Create an interface preview
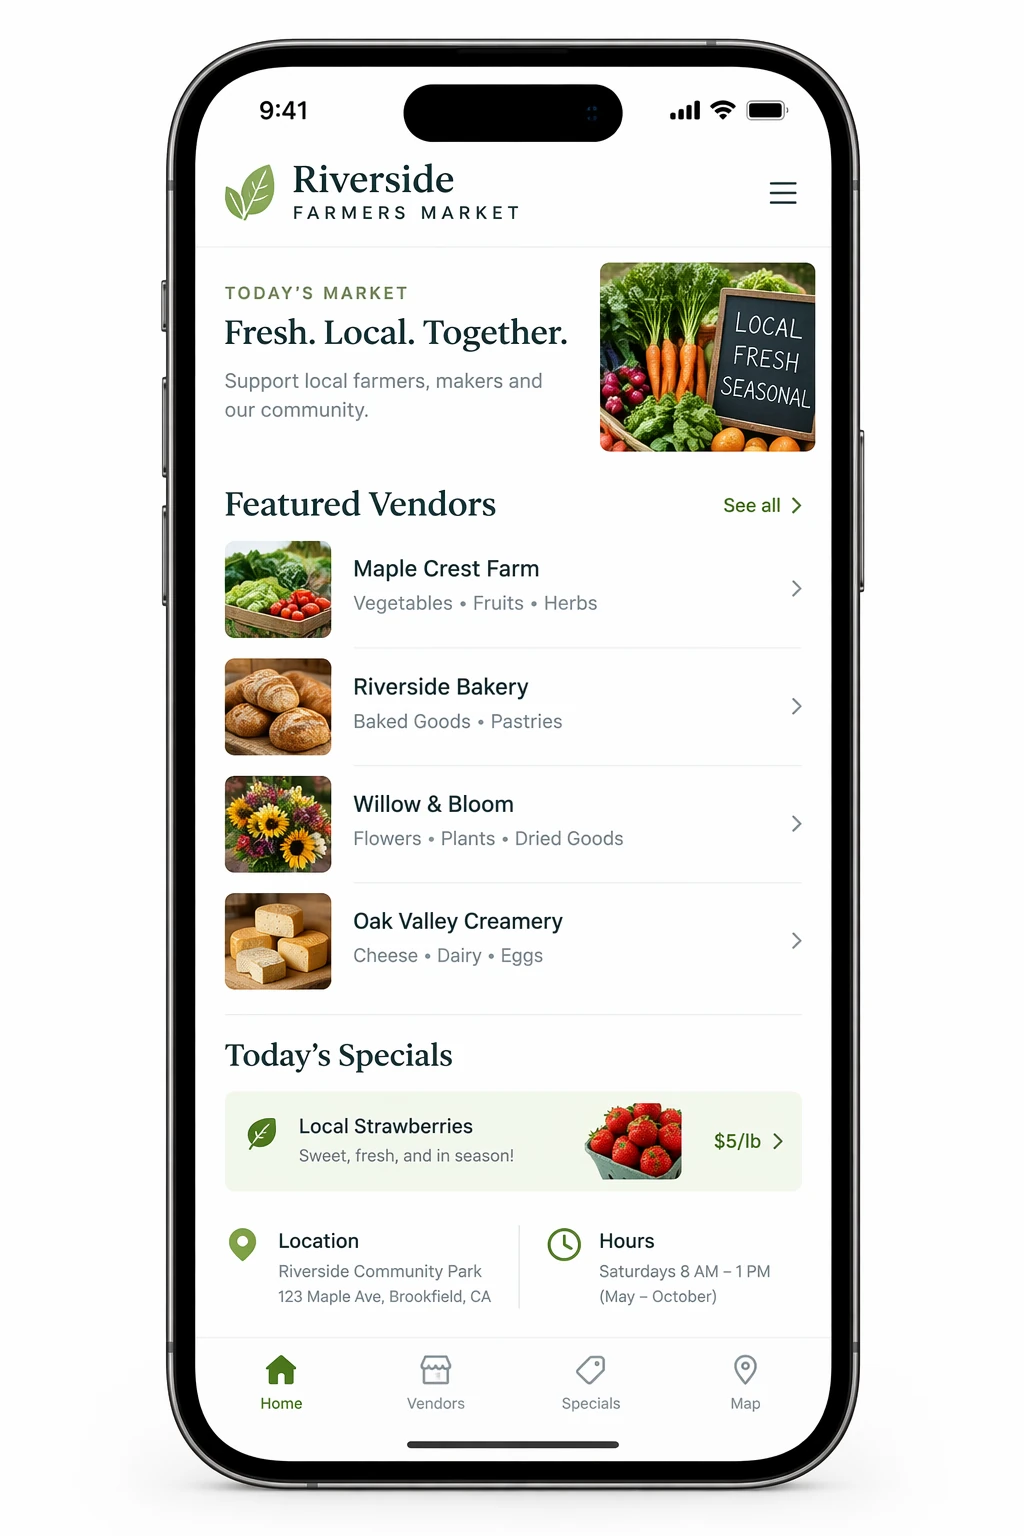
Interface previews work best when you describe the product as if it already exists. Focus on layout, hierarchy, spacing, and real interface elements, and avoid concept art language so the result looks like a usable, shipped interface rather than a design sketch.
Generation settings: size="1024x1536", quality="medium".
Create a realistic mobile app UI mockup for a local farmers market.
Show today’s market with a simple header, a short list of vendors with small photos and categories, a small “Today’s specials” section, and basic information for location and hours.
Design it to be practical, and easy to use. White background, subtle natural accent colors, clear typography, and minimal decoration.
It should look like a real, well-designed, beautiful app for a small local market.
Place the UI mockup in an iPhone frame.
Example outputs:
GPT Image 2.5 Flare
GPT Image 2.5 Sunburst

Create scientific and educational visuals
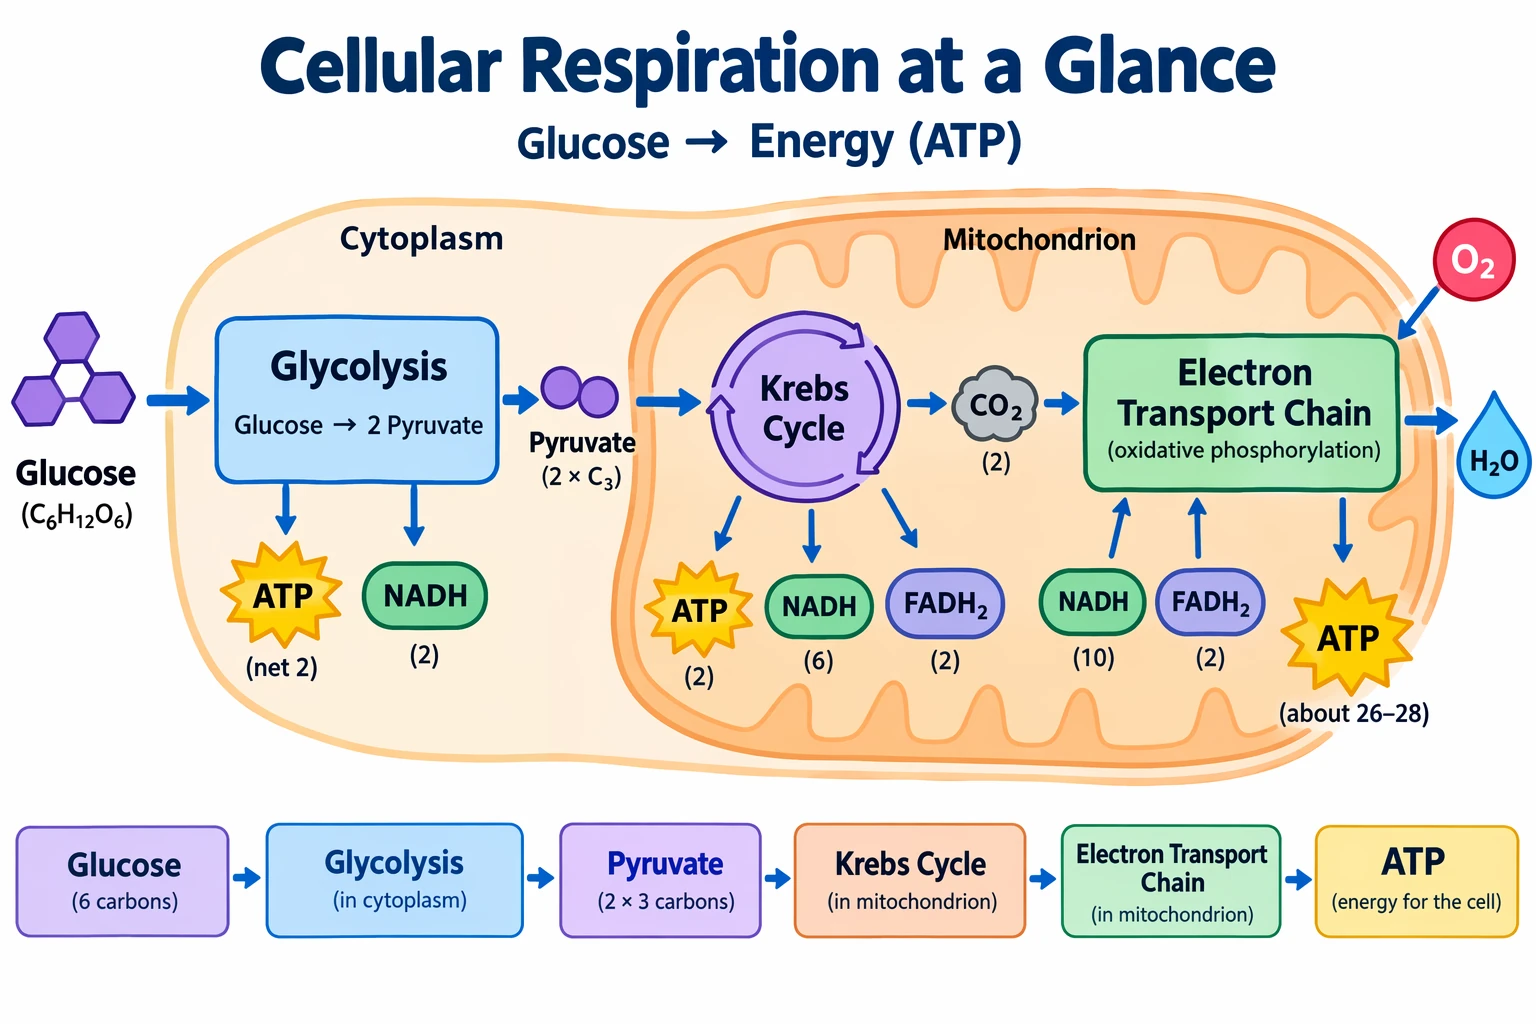
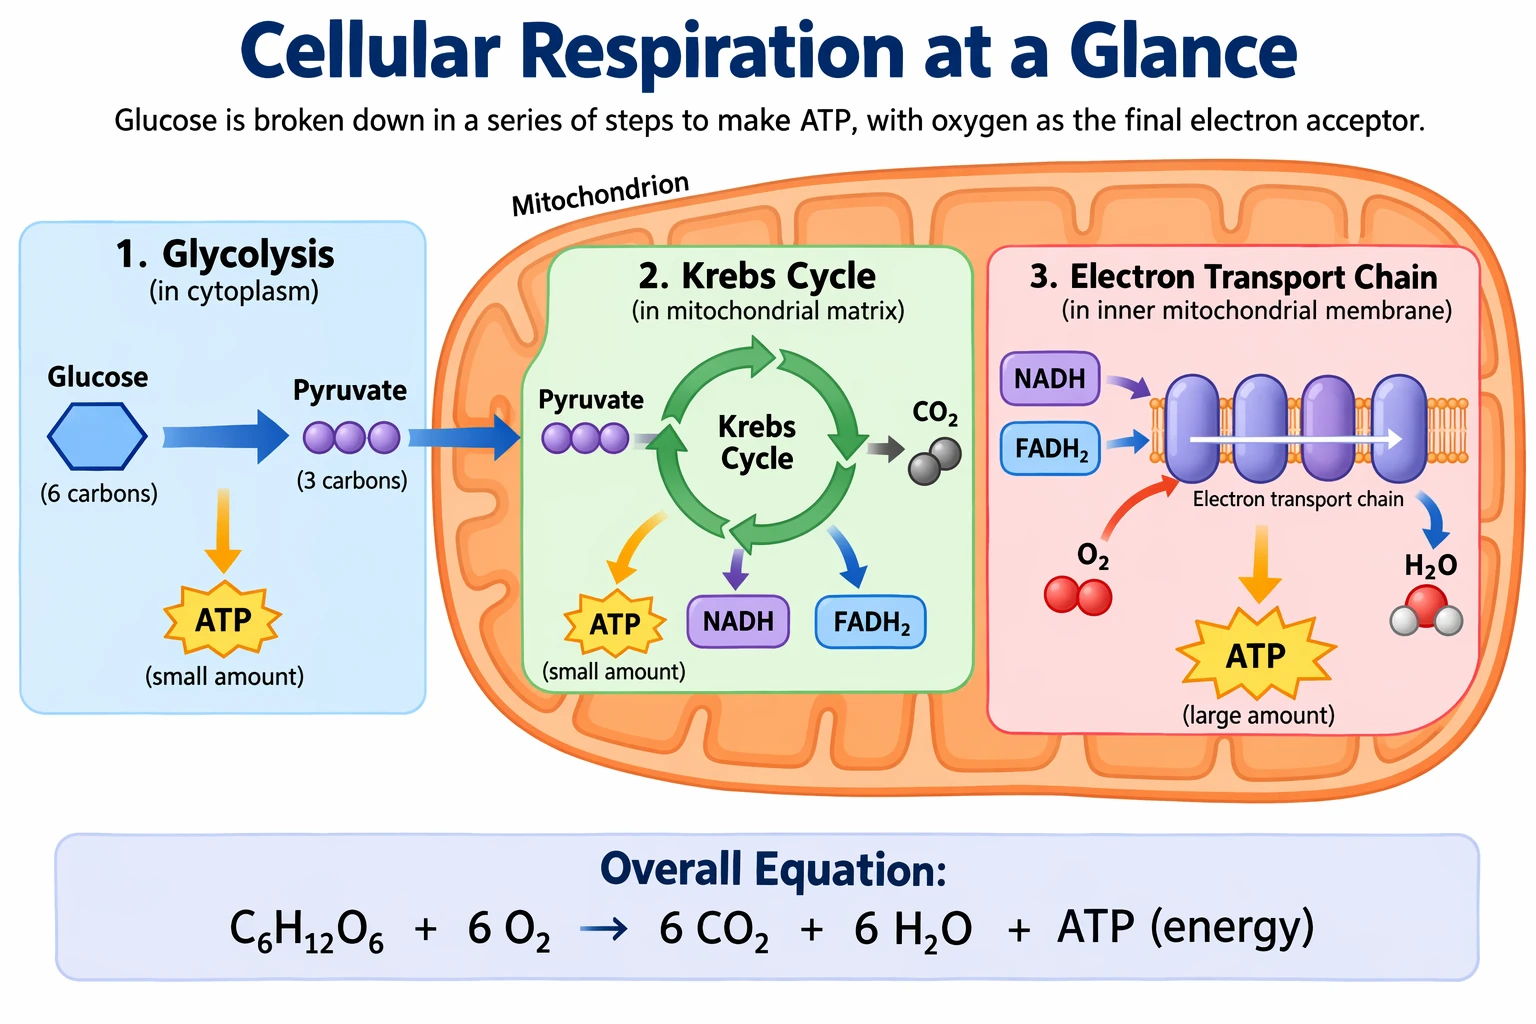
Scientific and educational visuals are strong fits for biology, chemistry, classroom explanations, flat scientific icon systems, diagrams, and learning assets. Prompt them like an instructional design brief: define the audience, lesson objective, visual format, required labels, and scientific constraints. For best results, ask for a clean, flat visual system with consistent icon style, clear arrows, readable labels, and enough white space for students to scan the concept quickly.
When accuracy matters, list the required components explicitly and say what should not be included. Use quality="high" for dense labels, diagrams, or assets that will be used in slides or course materials.
Generation settings: size="1536x1024", quality="high".
Create a simple biology diagram titled "Cellular Respiration at a Glance" for high school students.

Show how glucose turns into energy inside a cell. Include glycolysis, the Krebs cycle, and the electron transport chain.
Use arrows to connect the steps, and label the main molecules: glucose, pyruvate, ATP, NADH, FADH2, CO2, O2, and H2O.
Make it look like a clean classroom handout or slide, with a white background, simple icons, clear labels, and easy-to-read text.

Avoid tiny text, extra decoration, or anything that makes the diagram hard to understand.
Example outputs:
GPT Image 2.5 Flare
GPT Image 2.5 Sunburst
Build slides, diagrams, and charts
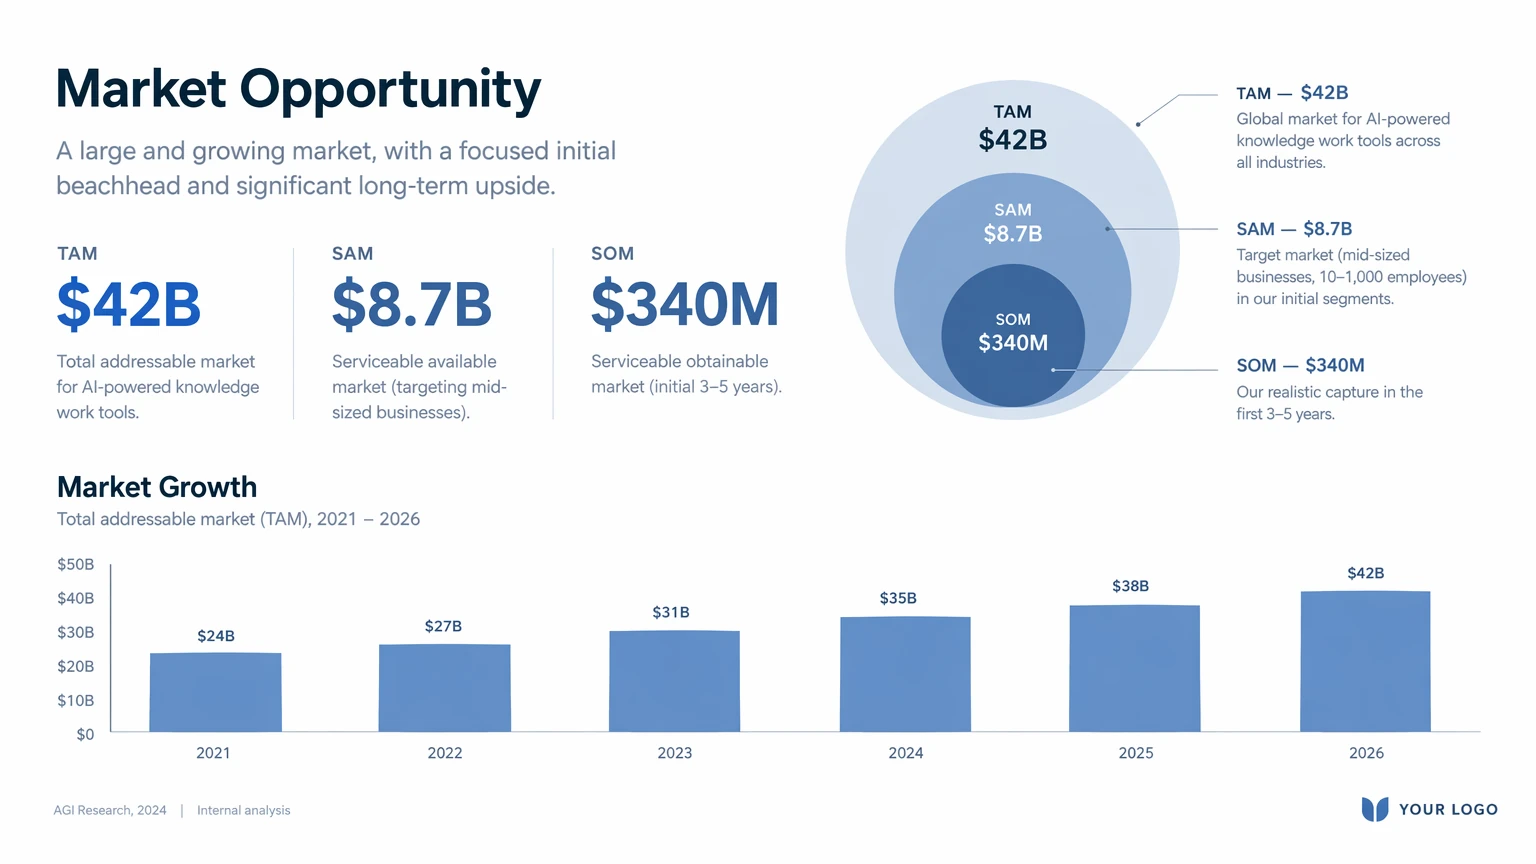
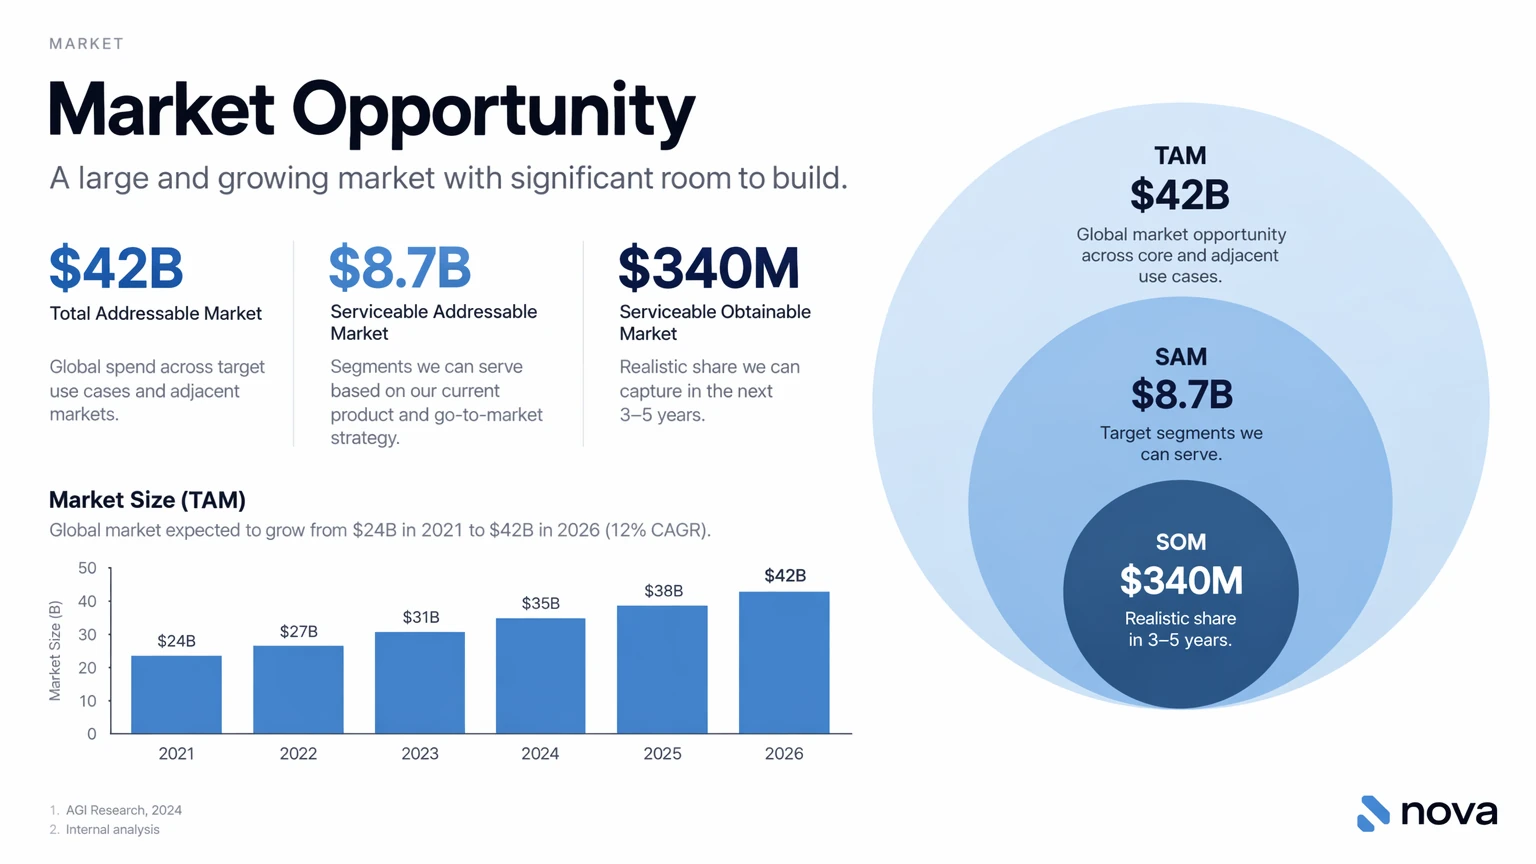
Productivity visuals work best when the prompt is written like an artifact spec rather than an illustration request. Name the exact deliverable (slide, workflow diagram, chart, page image), define the canvas and hierarchy, provide the real text or data, and describe the visual language. These prompts should include practical constraints: readable typography, polished spacing, no decorative clutter, and no generic stock-photo treatment.
For slides, charts, and diagram-heavy assets, include the numbers and labels directly in the prompt. Use a landscape size for deck-style outputs and quality="high" when the image contains small text, legends, axes, or footnotes.
The sample market figures and citations below are fictional design inputs. Replace them with verified data before using the slide.
Generation settings: size="1536x864", quality="high".
Create one pitch-deck slide titled **"Market Opportunity"** that feels like a real Series A fundraising slide from a YC-backed startup.

Use a clean white background, modern sans-serif typography like Inter, and a crisp, minimal layout. The slide should include:

* A TAM/SAM/SOM concentric-circle diagram in muted blues and grays
* Specific, believable market sizing numbers:

  * **TAM:** $42B
  * **SAM:** $8.7B
  * **SOM:** $340M
* A clean bar chart below showing market growth from **2021 to 2026**, with a subtle upward trend
* Small footnotes: **"AGI Research, 2024"** and **"Internal analysis"**
* A company logo placeholder in the bottom-right corner

The design should look like it belongs in a deck that actually raised money: highly readable text, clear data hierarchy, polished spacing, and professional startup-style visual language.

Avoid clip art, stock photography, gradients, shadows, decorative elements, or anything that feels generic or overdesigned.
Example outputs:
GPT Image 2.5 Flare
GPT Image 2.5 Sunburst
Edit images
Use client.images.edit with the referenced input images. For local edits that require a mask, see editing with a mask.
Translate while preserving layout
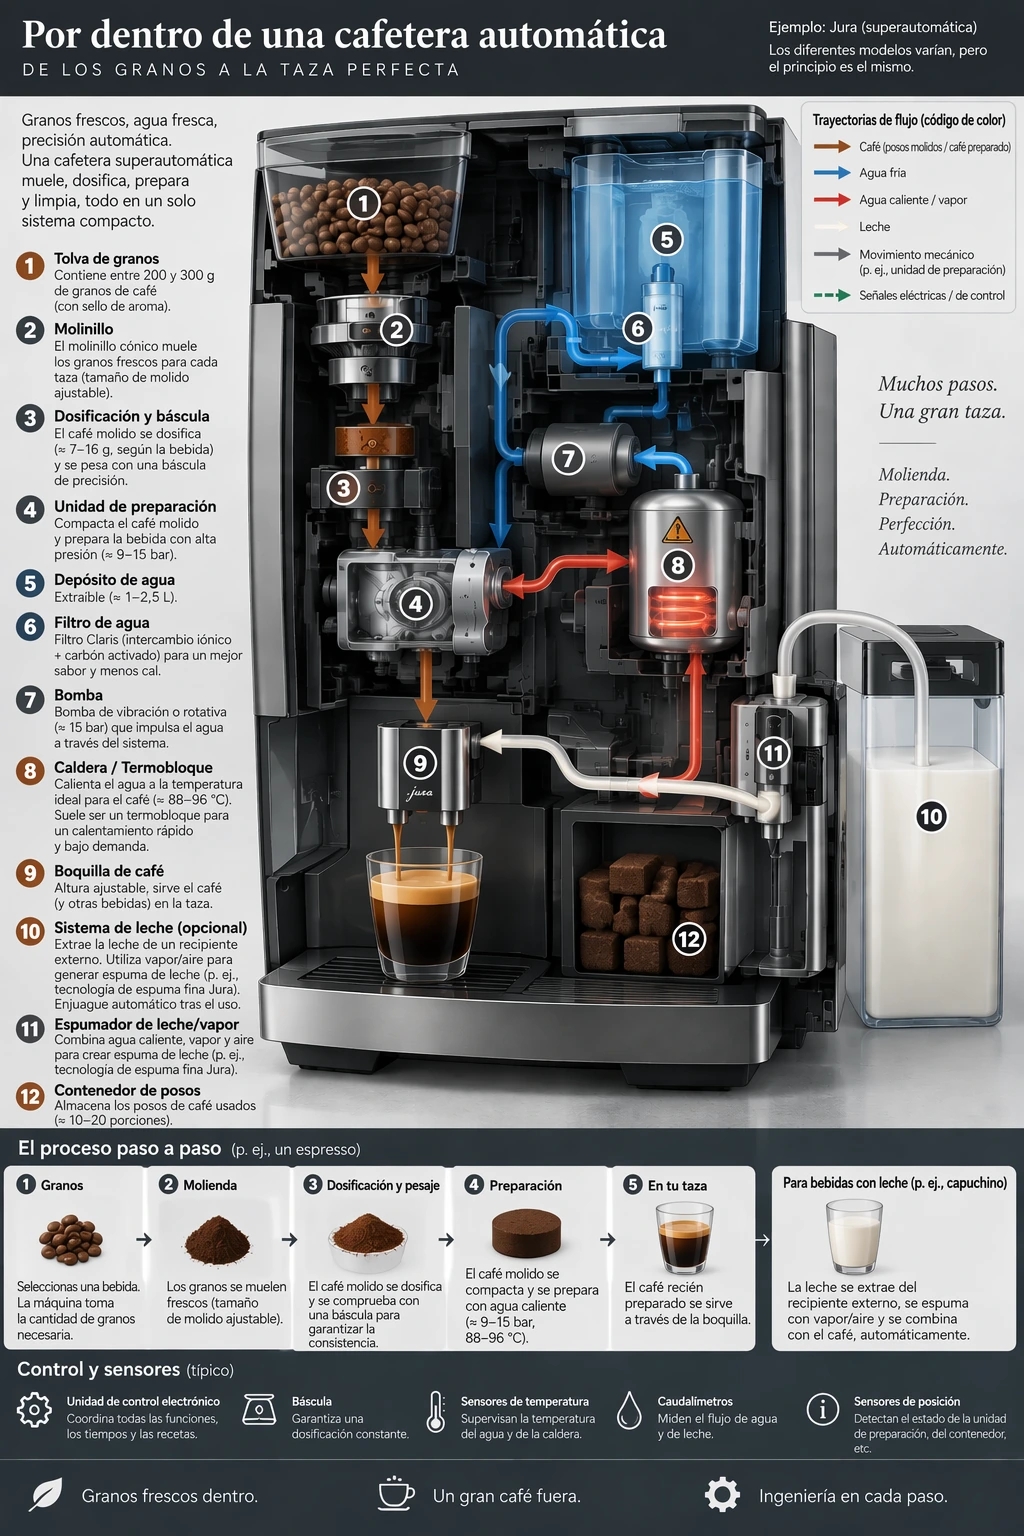
Use each model’s coffee-machine diagram from Explain a process visually as the input. Ask to replace its text while keeping the design unchanged, then check the translation and any words left in the original language.
Edit settings: size="1024x1536", quality="high".
Translate the text in the infographic to Spanish. Do not change any other aspect of the image.Example outputs:
GPT Image 2.5 Flare
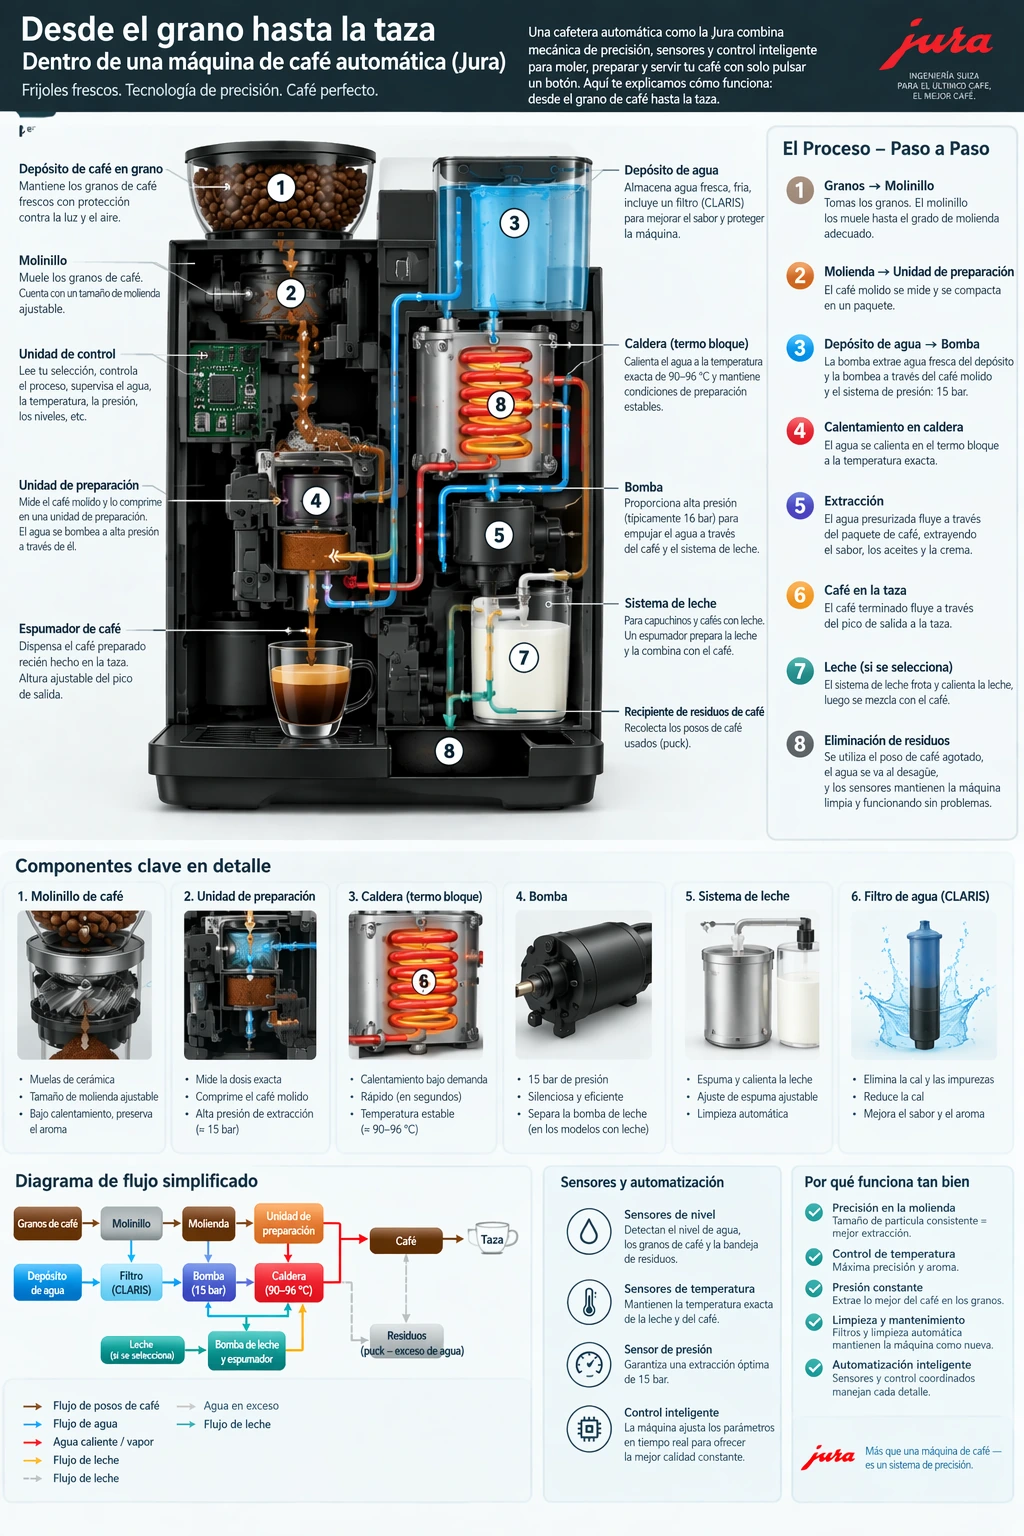
GPT Image 2.5 Sunburst
Transfer a visual style
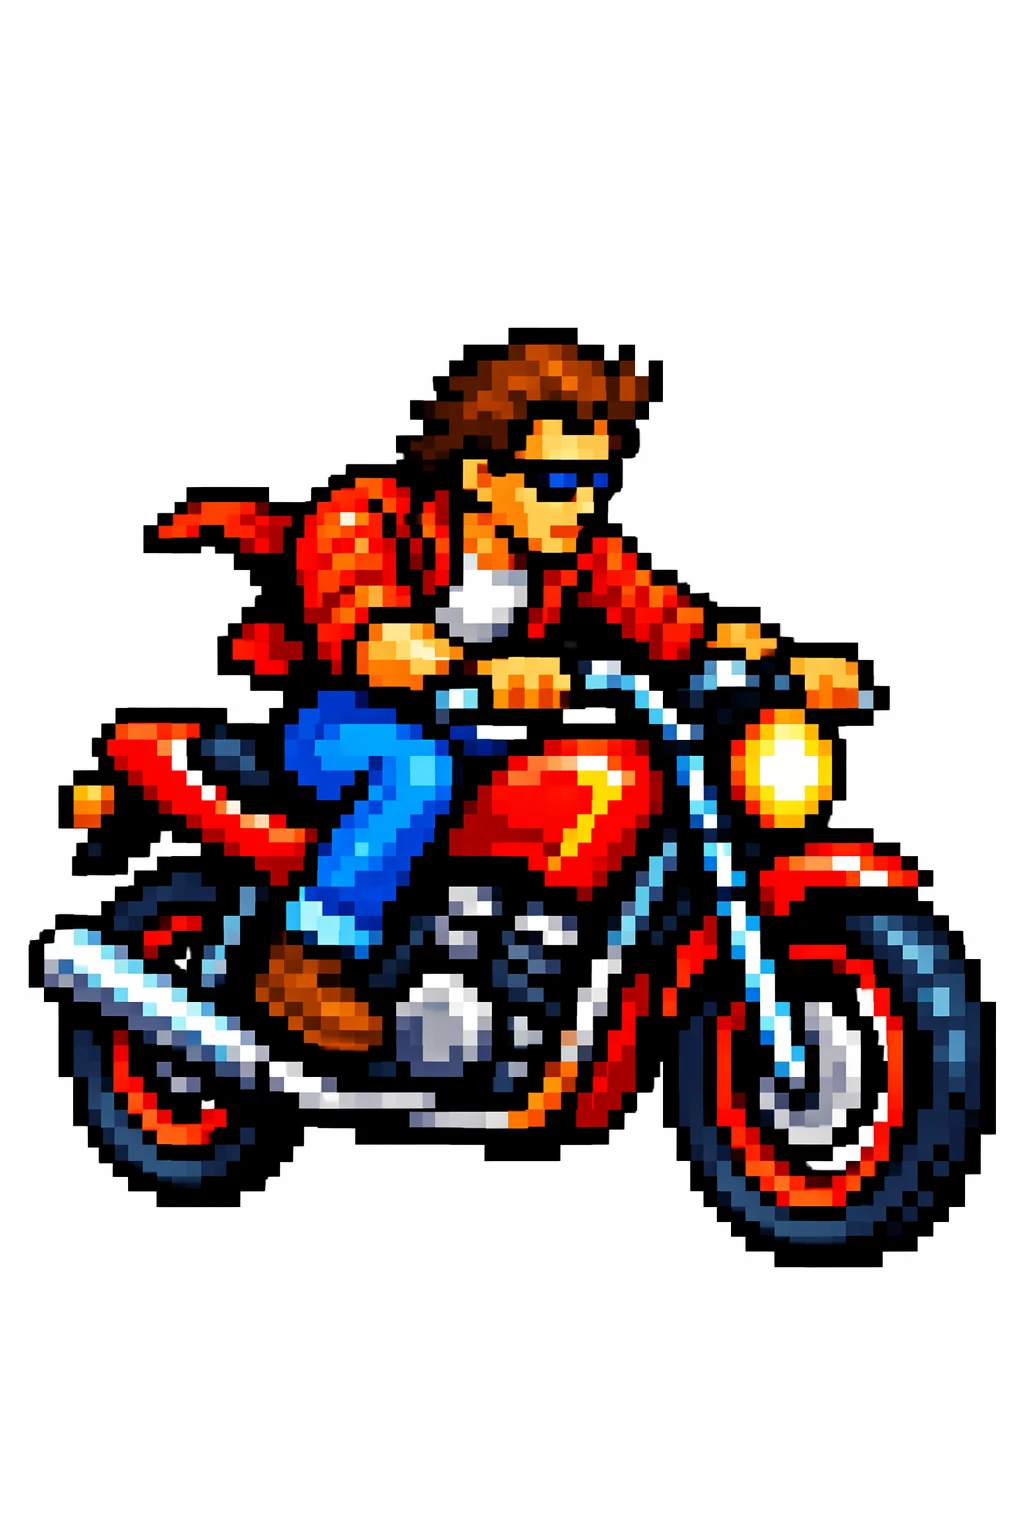
Assign the reference image a specific role: its palette, texture, or visual medium. Describe the new subject separately. Use the pixel-art image below as the input.
Edit settings: size="1024x1536", quality="medium".
Use the same style from the input image and generate a man riding a motorcycle on a white background.Input image:
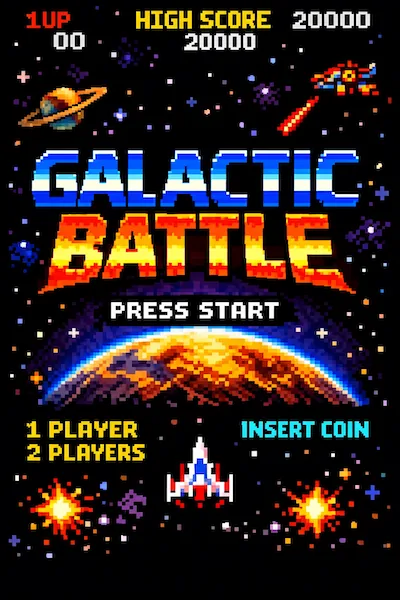
Example outputs:
GPT Image 2.5 Flare
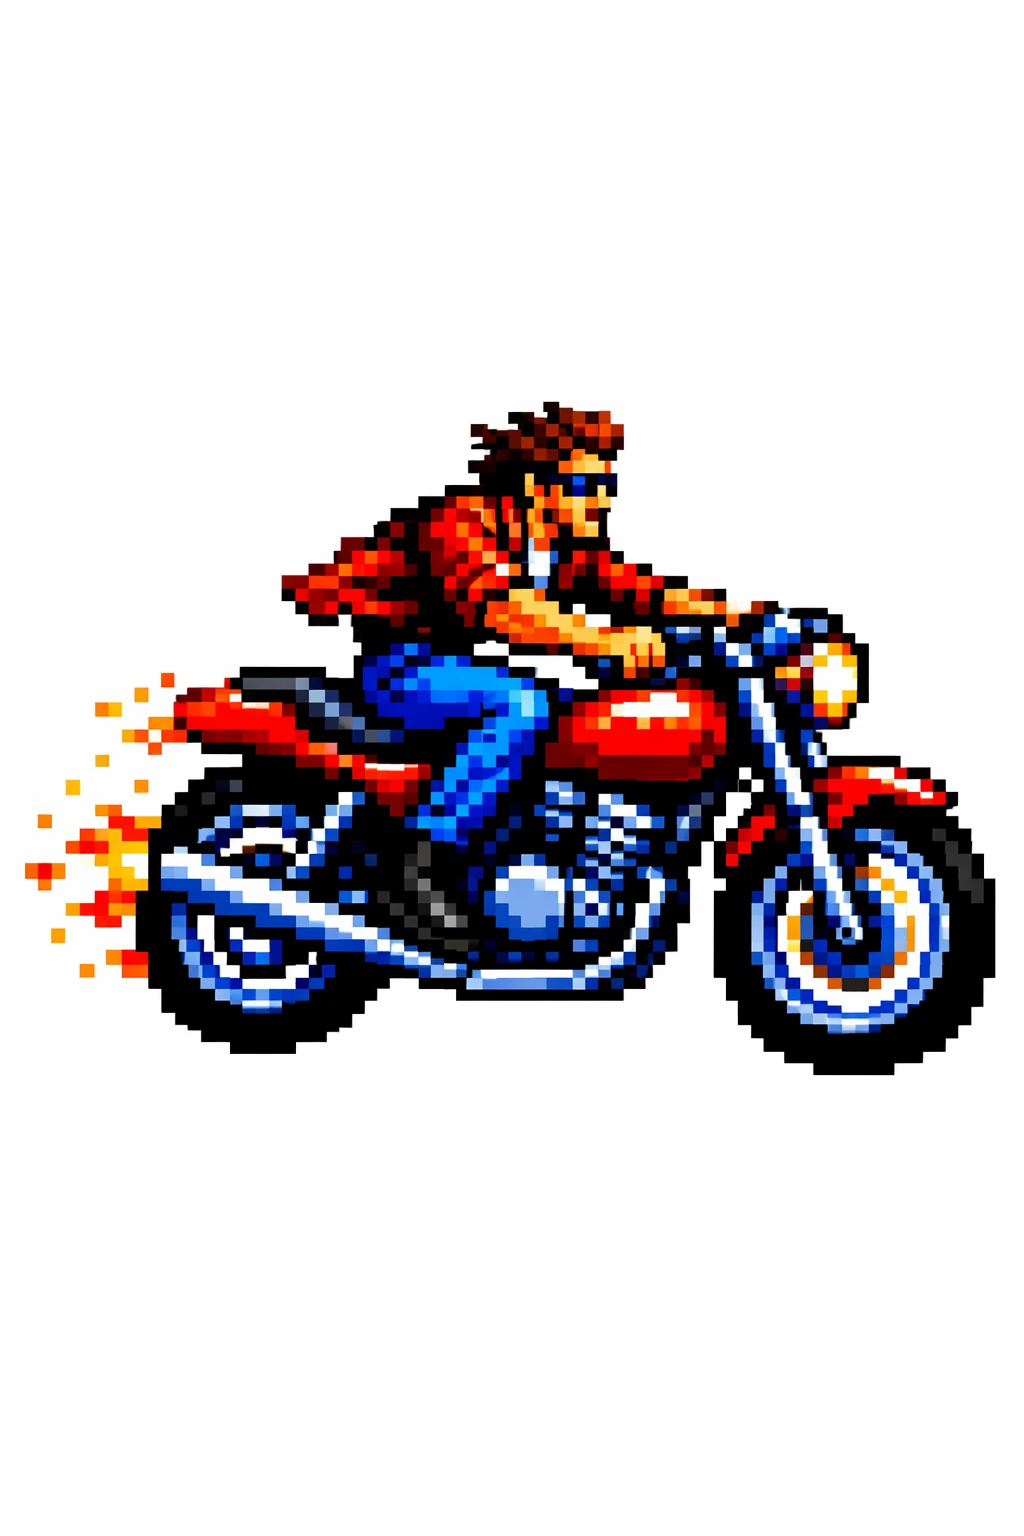
GPT Image 2.5 Sunburst
Preserve identity and change clothing
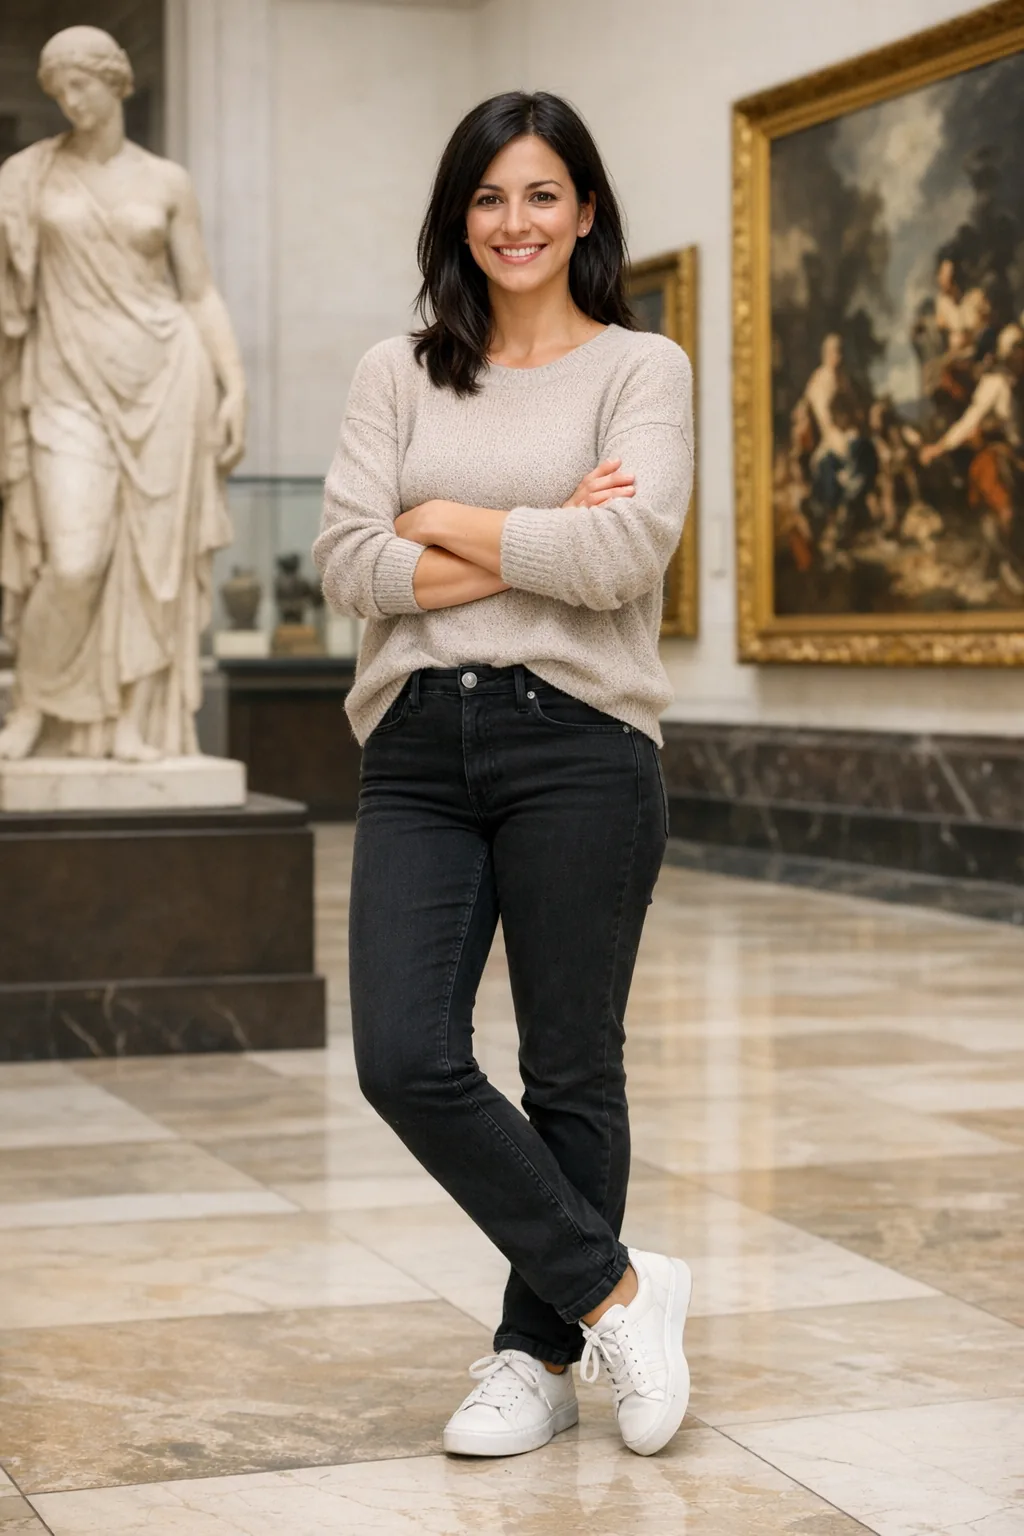
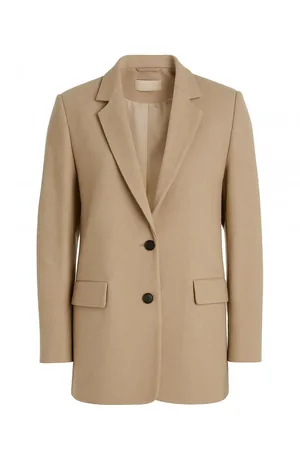
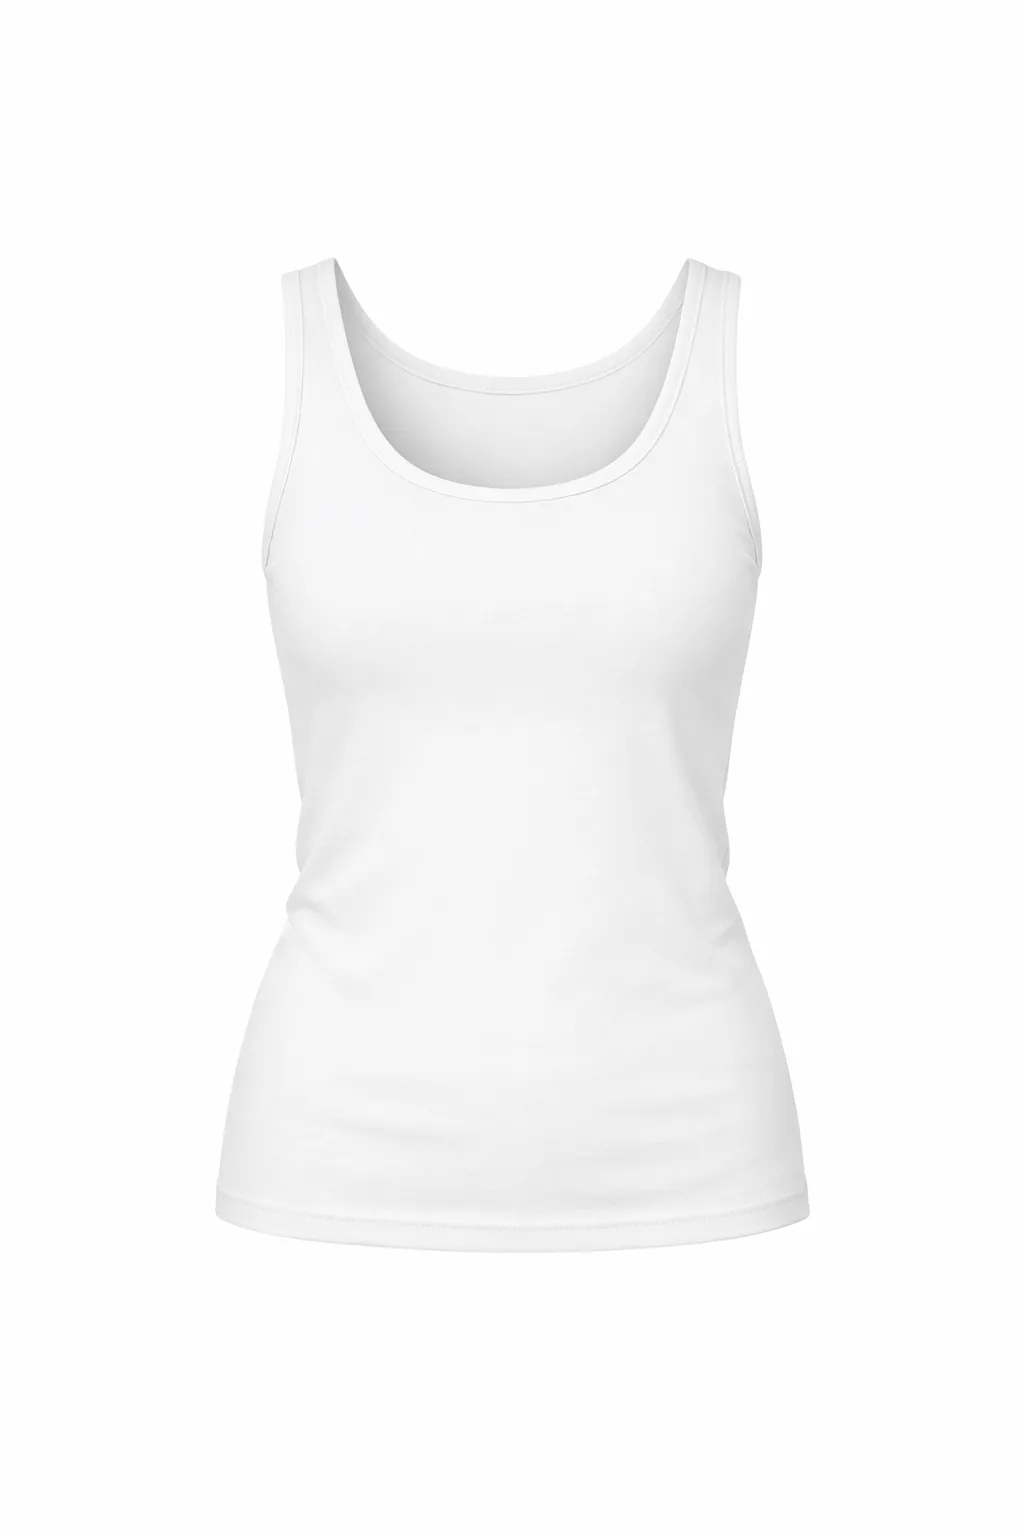
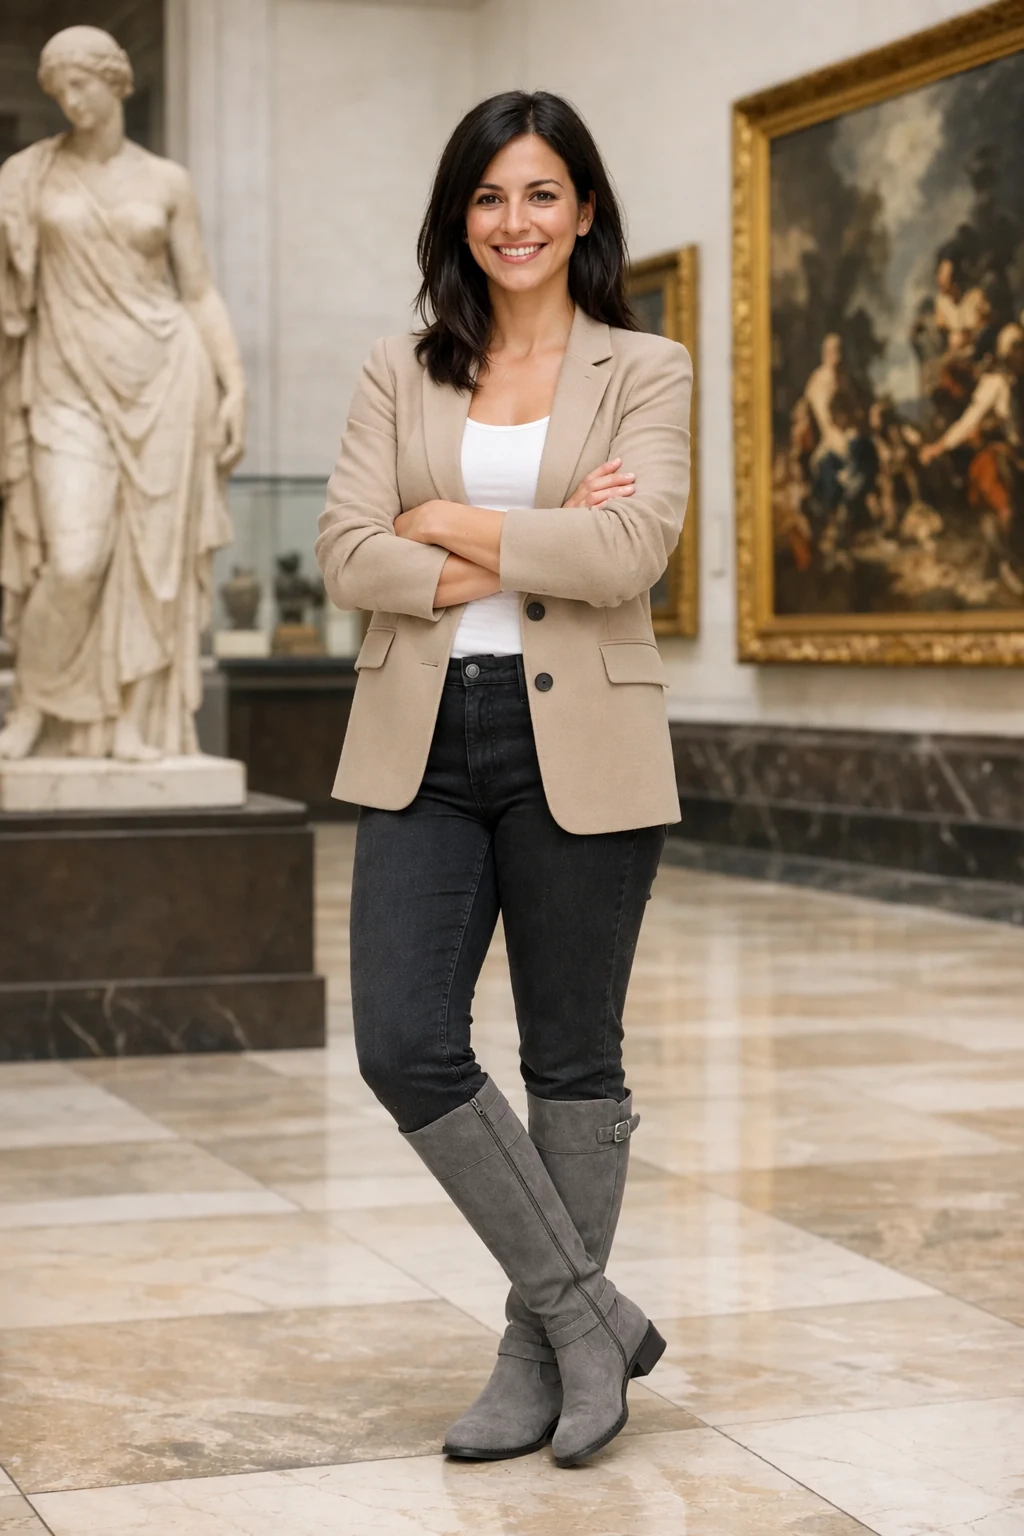
Use the person photograph and three clothing references below as inputs. State which aspects of the person must remain fixed, and allow only the clothing to change. This pattern also applies to edits where a product or object must remain recognizable.
Edit settings: size="1024x1536", quality="medium".
Edit the image to dress the woman using the provided clothing images. Do not change her face, facial features, skin tone, body shape, pose, or identity in any way. Preserve her exact likeness, expression, hairstyle, and proportions. Replace only the clothing, fitting the garments naturally to her existing pose and body geometry with realistic fabric behavior. Match lighting, shadows, and color temperature to the original photo so the outfit integrates photorealistically, without looking pasted on. Do not change the background, camera angle, framing, or image quality, and do not add accessories, text, logos, or watermarks.Input images:
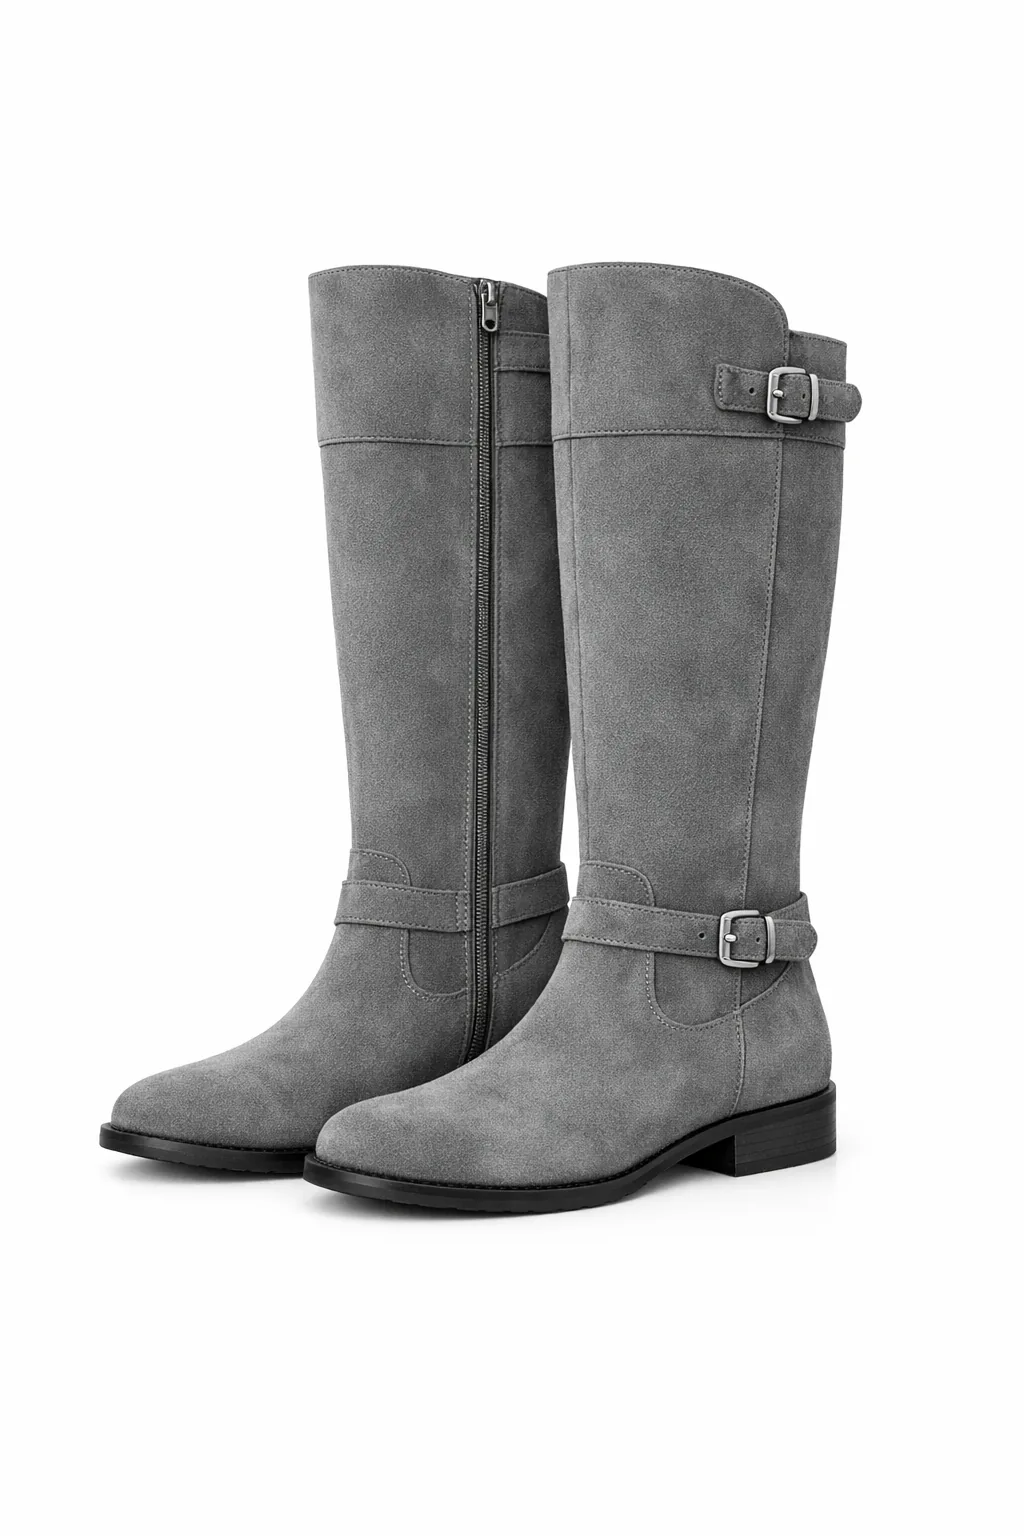
Example outputs:
GPT Image 2.5 Flare
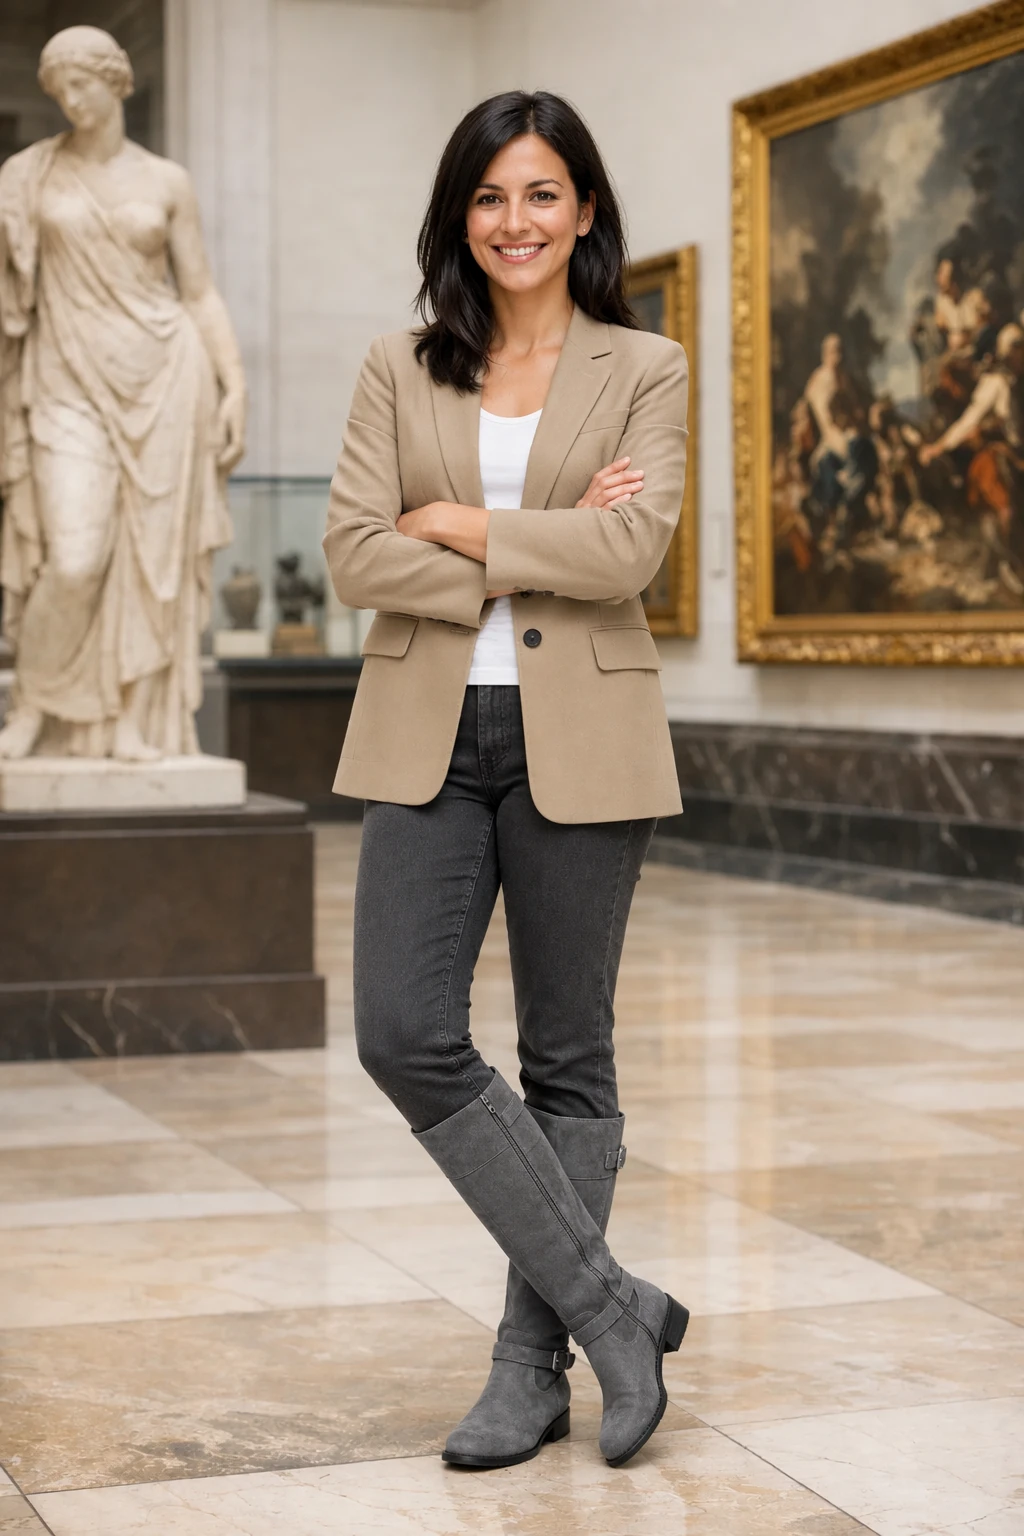
GPT Image 2.5 Sunburst
Combine references
Pass the scene photograph as image 1 and the dog photograph as image 2. Specify which element to move, its destination, and what must remain unchanged.
Edit settings: size="1024x1536", quality="medium".
Place the dog from the second image into the setting of image 1, right next to the woman, use the same style of lighting, composition and background. Do not change anything else.Input images:
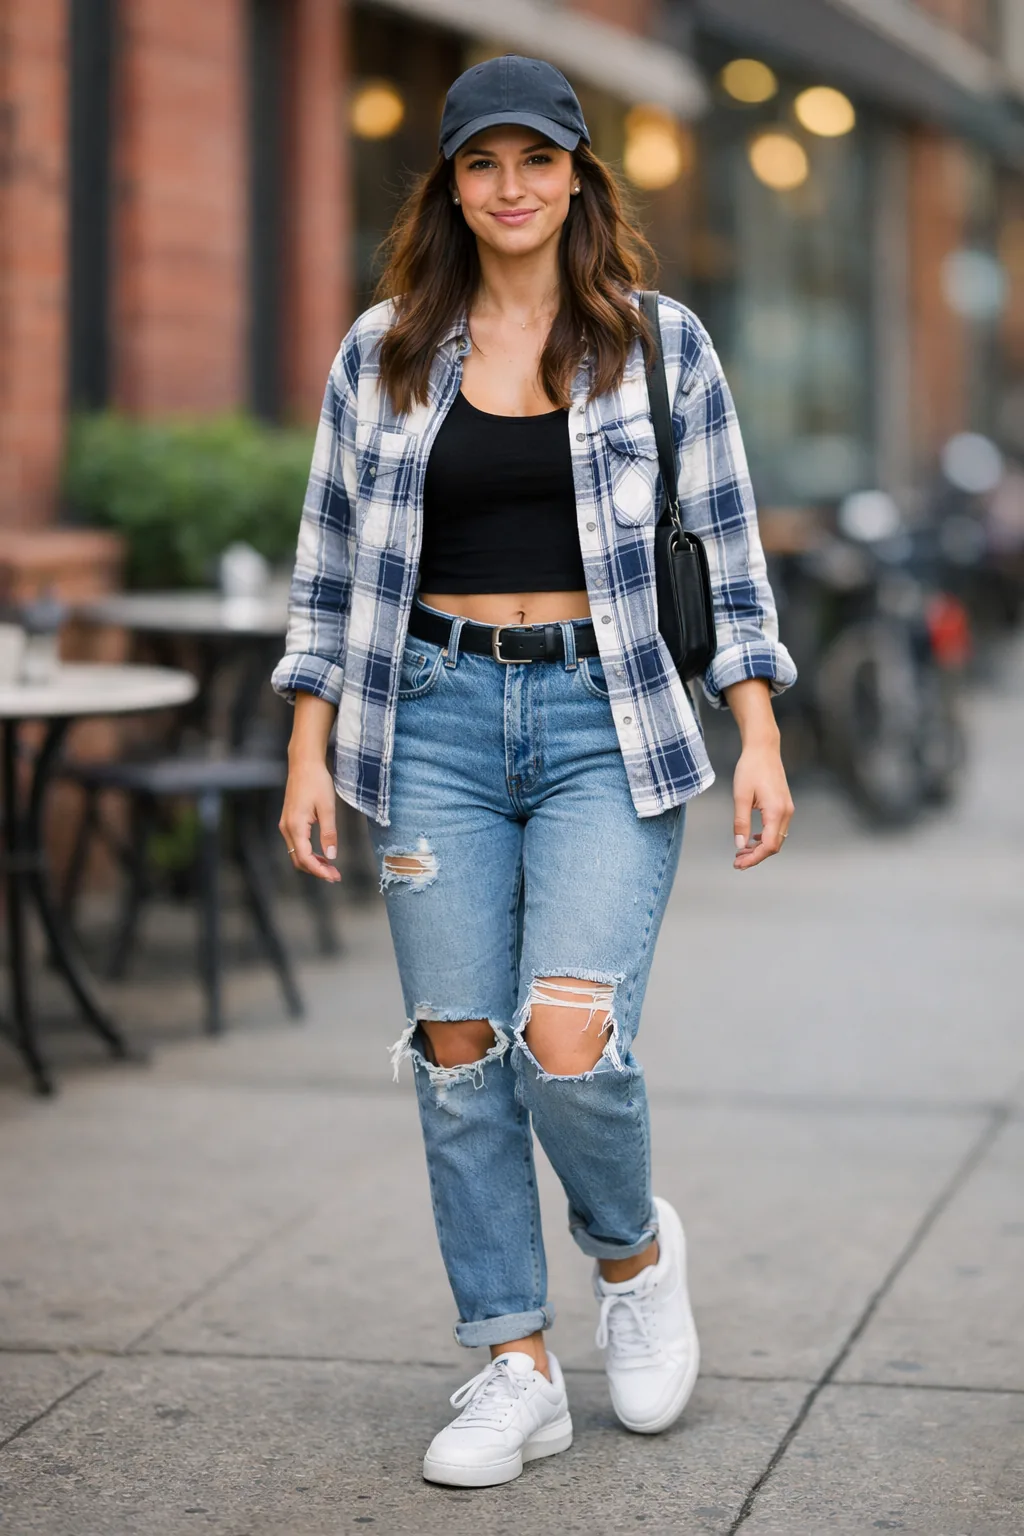
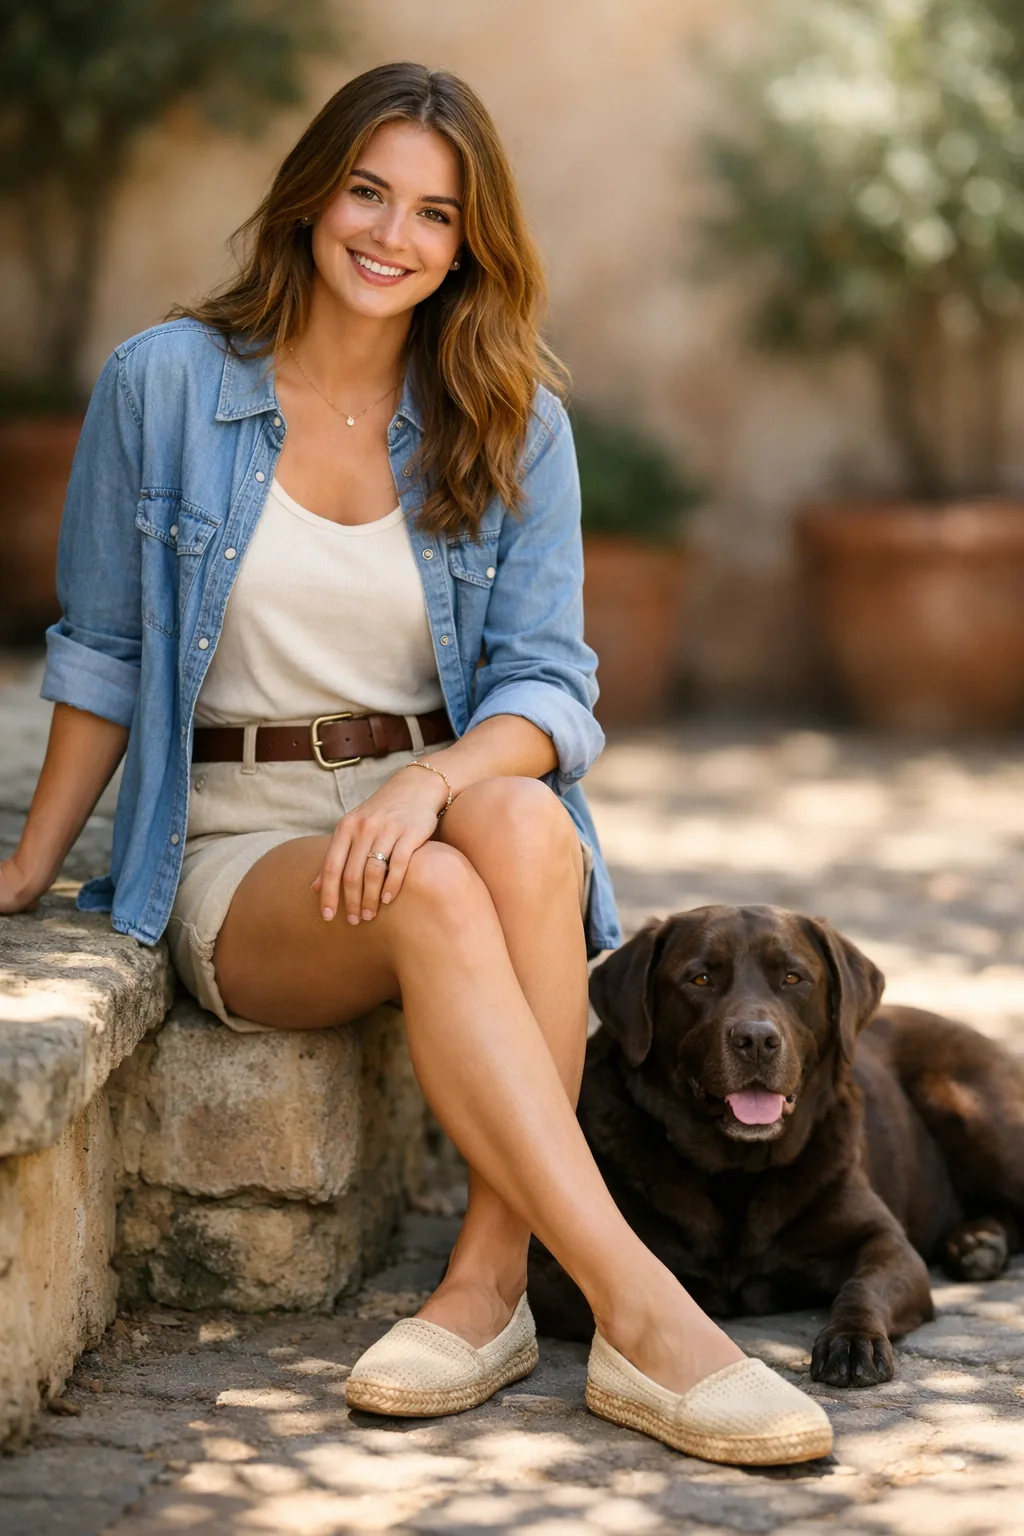
Example outputs:
GPT Image 2.5 Flare
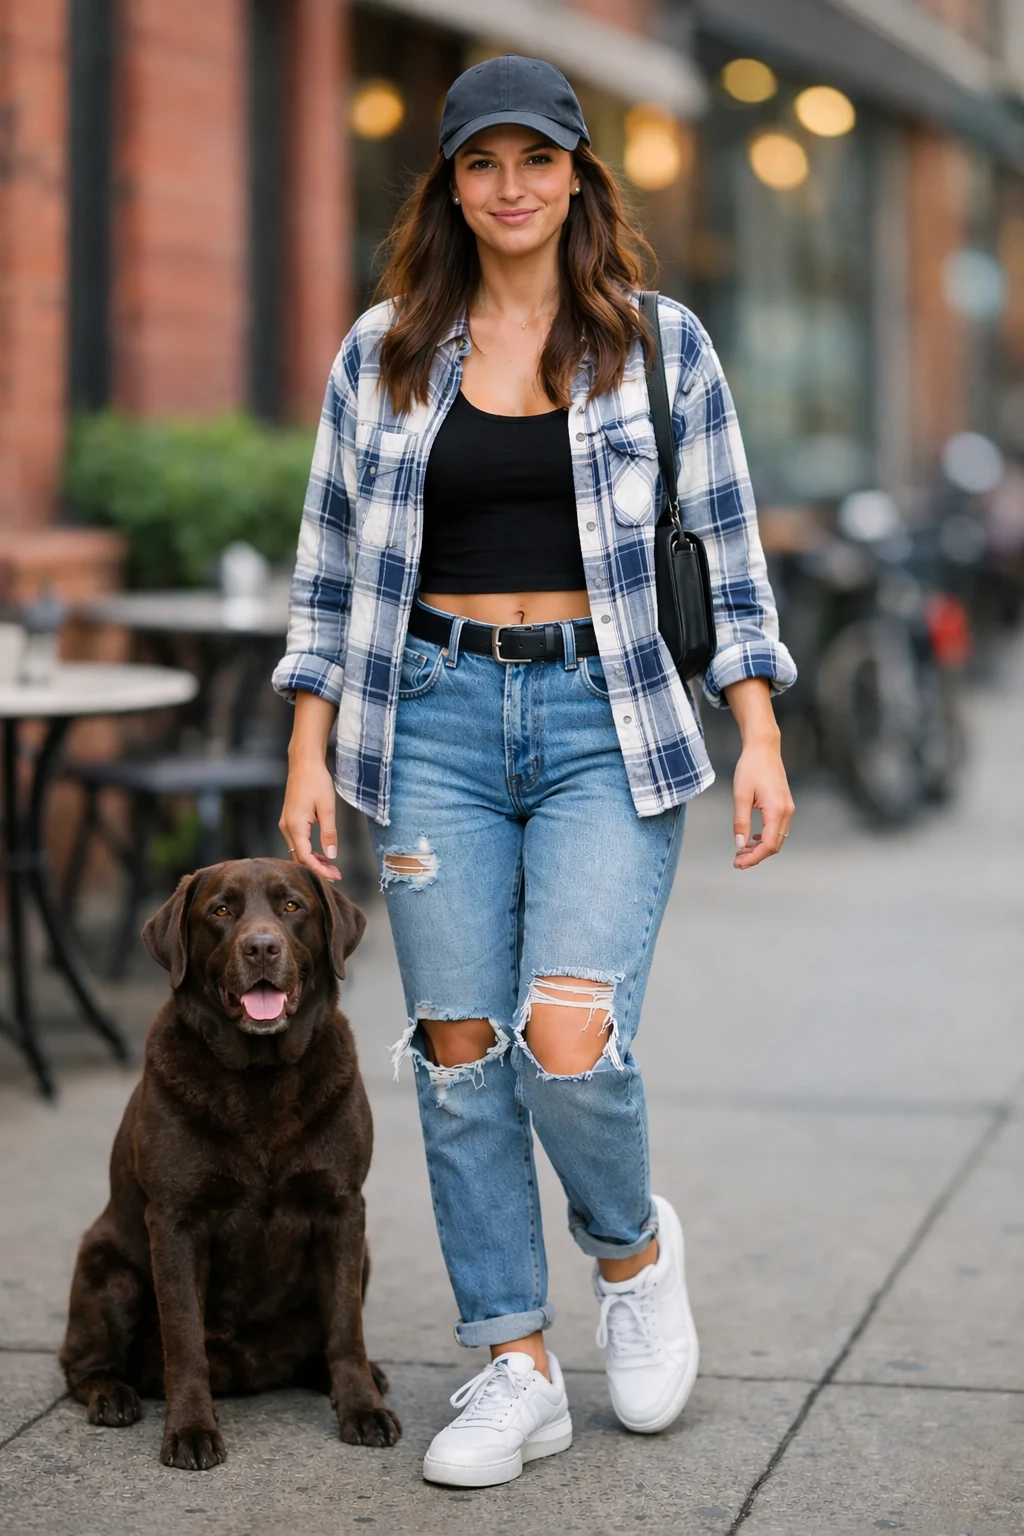
GPT Image 2.5 Sunburst
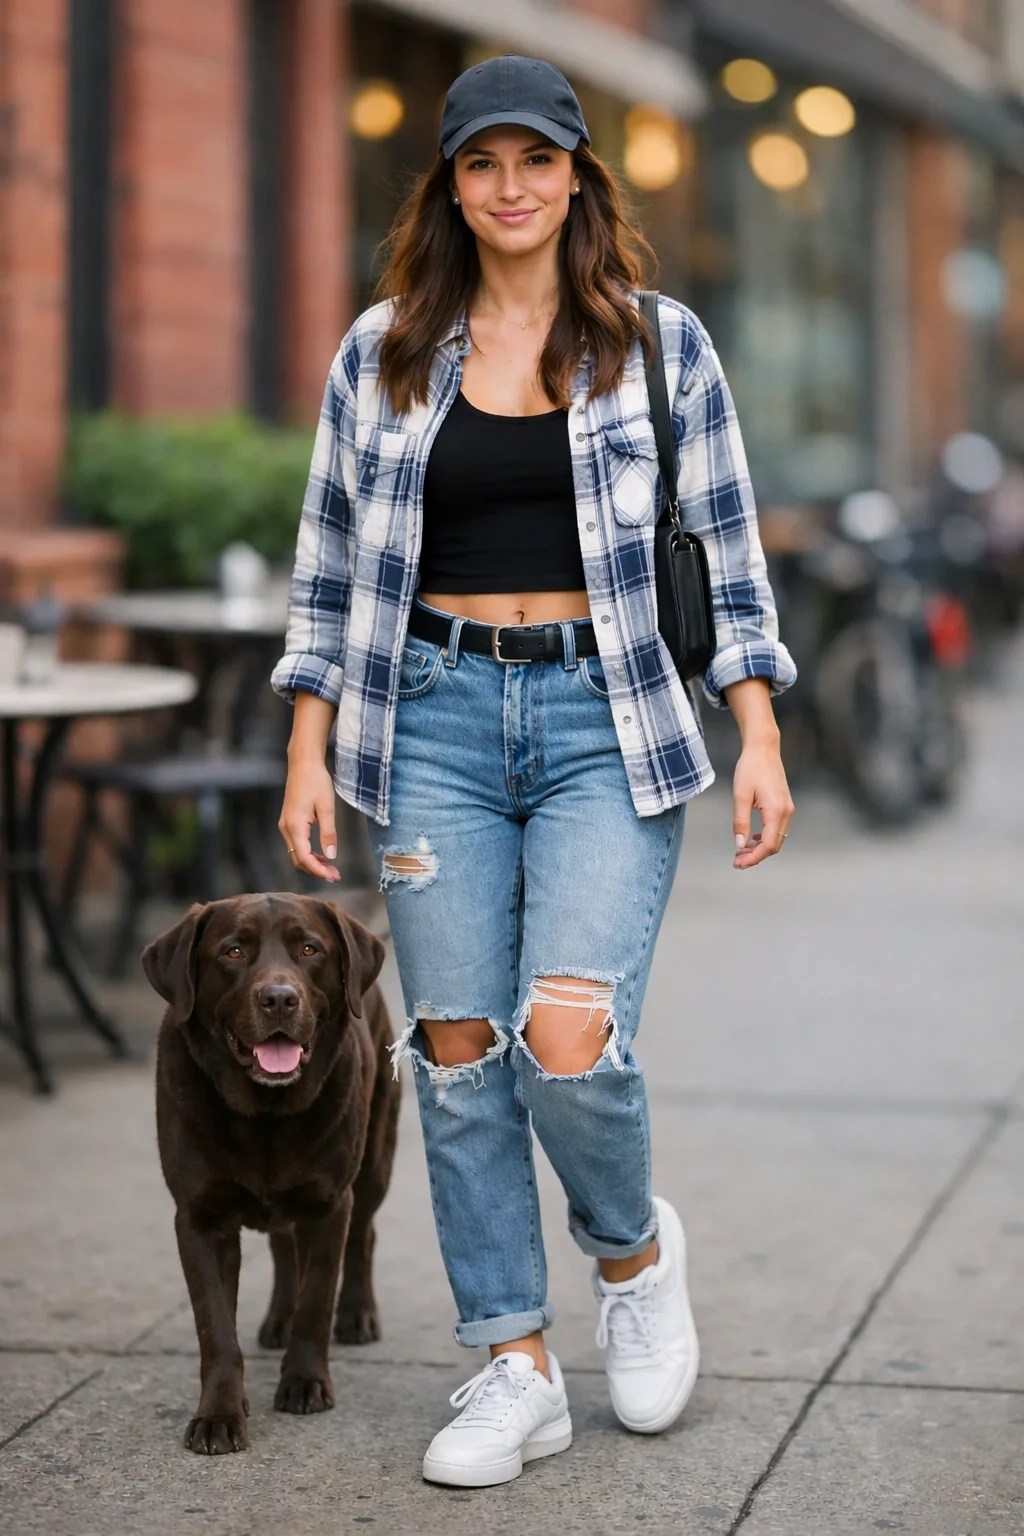
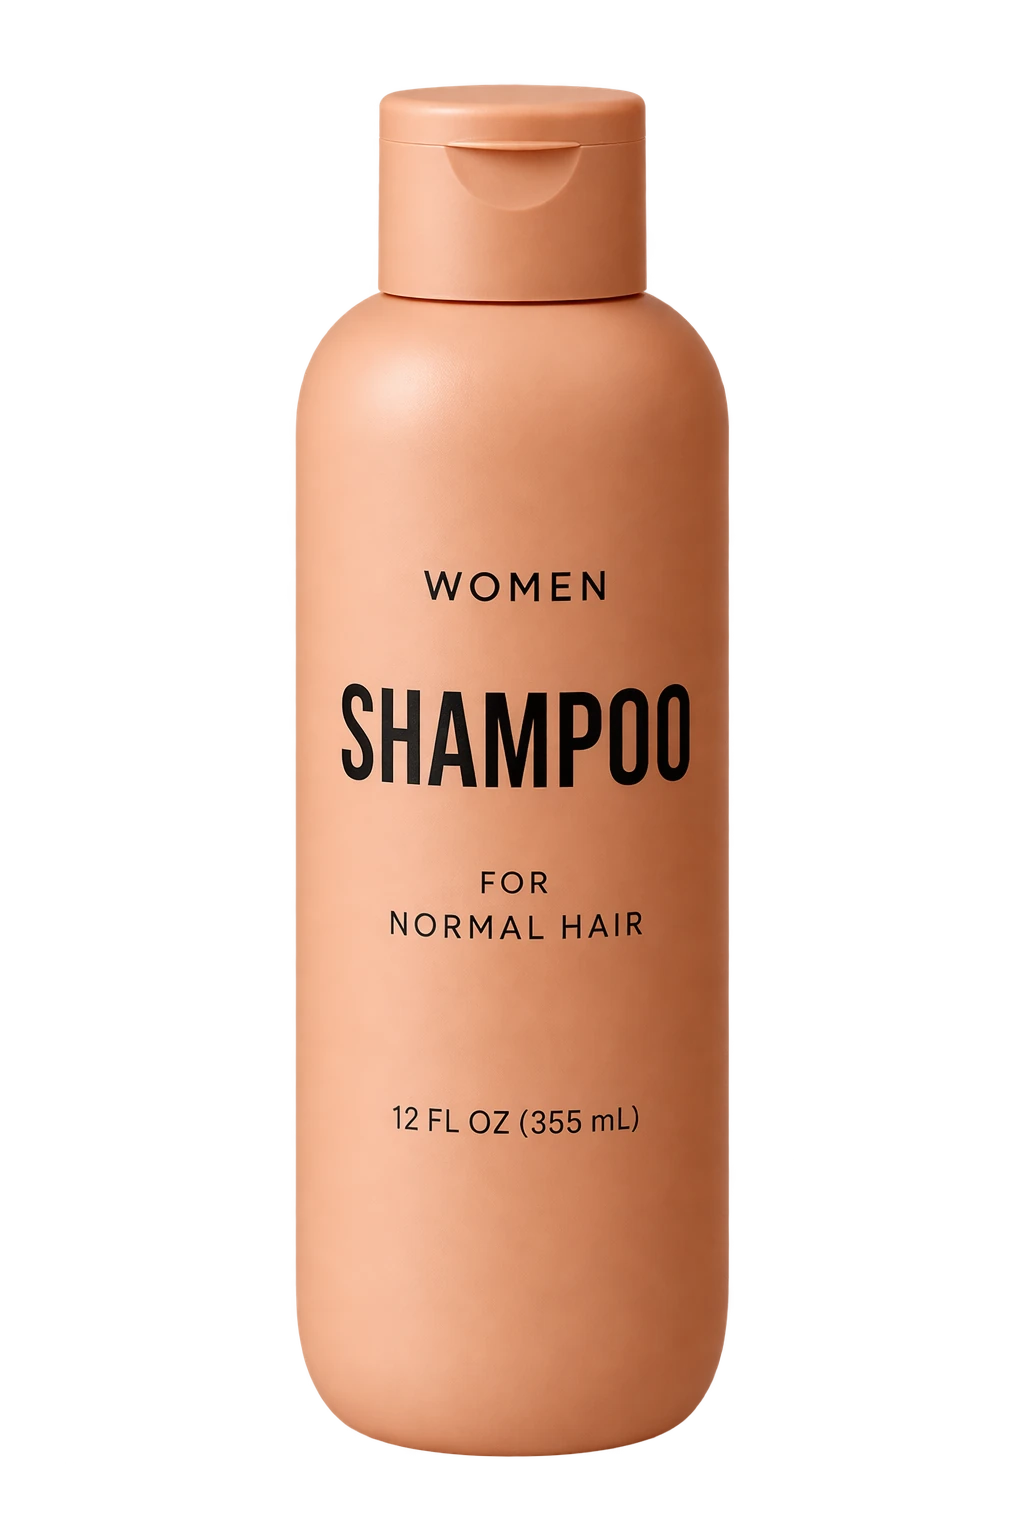
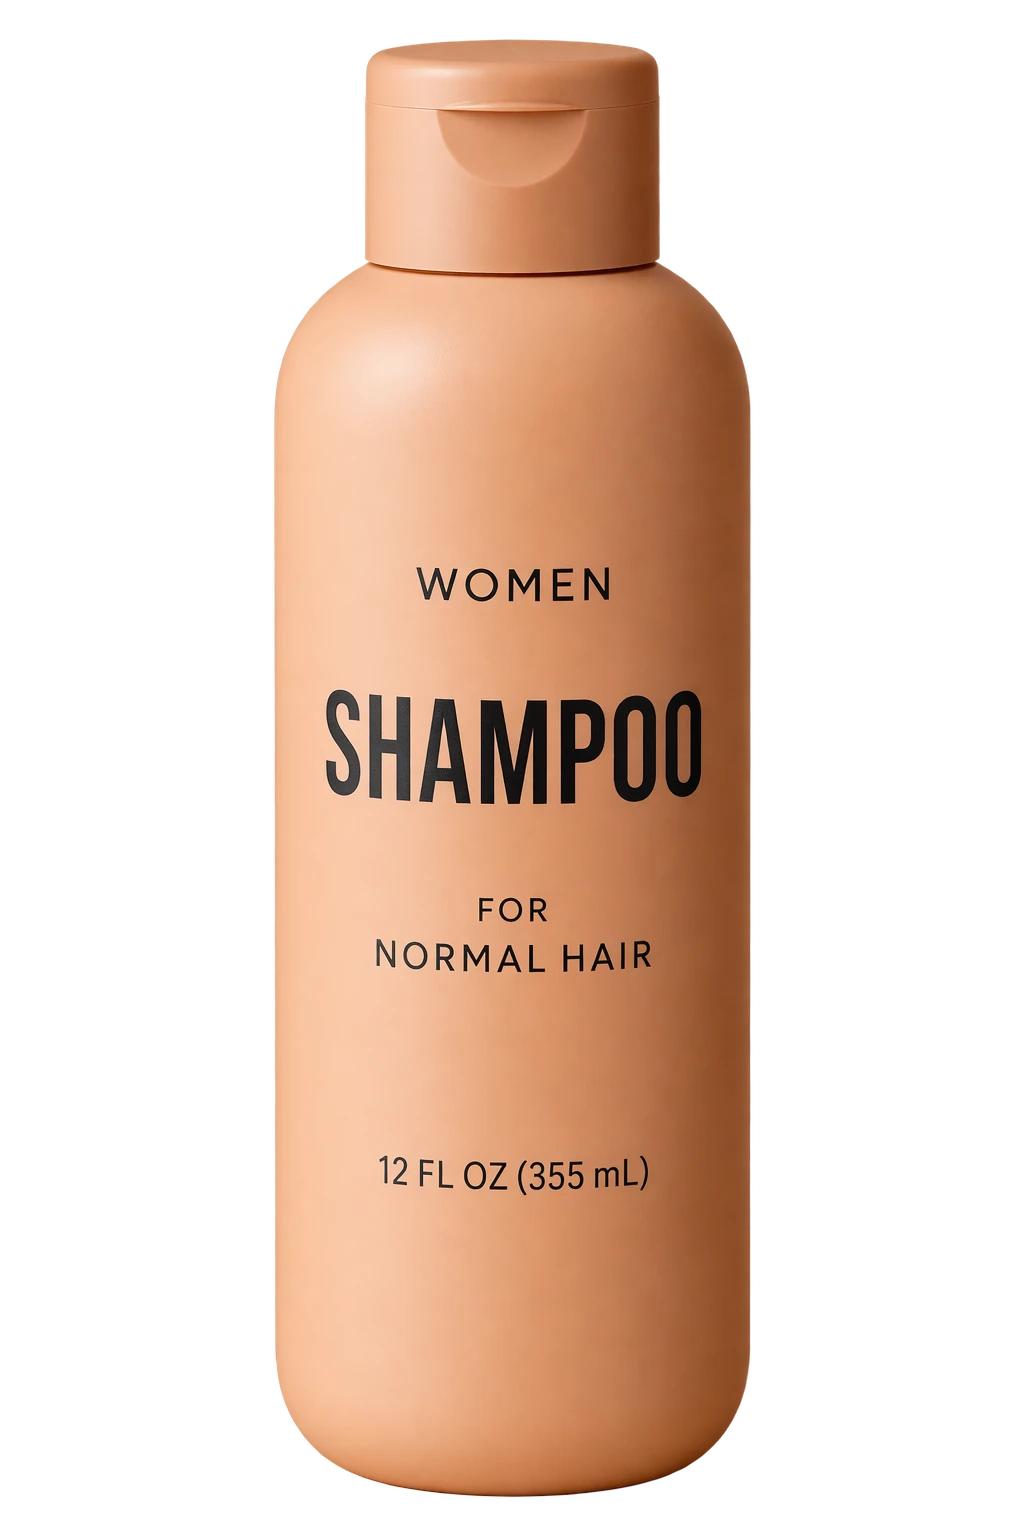
Create a transparent product cutout
Request both an isolated subject in the prompt and background="transparent" in the API. Use PNG or WebP, preserve the returned alpha channel, and omit output_compression for PNG. A drawn checkerboard is not transparency. For subsequent edits, repeat the requirement to preserve the transparent background. Use the product photograph below as the input.
Edit settings: size="1024x1536", quality="medium", background="transparent", output_format="png".
Extract the product from the input image and isolate it on a fully transparent background.
Output: centered product, crisp silhouette, no halos/fringing.
Preserve product geometry and label legibility exactly.
Add only light polishing. Do not add a solid backdrop, checkerboard, scenery, or shadow.
Do not restyle the product; remove the background and preserve clean alpha transparency.
Input image:
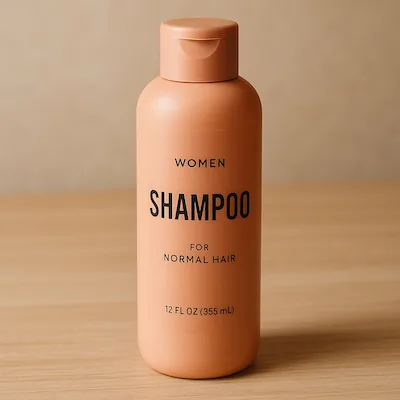
Example outputs:
GPT Image 2.5 Flare
GPT Image 2.5 Sunburst
Turn a drawing into a realistic image
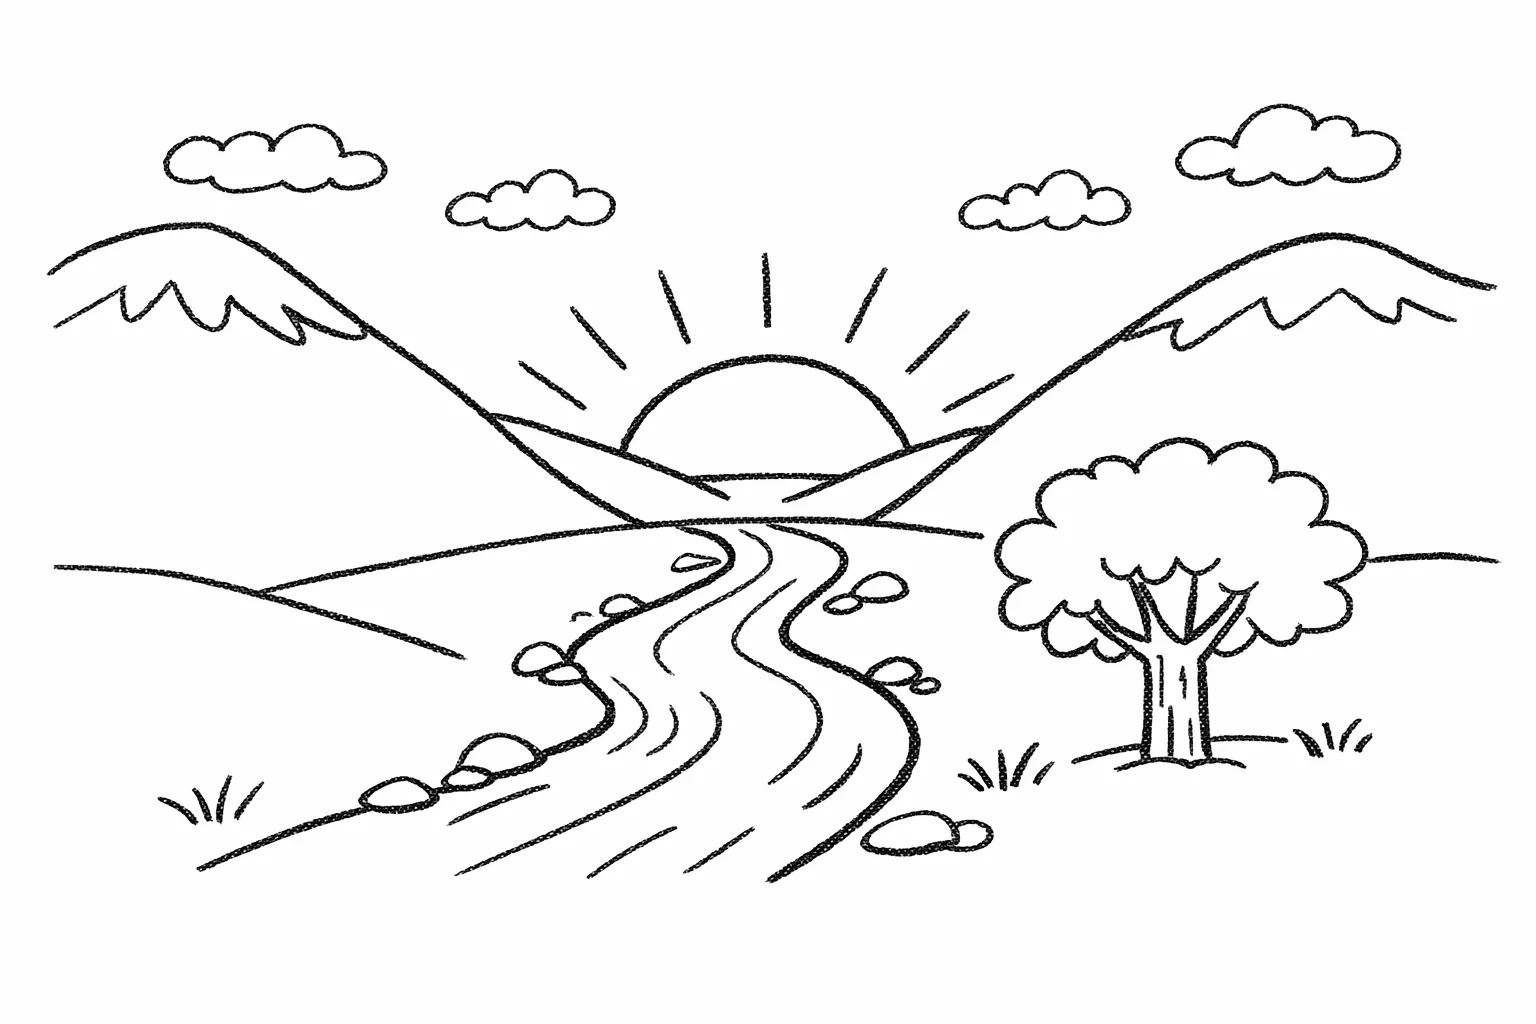
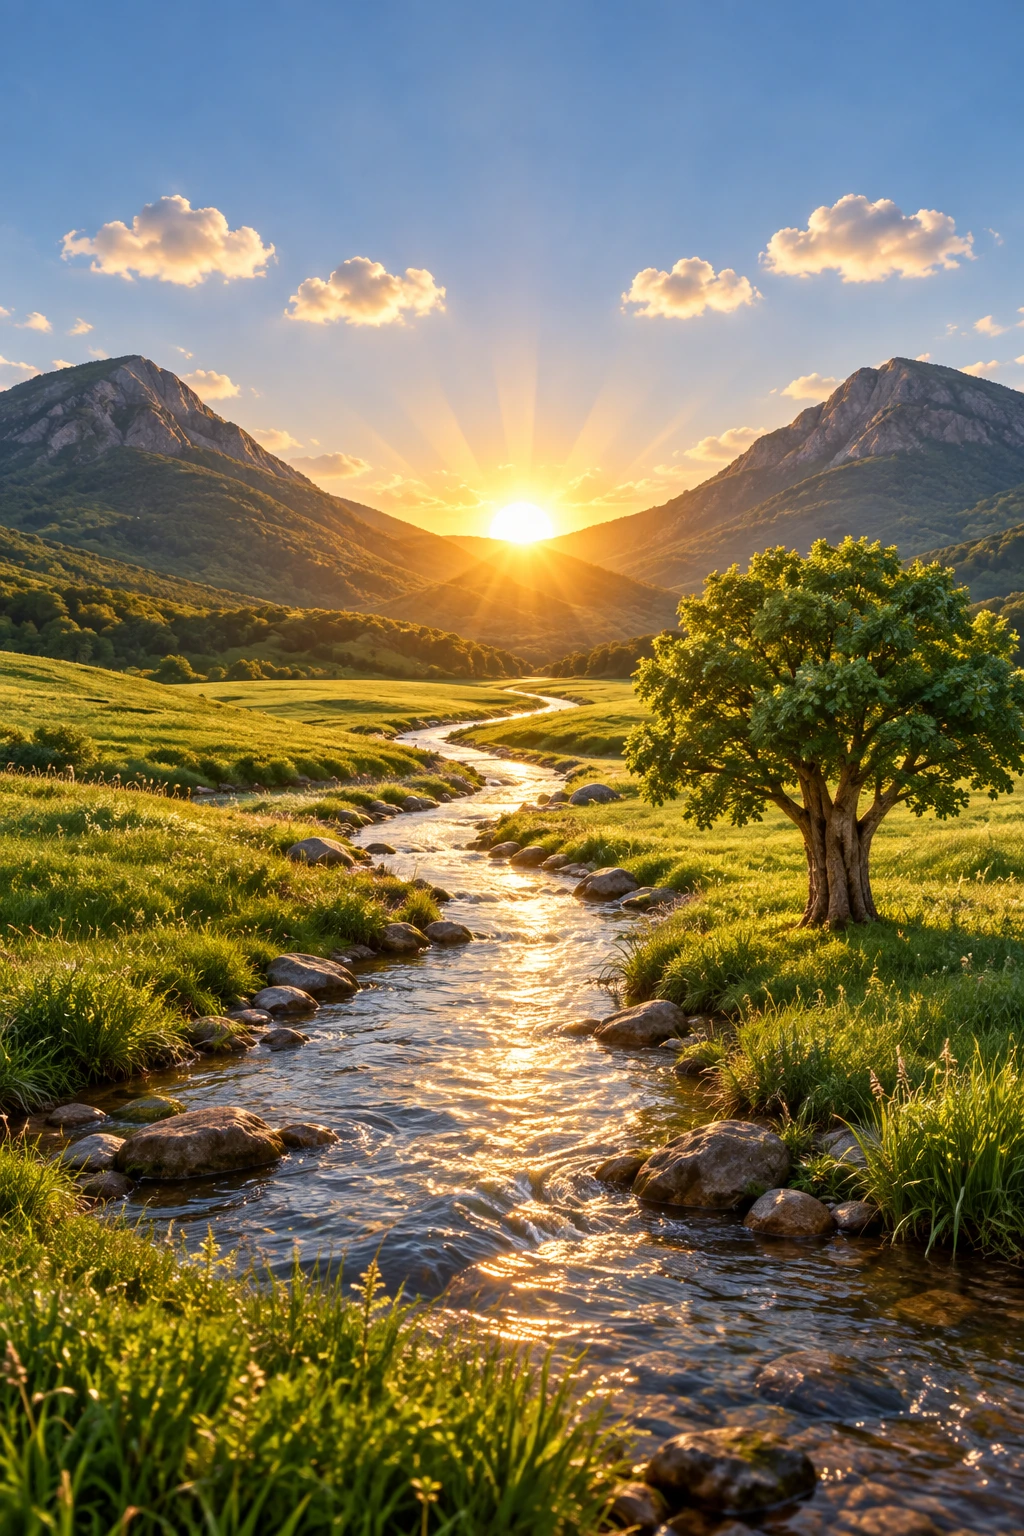
Sketch-to-render workflows are great for turning rough drawings into photorealistic concepts while keeping the original intent. Treat the prompt like a spec: preserve layout and perspective, then add realism by specifying plausible materials, lighting, and environment. Include “do not add new elements/text” to avoid creative reinterpretations.
Edit settings: size="1024x1536", quality="medium".
Turn this drawing into a photorealistic image.
Preserve the exact layout, proportions, and perspective.
Choose realistic materials and lighting consistent with the sketch intent.
Do not add new elements or text.
Input image:
Example outputs:
GPT Image 2.5 Flare
GPT Image 2.5 Sunburst
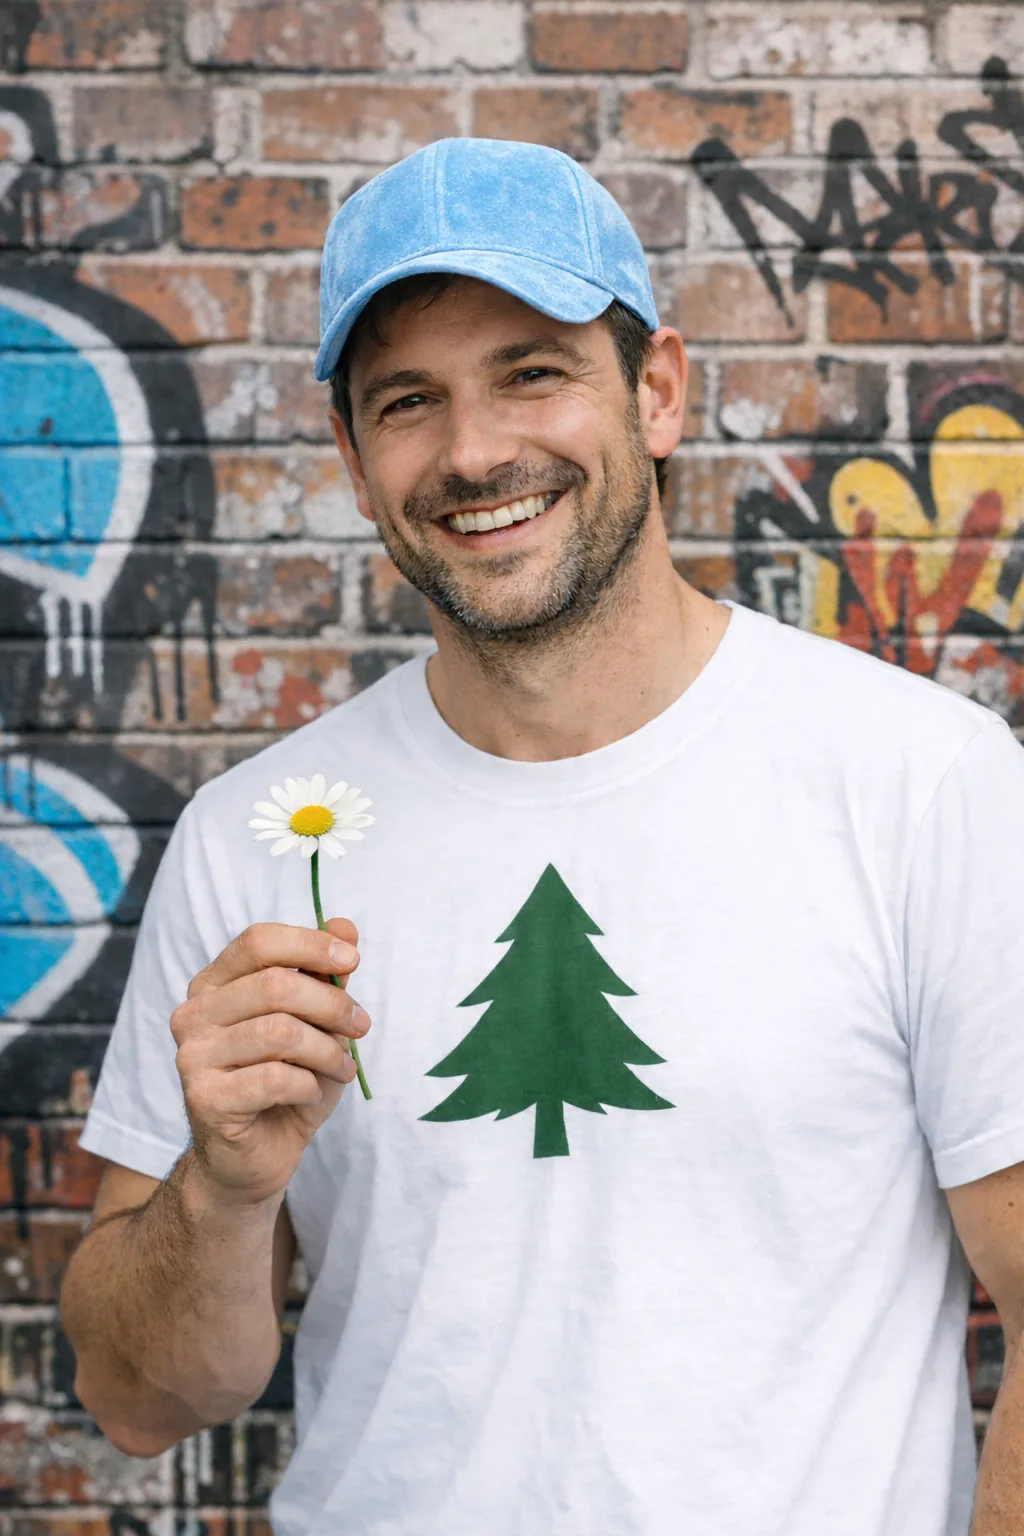
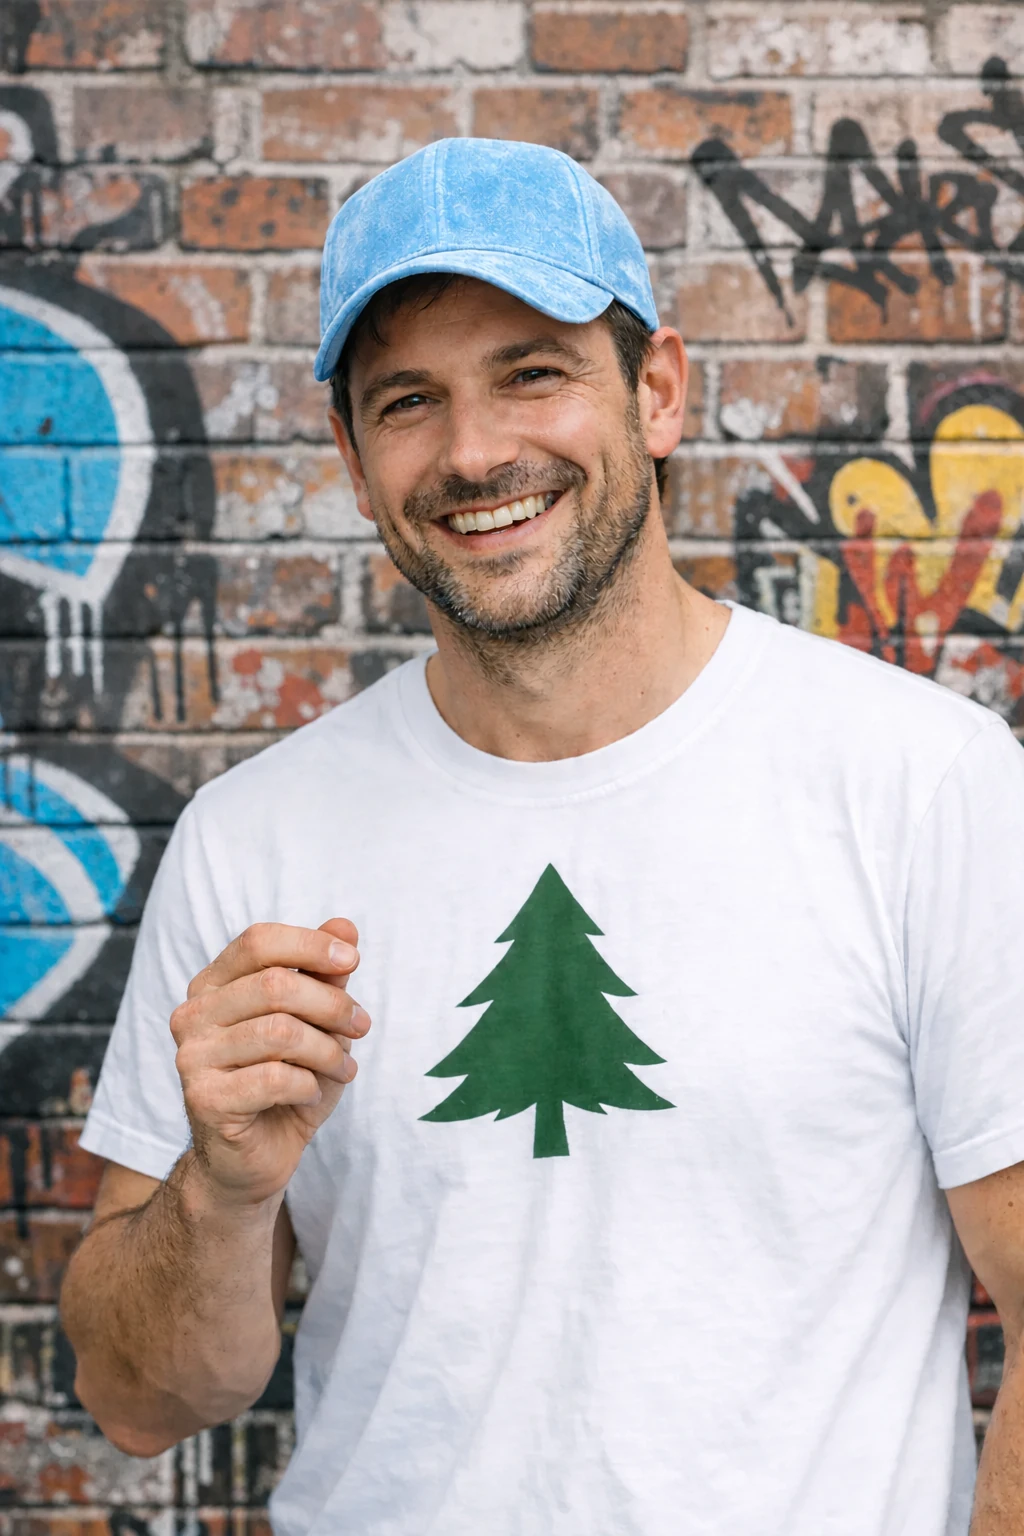
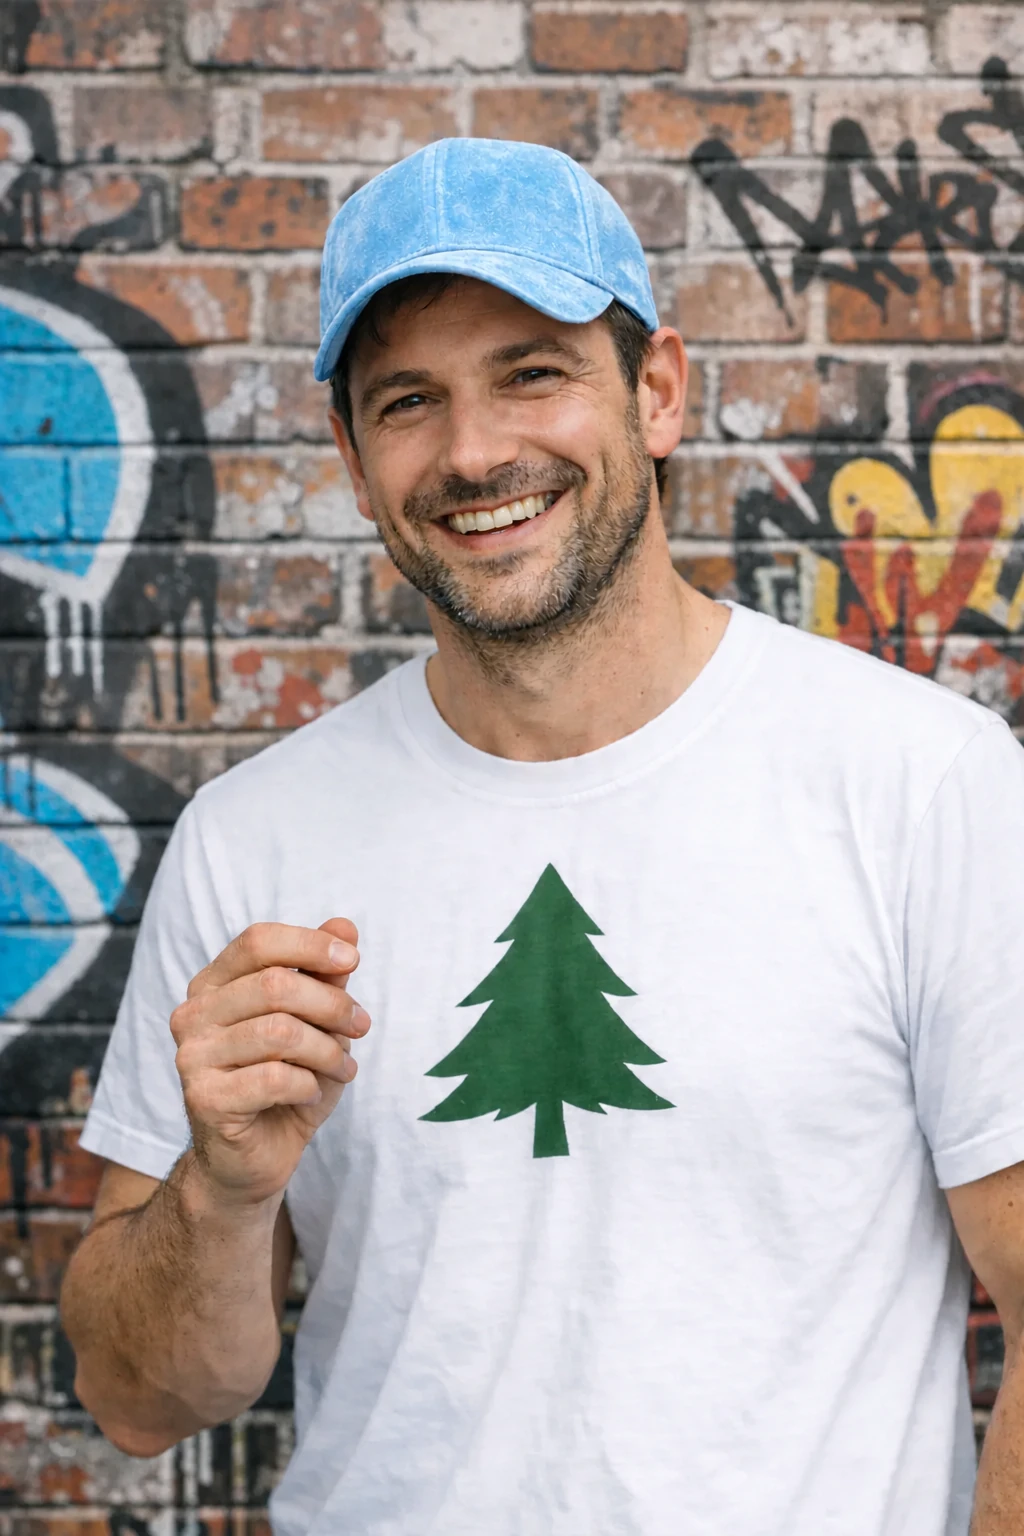
Remove an object
Remove one object by naming it explicitly and preserving everything around it. Keep the person, pose, lighting, and composition unchanged so the edit stays local.
Edit settings: size="1024x1536", quality="medium".
Remove the flower from man's hand. Do not change anything else.Input image:
Example outputs:
GPT Image 2.5 Flare
GPT Image 2.5 Sunburst
Insert a person into a scene
Insert a person into a new scene while preserving their identity. Specify natural lighting, believable detail, body framing, gaze, and interaction with the scene. State which facial features and proportions must remain unchanged. For gpt-image-2, omit input_fidelity; image inputs are always processed at high fidelity.
Use the woman in the museum as the input image.
Edit settings: size="1024x1536", quality="medium".
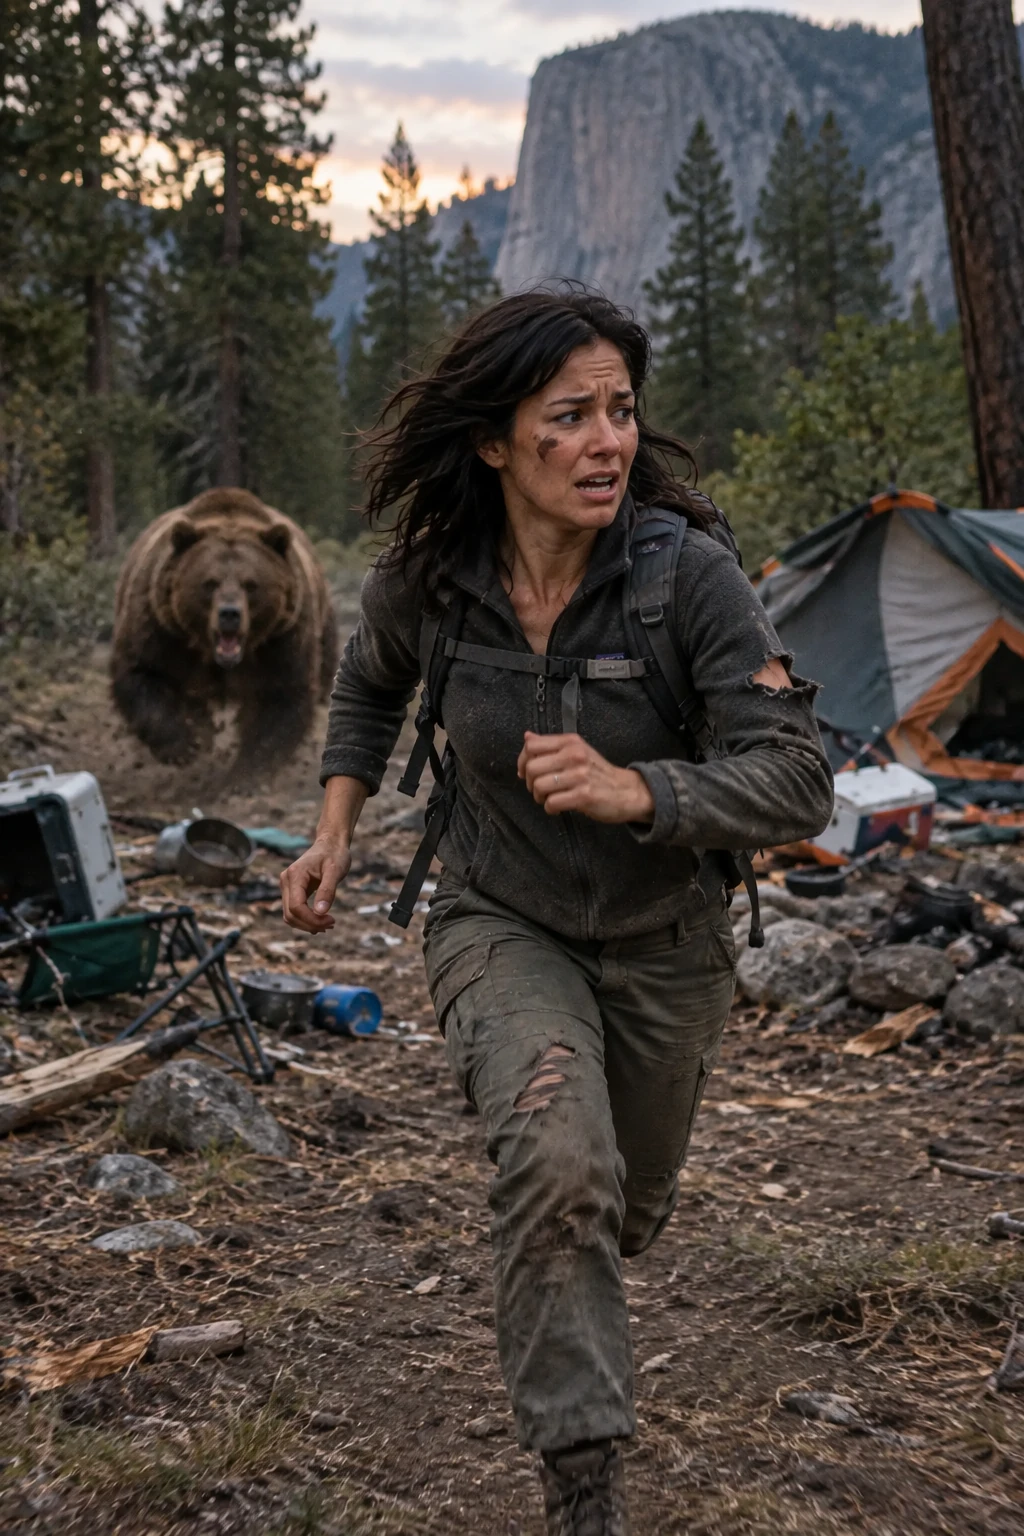
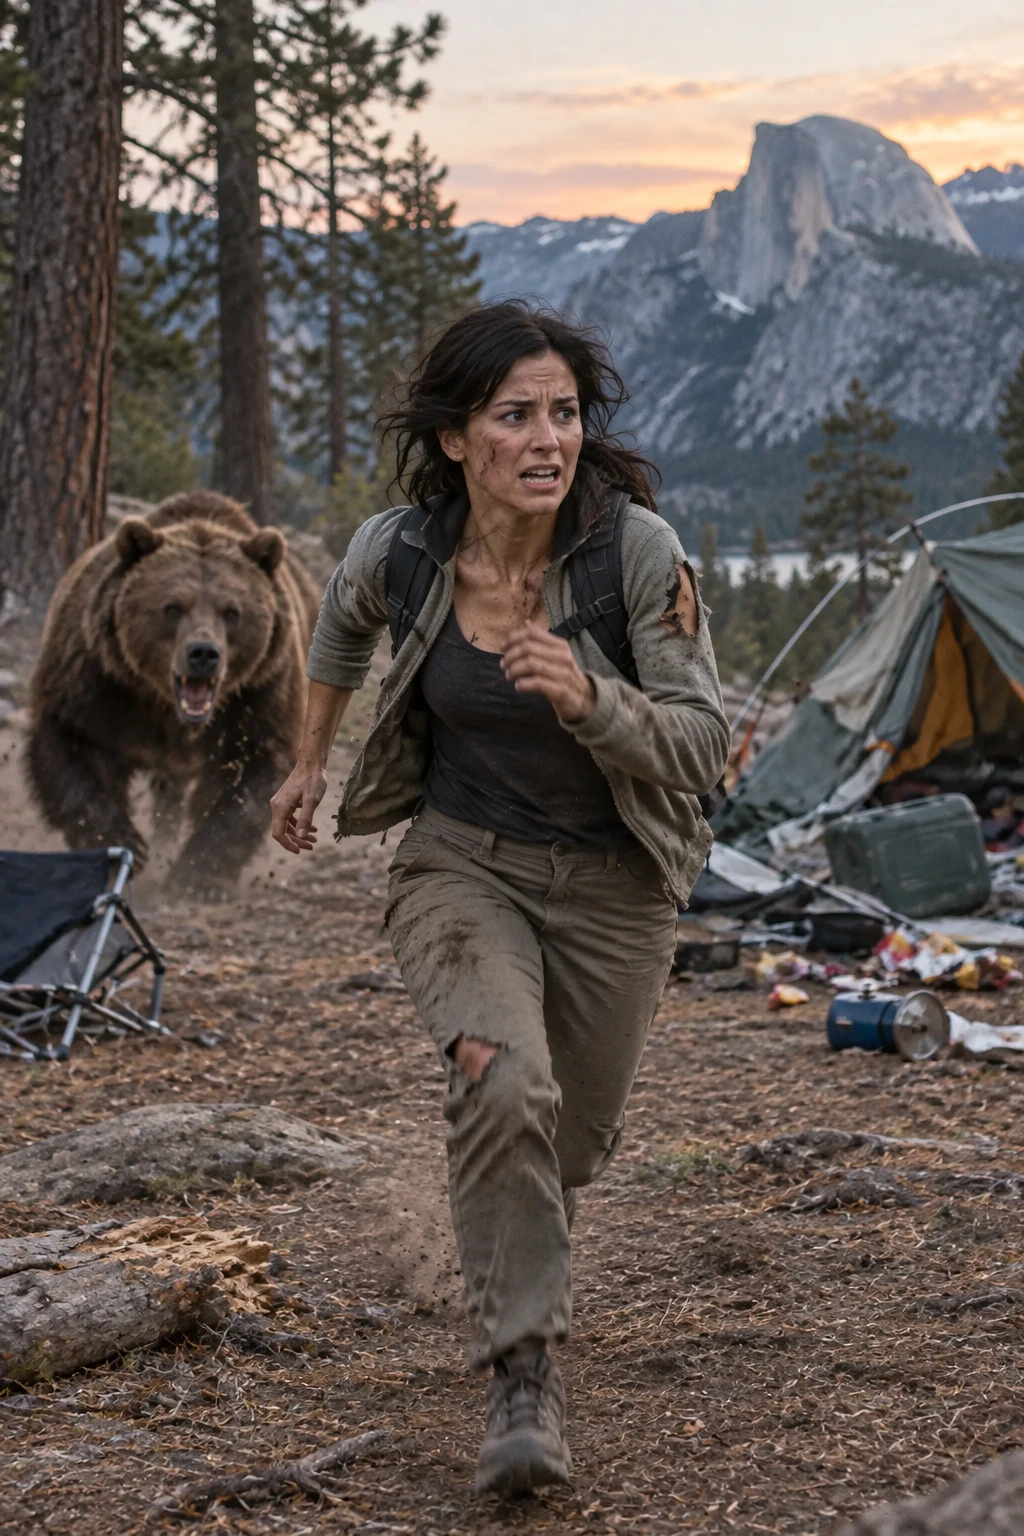
Generate a highly realistic action scene where this person is running away from a large, realistic brown bear attacking a campsite. The image should look like a real photograph someone could have taken, not an overly enhanced or cinematic movie-poster image.
She is centered in the image but looking away from the camera, wearing outdoorsy camping attire, with dirt on her face and tears in her clothing. She is clearly afraid but focused on escaping, running away from the bear as it destroys the campsite behind her.
The campsite is in Yosemite National Park, with believable natural details. The time of day is dusk, with natural lighting and realistic colors. Everything should feel grounded, authentic, and unstyled, as if captured in a real moment. Avoid cinematic lighting, dramatic color grading, or stylized composition.
Example outputs:
GPT Image 2.5 Flare
GPT Image 2.5 Sunburst
Refine an image across turns
Start with one output, inspect it, and use it as the next input. Keep each follow-up narrow so you can see which change helped.
Create the starting image
Use the shampoo photograph from Create a transparent product cutout as the input for this billboard scene. Quote the label text exactly.
Edit settings: size="1024x1536", quality="medium".
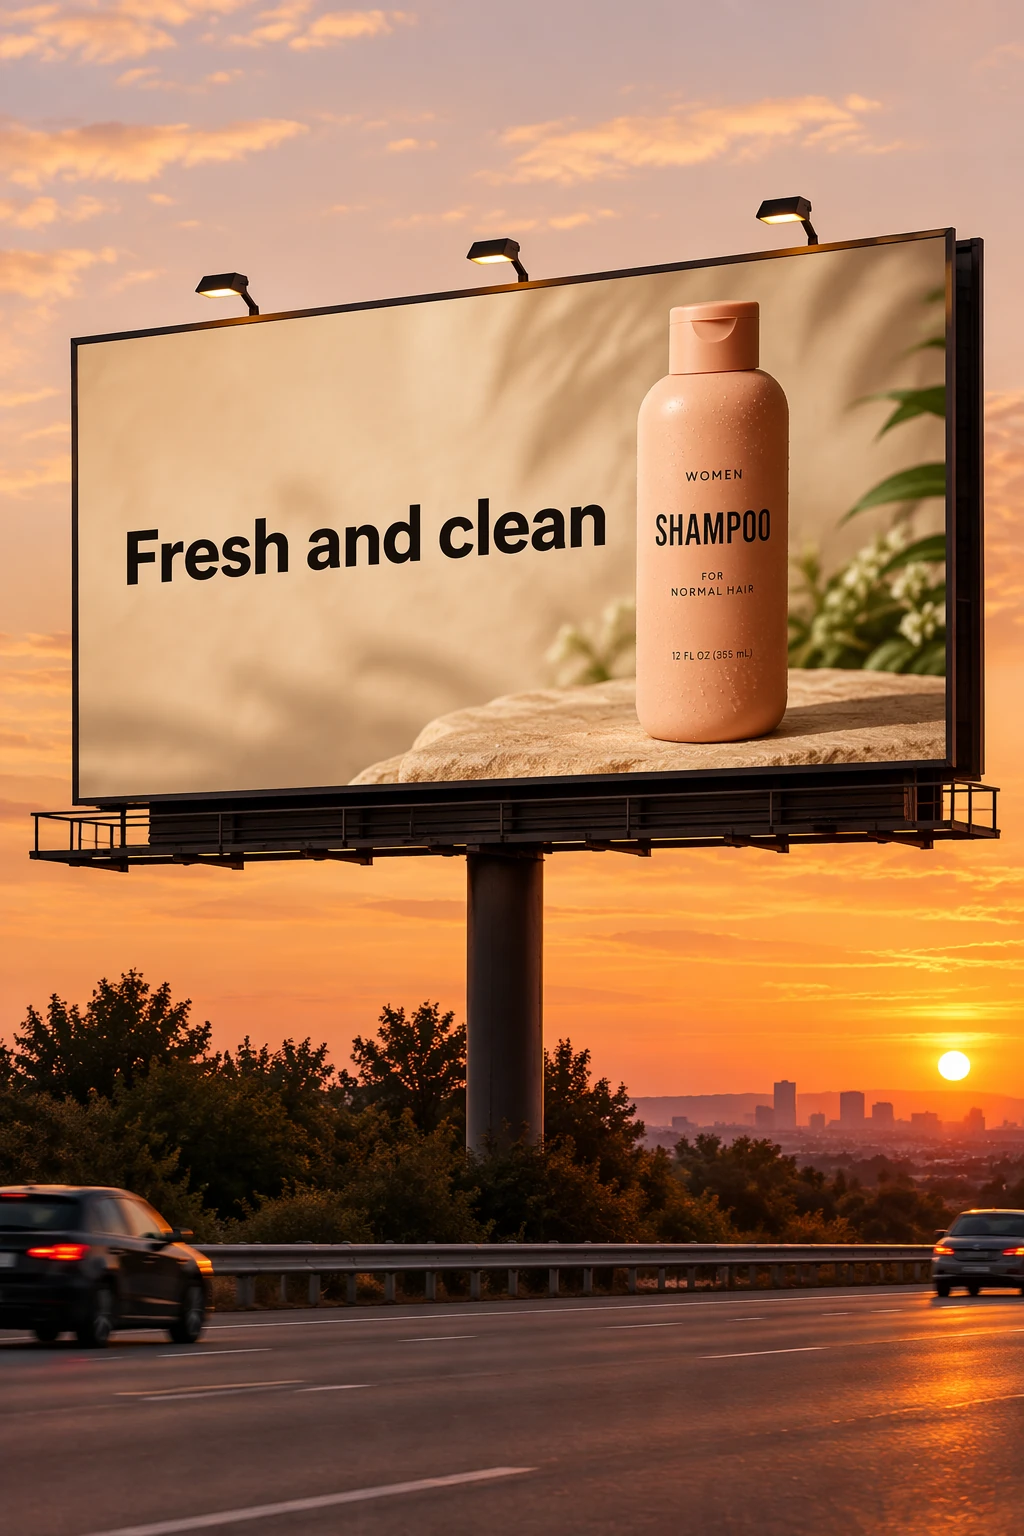
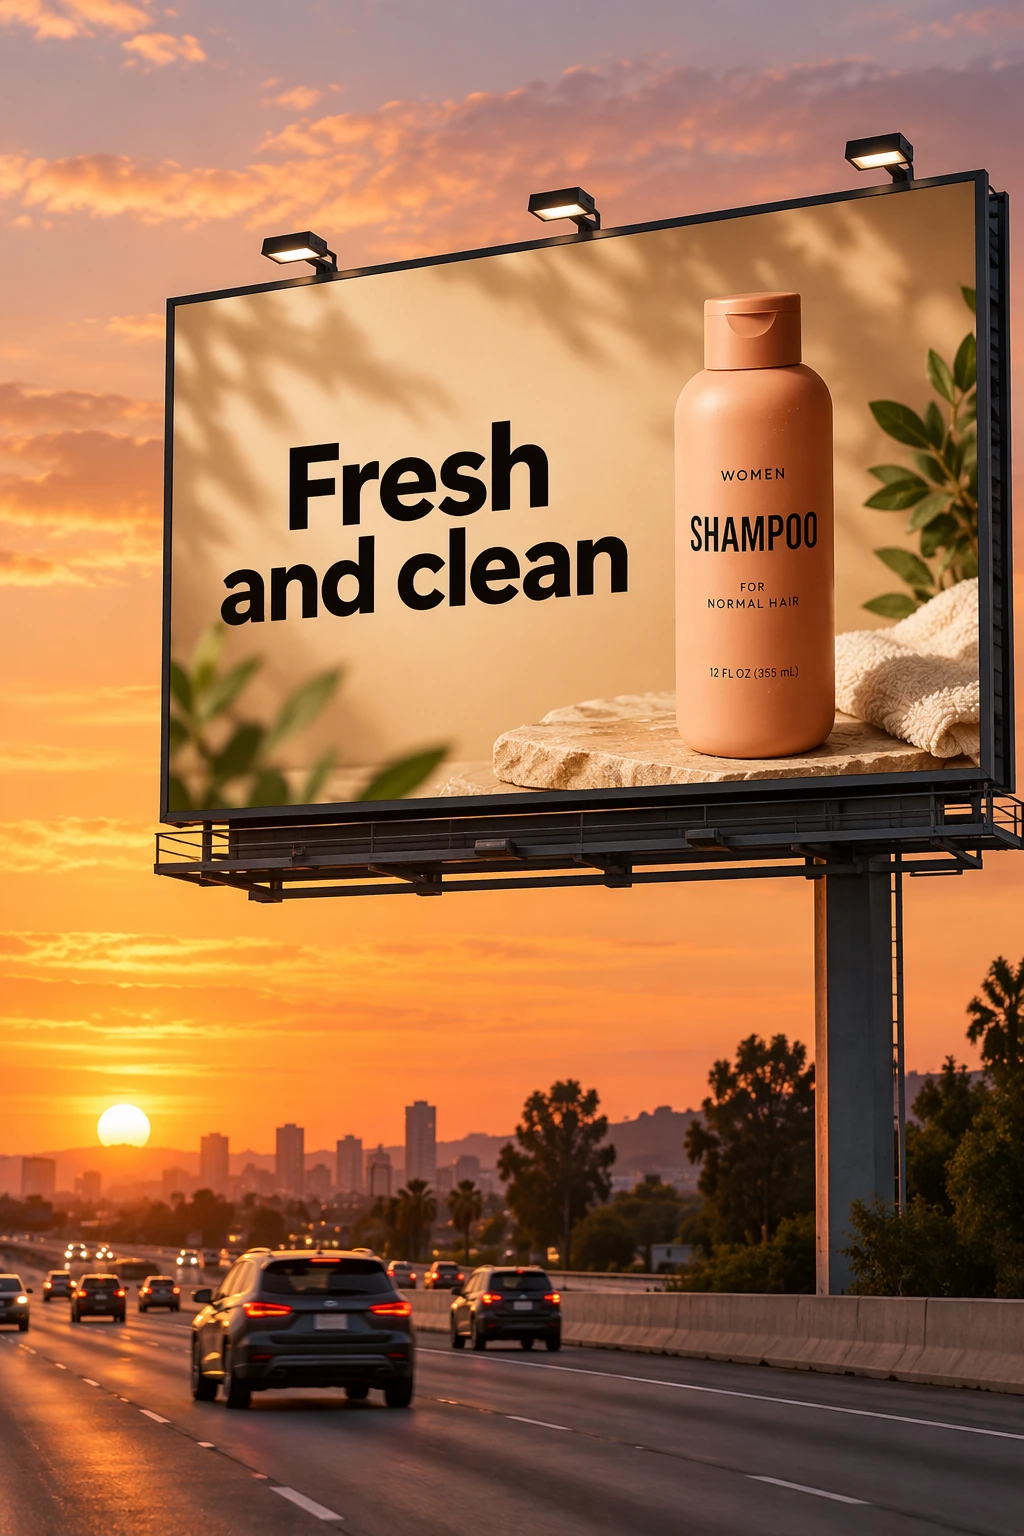
Create a realistic billboard mockup of the shampoo on a highway scene during sunset.
Billboard text (EXACT, verbatim, no extra characters):
"Fresh and clean"
Typography: bold sans-serif, high contrast, centered, clean kerning.
Ensure text appears once and is perfectly legible.
No watermarks, no logos.
Input image:
Example outputs:
GPT Image 2.5 Flare
GPT Image 2.5 Sunburst
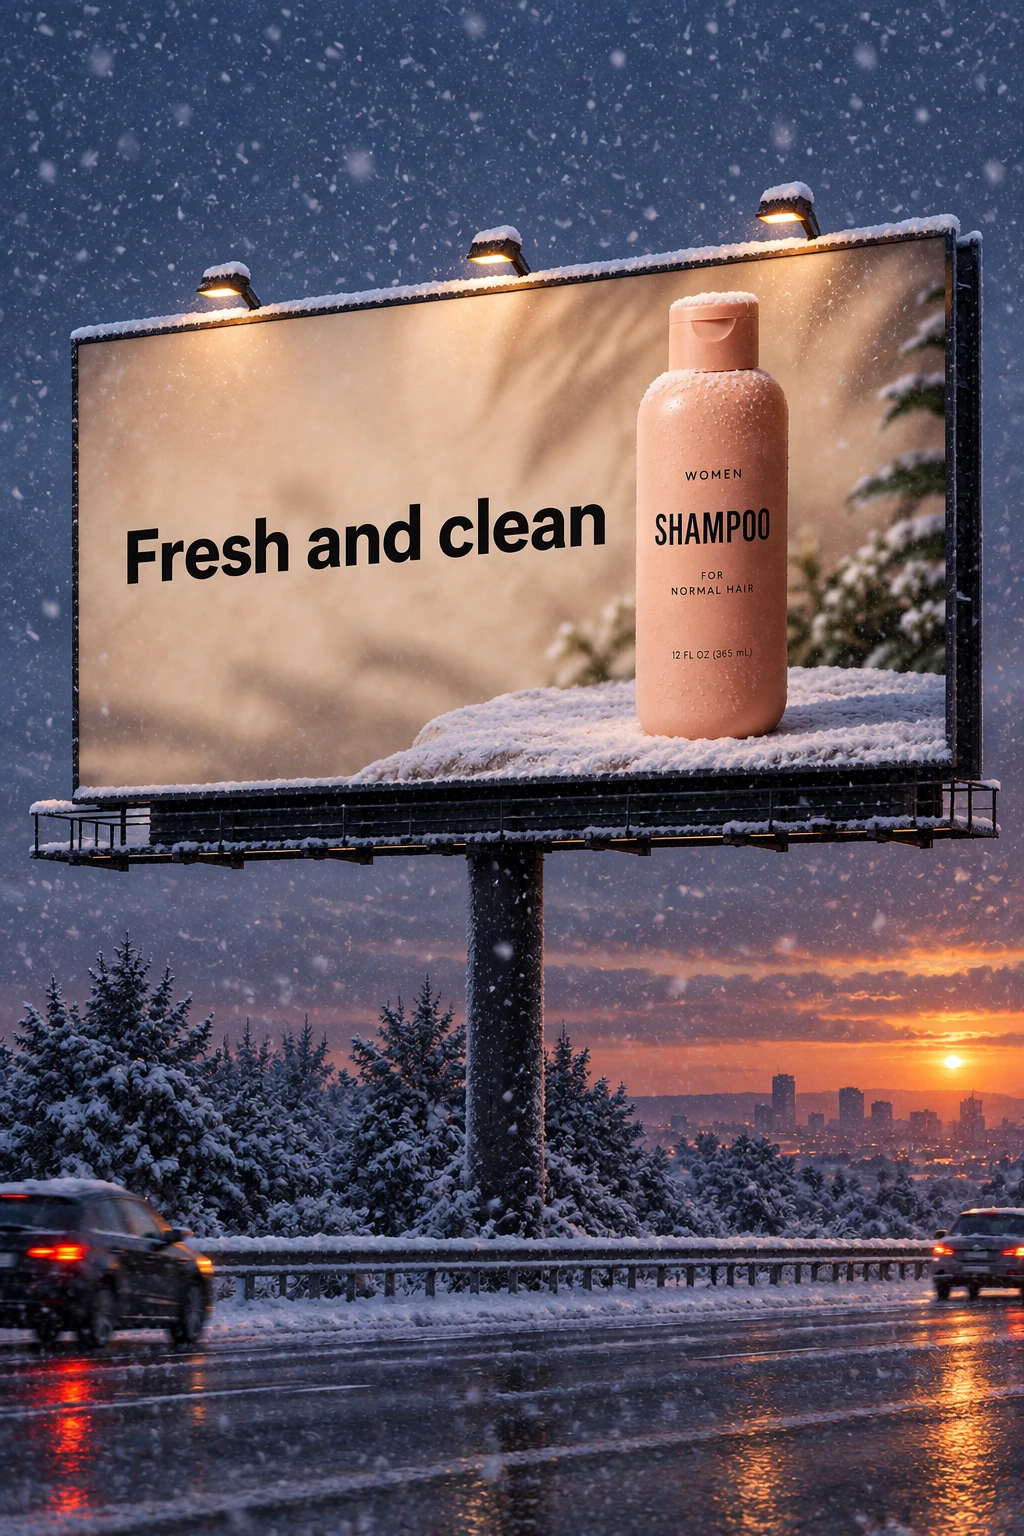
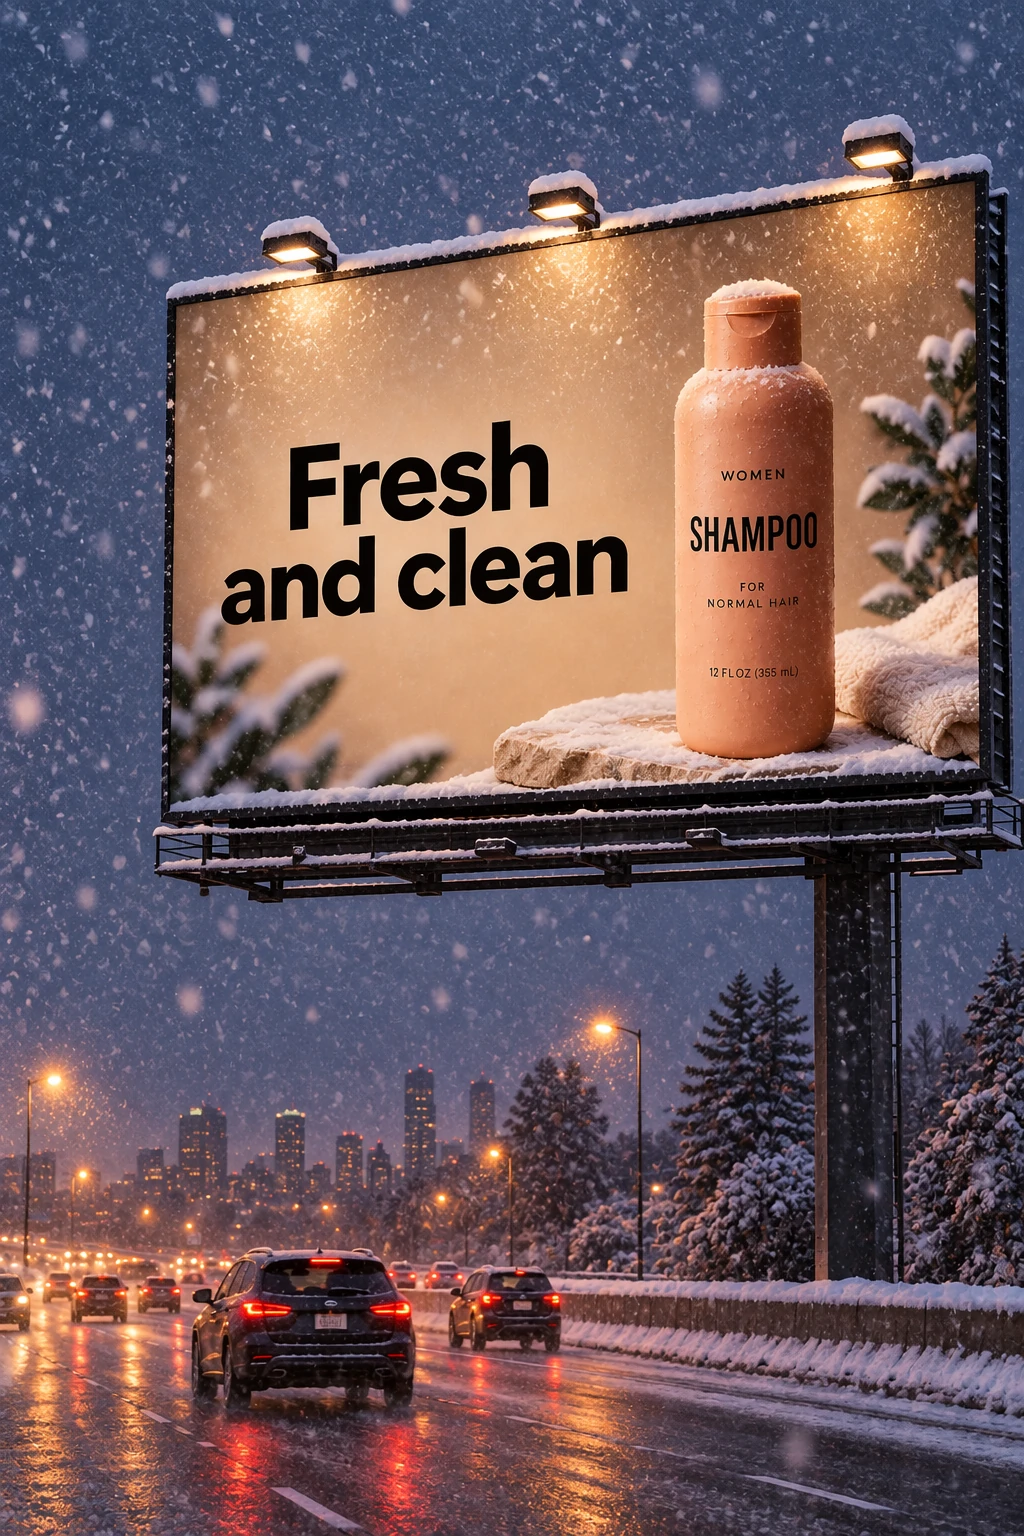
Change one condition
Pass each model’s billboard output from the previous step into its next edit request. This short follow-up changes the weather while retaining the existing scene.
Edit settings: size="1024x1536", quality="medium".
Make it look like a winter evening with snowfall.Example outputs:
GPT Image 2.5 Flare
GPT Image 2.5 Sunburst
Keep a character consistent
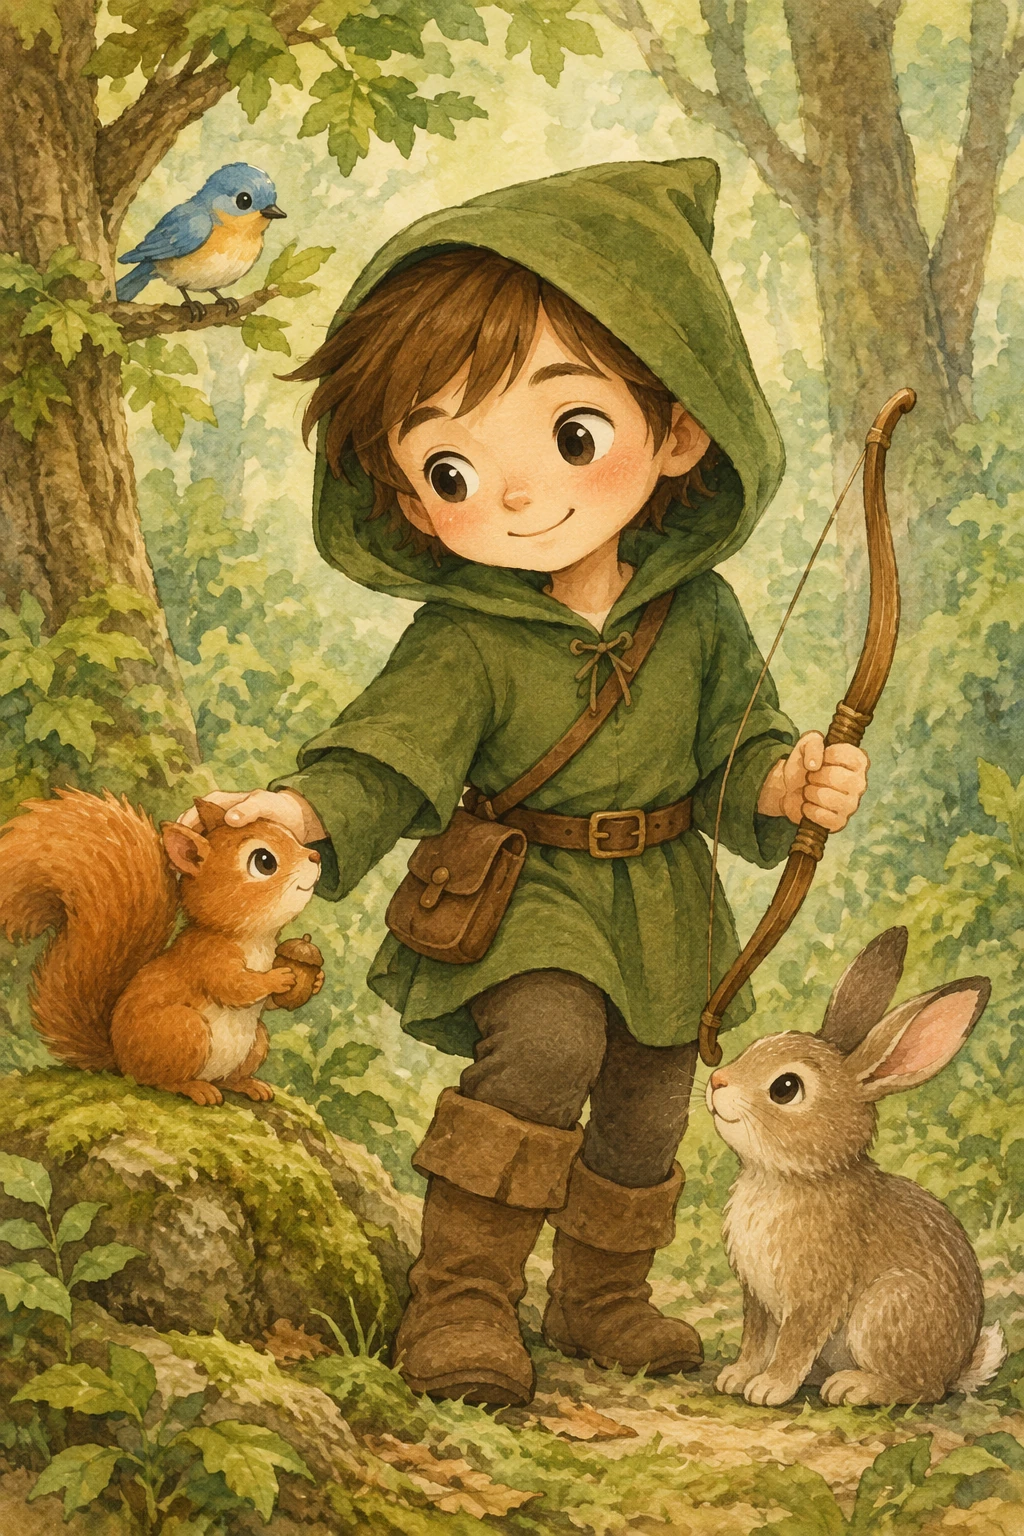
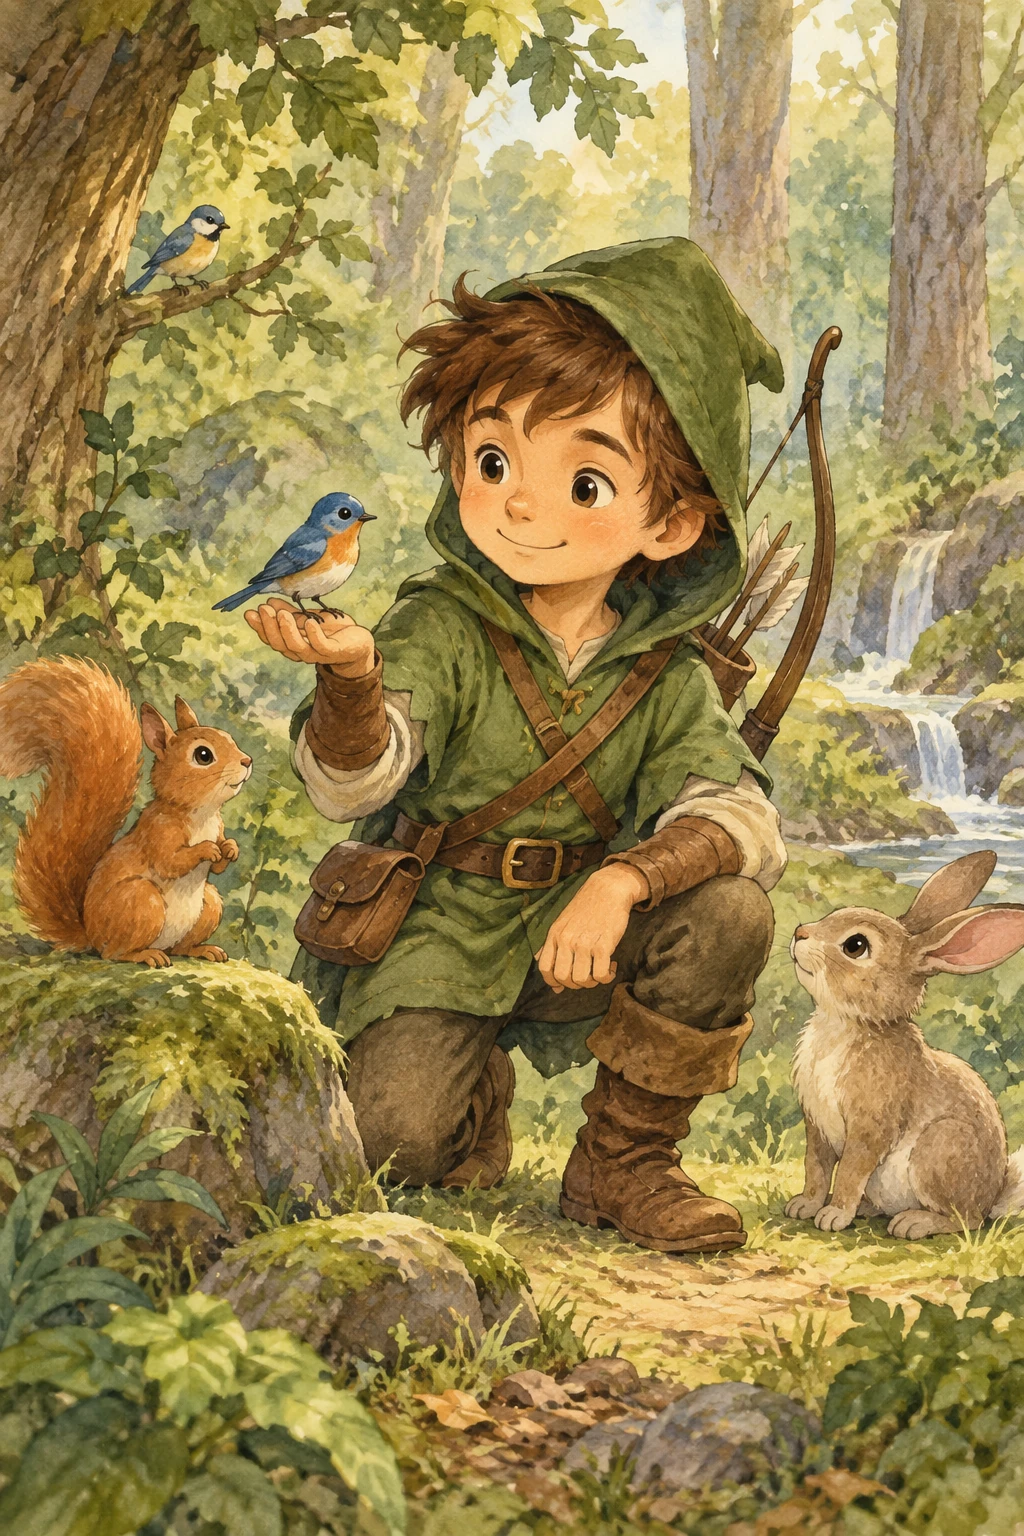
For a book with multiple illustrations, create a reusable character reference to help preserve appearance across scenes, poses, and pages. Change the environment and story while repeating the character’s defining details.
Establish the character
Define the character’s appearance, proportions, outfit, and tone.
Generation settings: size="1024x1536", quality="medium".
Create a children’s book illustration introducing a main character.

Character:
A young, storybook-style hero inspired by a little forest outlaw,
wearing a simple green hooded tunic, soft brown boots, and a small belt pouch.
The character has a kind expression, gentle eyes, and a brave but warm demeanor.
Carries a small wooden bow used only for helping, never harming.

Theme:
The character protects and rescues small forest animals like squirrels, birds, and rabbits.

Style:
Children’s book illustration, hand-painted watercolor look,
soft outlines, warm earthy colors, whimsical and friendly.
Proportions suitable for picture books (slightly oversized head, expressive face).

Constraints:
- Original character (no copyrighted characters)
- No text
- No watermarks
- Plain forest background to clearly showcase the character
Example outputs:
GPT Image 2.5 Flare
GPT Image 2.5 Sunburst
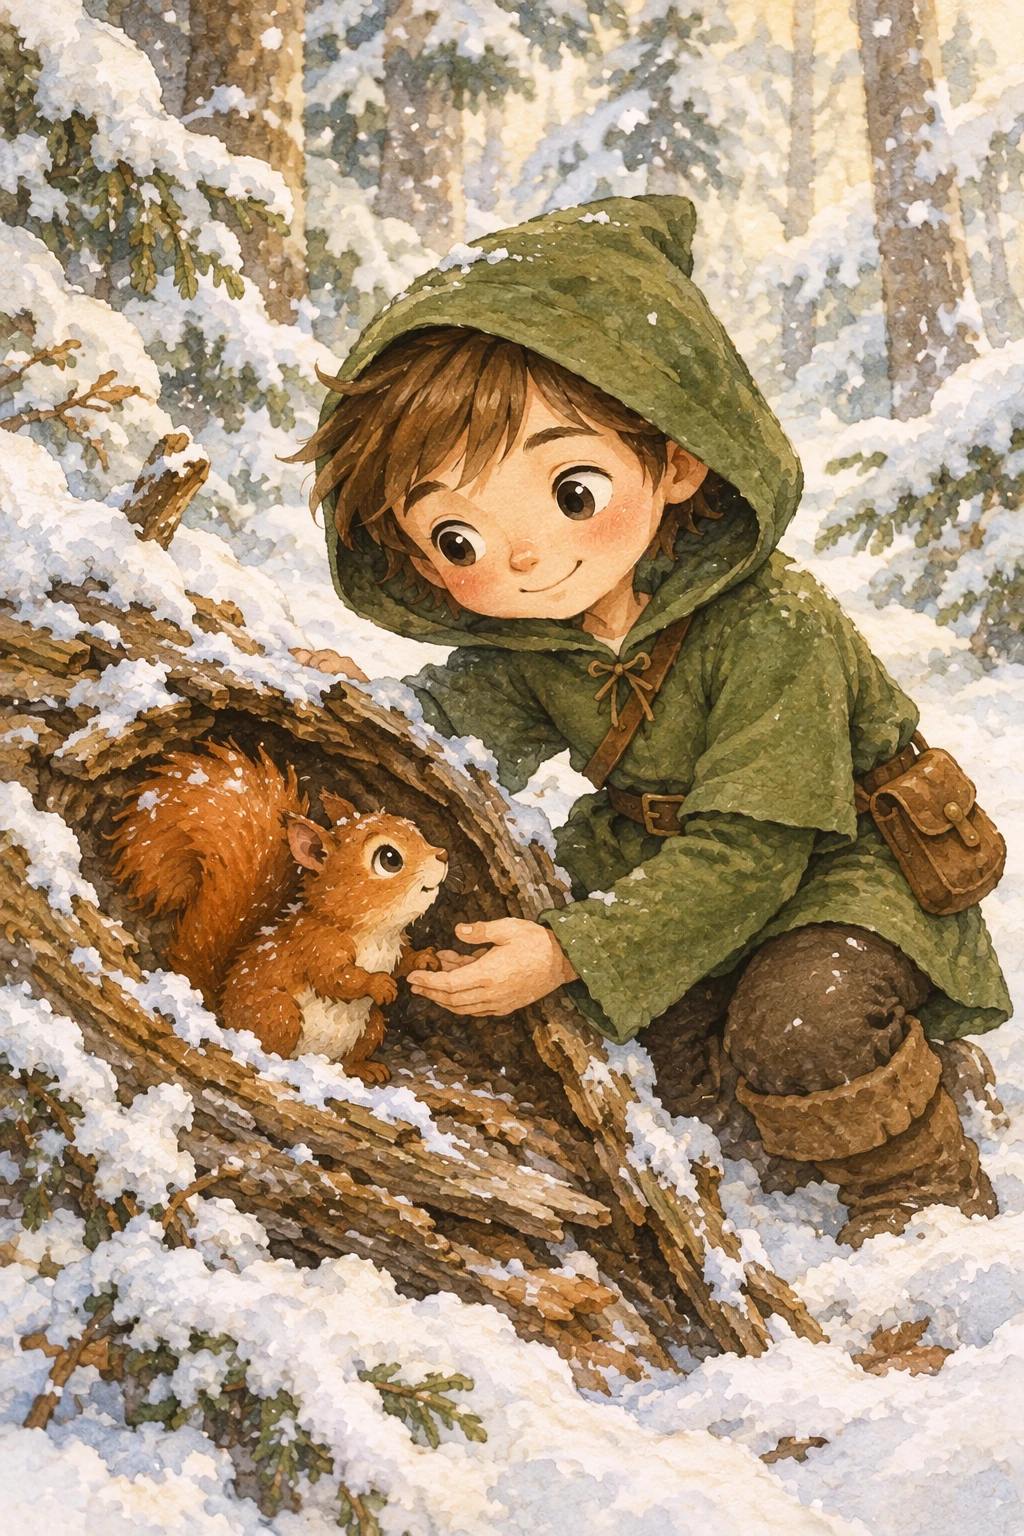
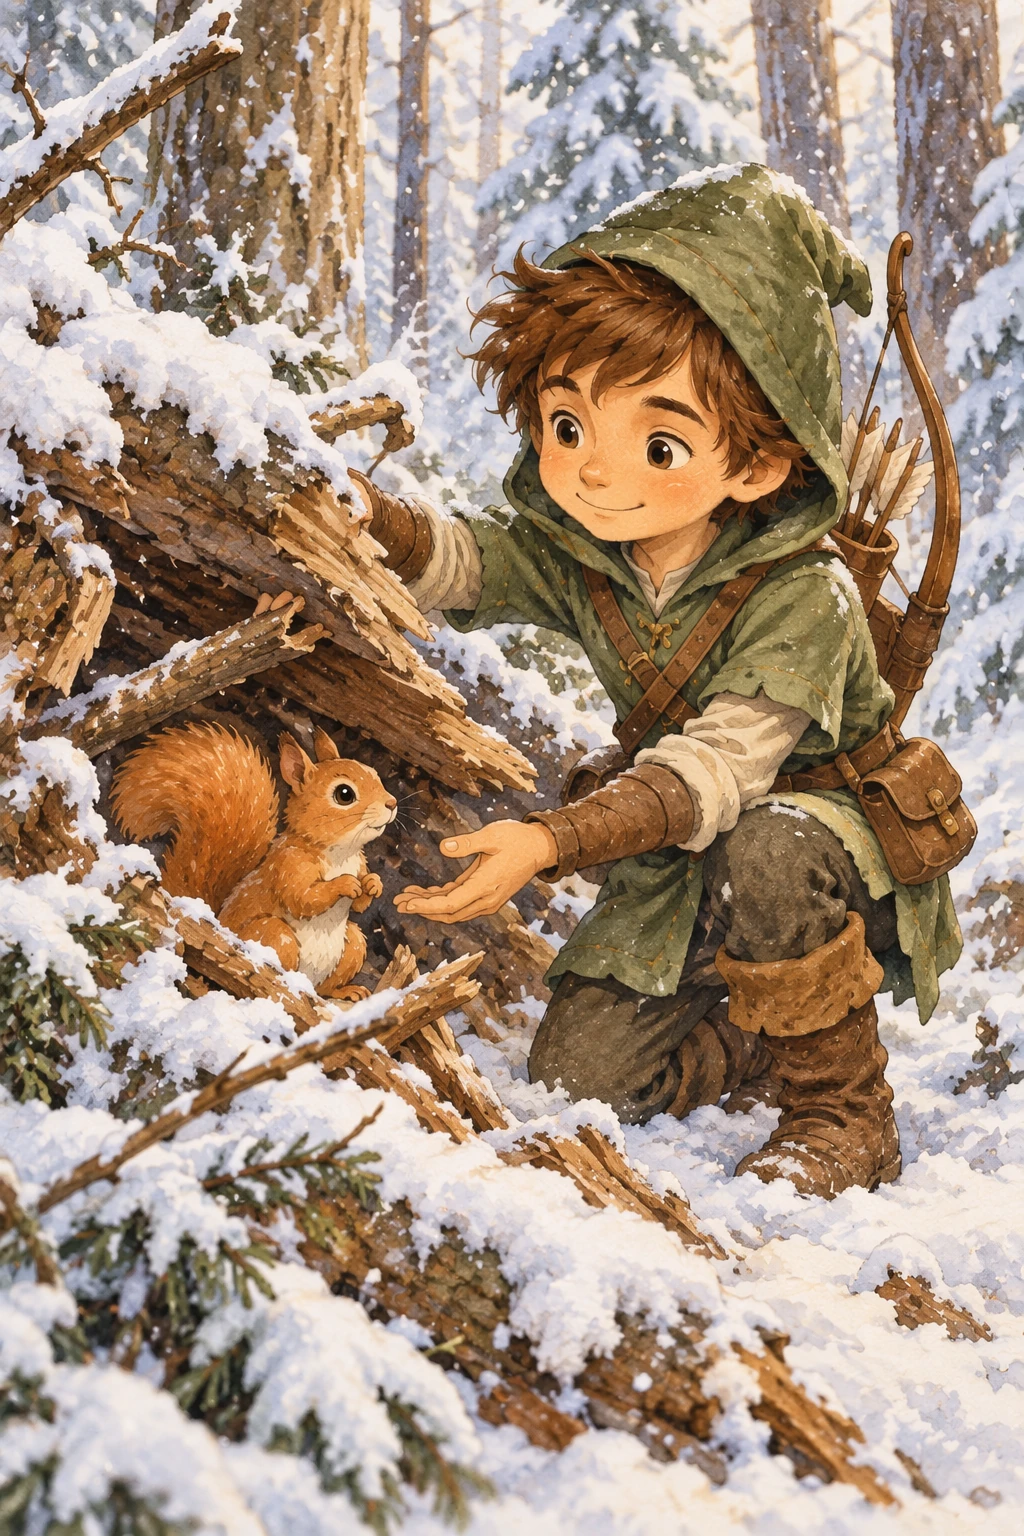
Continue the story
Reuse each model’s generated character image and describe a new scene. Repeat the appearance constraints so the character stays consistent.
Edit settings: size="1024x1536", quality="medium".
Continue the children’s book story using the same character.

Scene:
The same young forest hero is gently helping a frightened squirrel
out of a fallen tree after a winter storm.
The character kneels beside the squirrel, offering reassurance.

Character Consistency:
- Same green hooded tunic
- Same facial features, proportions, and color palette
- Same gentle, heroic personality

Style:
Children’s book watercolor illustration,
soft lighting, snowy forest environment,
warm and comforting mood.

Constraints:
- Do not redesign the character
- No text
- No watermarks
Example outputs:
GPT Image 2.5 Flare
GPT Image 2.5 Sunburst
More workflows
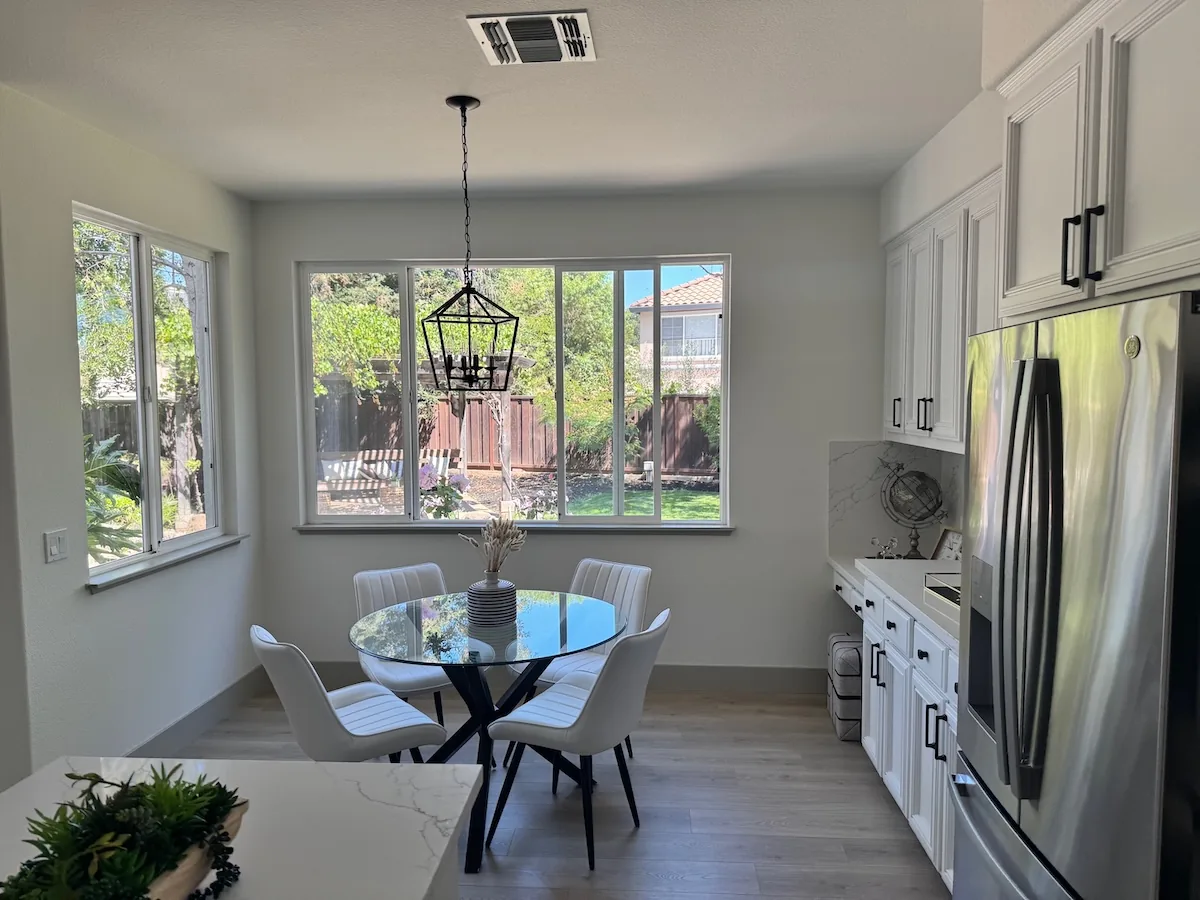
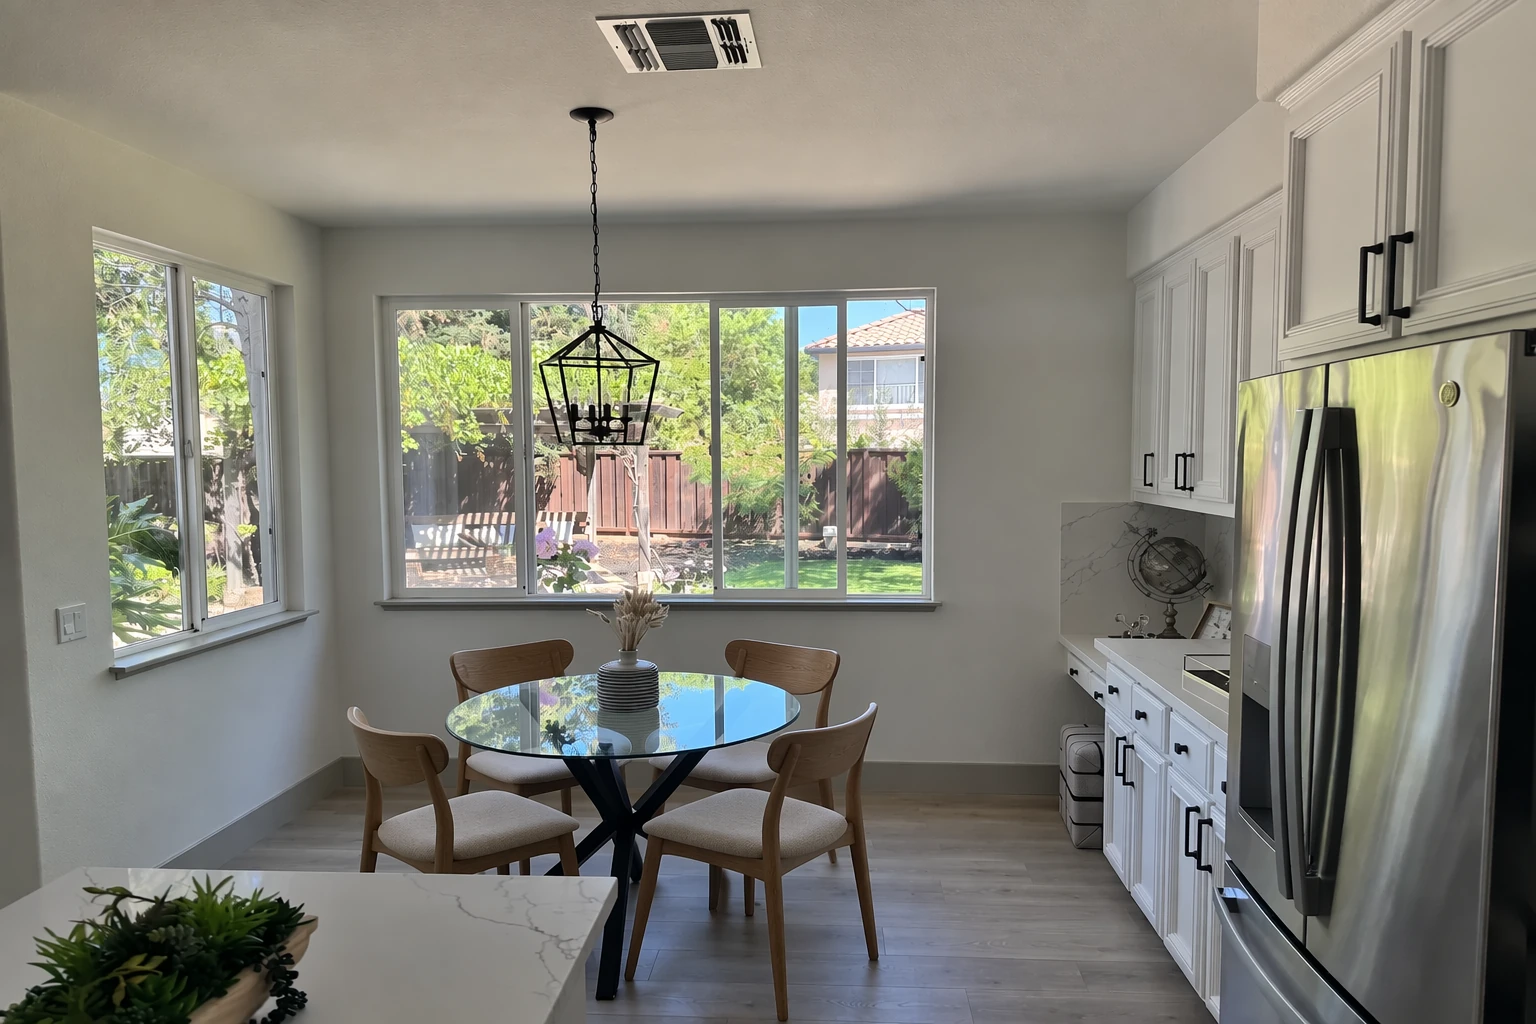
Change furniture in a room
Visualize furniture or décor changes in real spaces without recreating the entire scene. The goal is surgical realism: swap a single object while preserving camera angle, lighting, shadows, and surrounding context so the edit looks like a real photograph, not a redesign.
Edit settings: size="1536x1024", quality="medium".
In this room photo, replace ONLY the white chairs with chairs made of wood.
Preserve camera angle, room lighting, floor shadows, and surrounding objects.
Keep all other aspects of the image unchanged.
Photorealistic contact shadows and fabric texture.
Input image:
Example outputs:
GPT Image 2.5 Flare
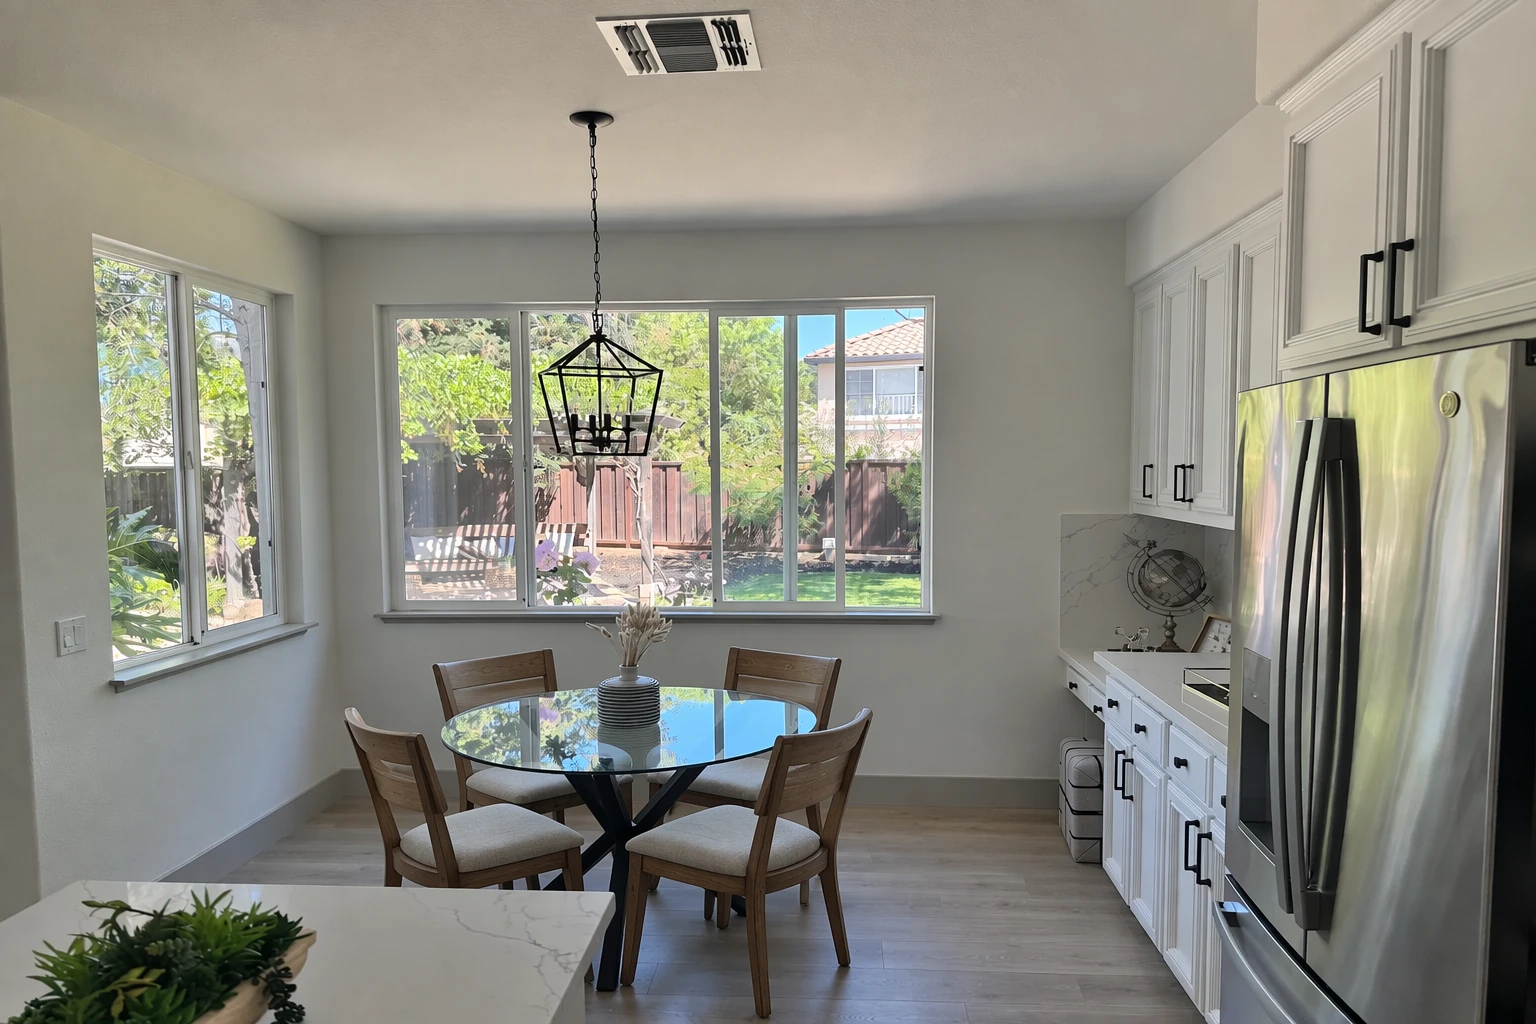
GPT Image 2.5 Sunburst
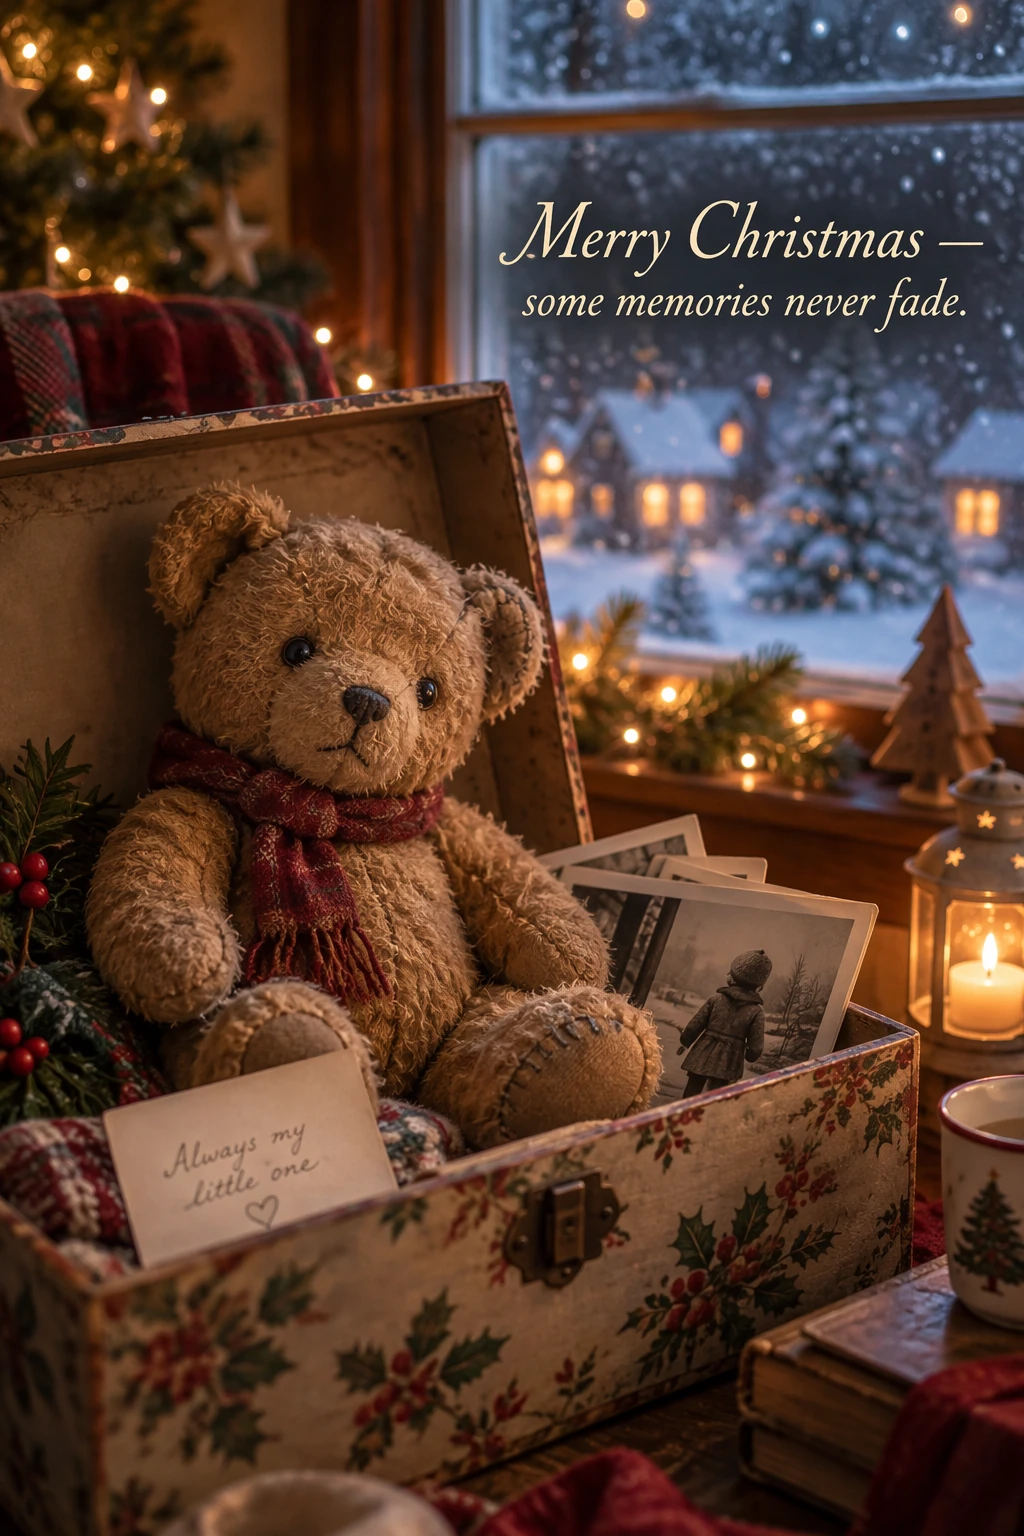
Design a holiday card
For seasonal card concepts, describe the scene, emotional tone, materials, lighting, and exact copy. For a 3D pop-up or photographed-card treatment, specify paper layers, fibers, folds, and soft studio lighting. The example below uses a nostalgic teddy-bear scene.
Generation settings: size="1024x1536", quality="medium".
Create a Christmas holiday card illustration.

Scene:
a cozy Christmas scene with an old teddy bear sitting inside a keepsake box, slightly worn fur, soft stitching repairs, placed near a window with falling snow outside. The scene suggests the child has grown up, but the memories remain.

Mood:
Warm, nostalgic, gentle, emotional.

Style:
Premium holiday card photography, soft cinematic lighting,
realistic textures, shallow depth of field,
tasteful bokeh lights, high print-quality composition.

Constraints:
- Original artwork only
- No trademarks
- No watermarks
- No logos

Include ONLY this card text (verbatim):
"Merry Christmas — some memories never fade."
Example outputs:
GPT Image 2.5 Flare

GPT Image 2.5 Sunburst
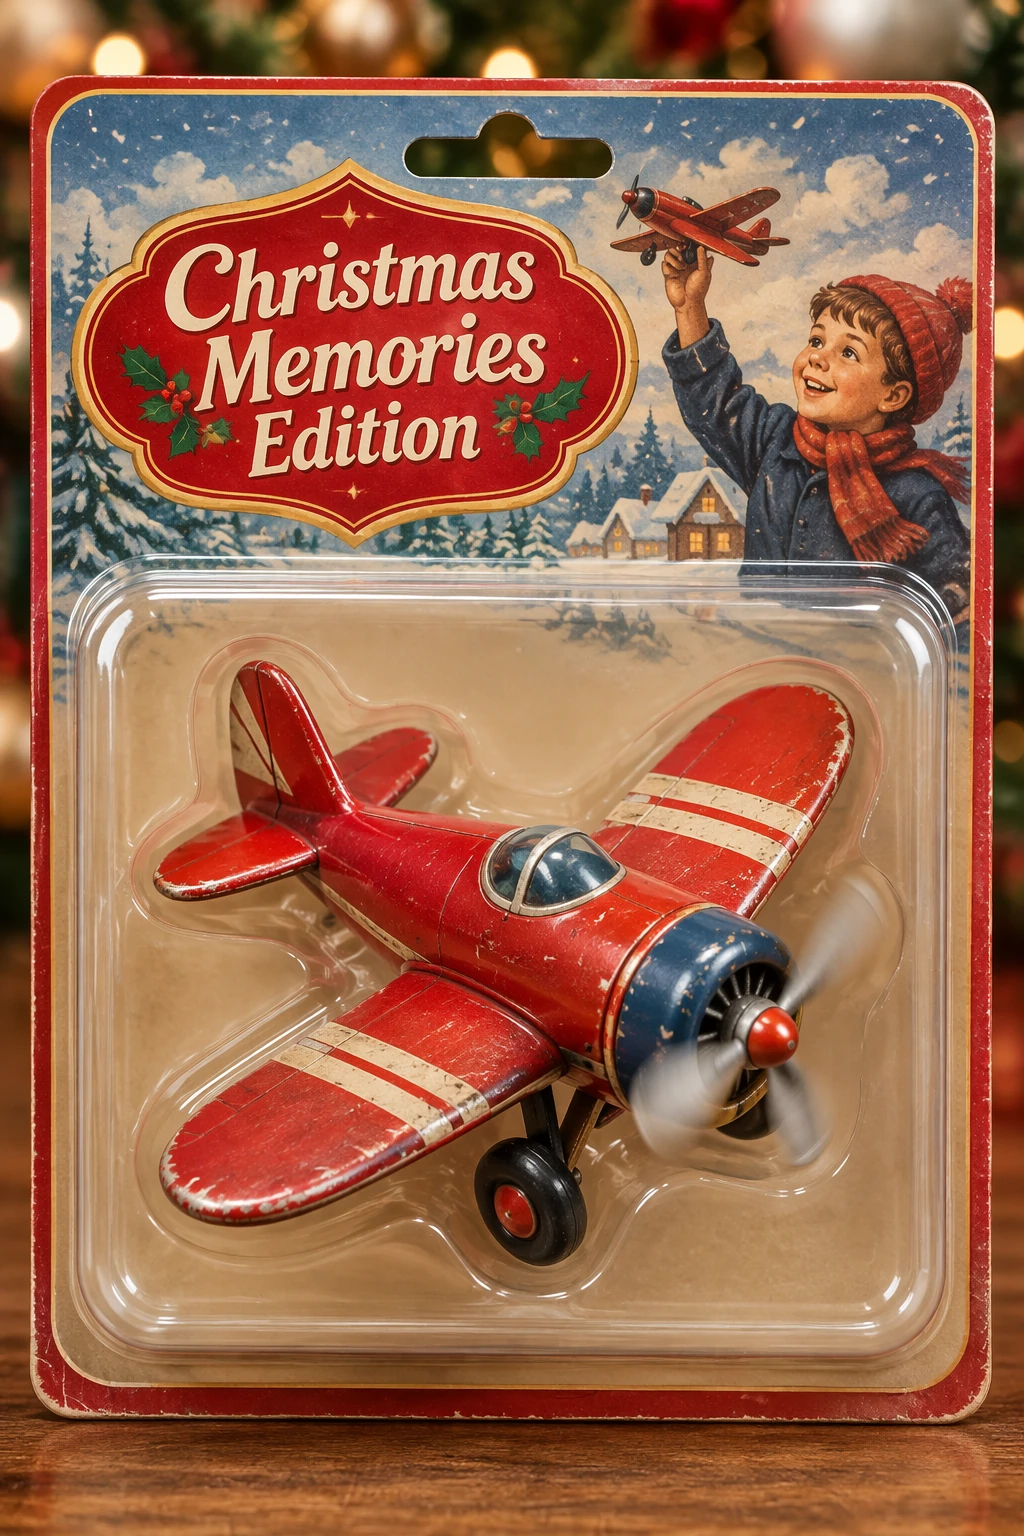
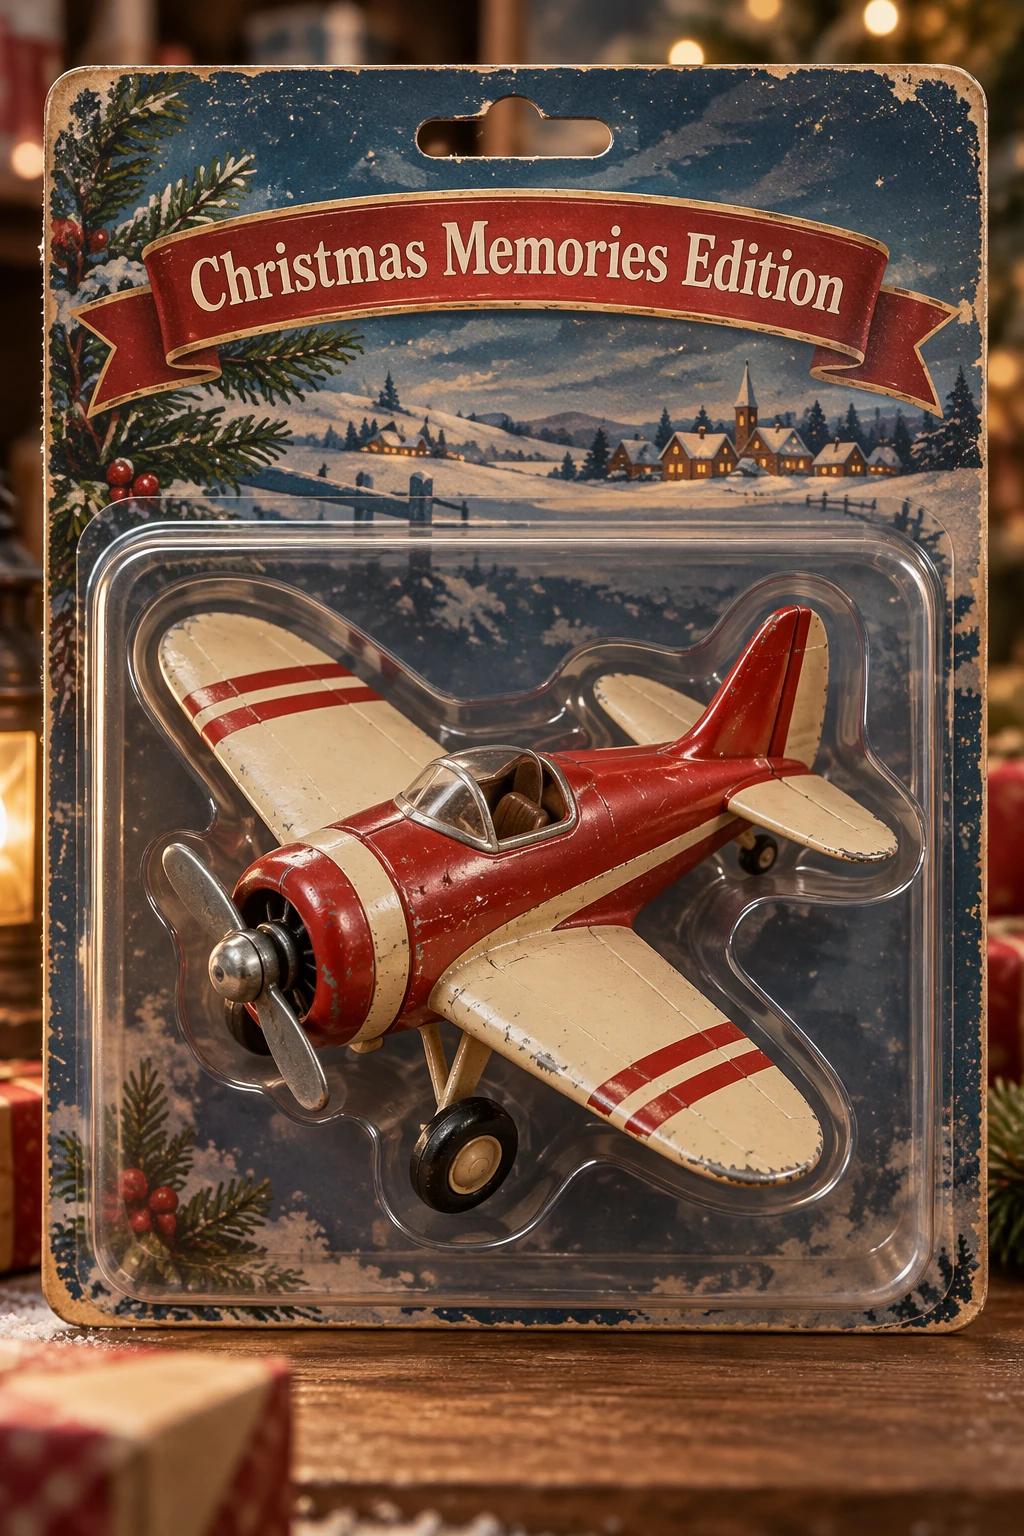
Design collectible merchandise
Explore merchandise and packaging concepts using product photography cues: materials, packaging, and print clarity. Keep designs original and non-infringing, and compare multiple character or packaging variants.
Generation settings: size="1024x1536", quality="medium".
Create a collectible action figure of a vintage-style toy propeller airplane with rounded wings, a front-mounted spinning propeller, slightly worn paint edges, classic childhood proportions, designed as a nostalgic holiday collectible, in blister packaging.

Concept:
A nostalgic holiday collectible inspired by the simple toy airplanes
children used to play with during winter holidays.
Evokes warmth, imagination, and childhood wonder.

Style:
Premium toy photography, realistic plastic and painted metal textures,
studio lighting, shallow depth of field,
sharp label printing, high-end retail presentation.

Constraints:
- Original design only
- No trademarks
- No watermarks
- No logos

Include ONLY this packaging text (verbatim):
"Christmas Memories Edition"
Example outputs:
GPT Image 2.5 Flare
GPT Image 2.5 Sunburst
Run a complete example
This runnable example remains pinned to gpt-image-2. Use it as a baseline, then choose an available model and its supported request settings for your evaluation.
The examples below generate four logo variations and extract a product onto a transparent background. Install the OpenAI SDK with pip install openai for Python or gem install openai for Ruby. Set OPENAI_API_KEY and save the product photograph as input_images/shampoo.webp. Live requests incur API usage charges.
For additional prompts and complete workflows, see the original notebook.
Check the result
Check the output against the requirements before using it:
- Is required text accurate and legible? Are diagram labels and relationships correct?
- Do identities, product shapes, labels, and reference details remain intact?
- Did the edit change only what you requested?
- If transparency is required, does the file contain an alpha channel rather than a painted background?
Compare quality, latency, and cost on representative inputs when changing prompts or models. See image generation pricing for current costs.
GPT Image 2 reference
Overview and request settings for existing GPT Image 2 workflows.
Overview
GPT Image 2 supports image generation and editing, including text rendering, reference-based edits, and flexible output sizes. Use this reference to maintain existing integrations. The prompting guide covers shared techniques for composition, text, reference images, and preserving details during edits. Its illustrated examples use GPT Image 2.5 Flare and GPT Image 2.5 Sunburst; outputs can differ across models. For migration, use the guide’s model selection and evaluation workflow.
Model parameters
Use client.images.generate for generation and client.images.edit for edits. See the image generation guide for API setup and request examples.
| Parameter | GPT Image 2 |
|---|---|
model |
gpt-image-2 |
quality |
low, medium, high, or auto |
size |
auto or a supported resolution; see size constraints |
input_fidelity |
Omit it. Image inputs are always processed at high fidelity. |
output_format |
png, jpeg, or webp |
background |
For transparent output, explicitly set transparent and use PNG or WebP. |
output_compression |
Use only for JPEG or WebP output, not PNG. |
Transparent backgrounds are available in preview for gpt-image-2.
For the original prompts, inputs, and runnable workflows, see the pinned GPT Image 2 notebook.
GPT Image 1.5 reference
Overview and request settings for existing GPT Image 1.5 workflows.
Overview
Deprecated model. gpt-image-1.5 is scheduled to shut down on December 1,
2026. See the deprecation
notice and
validate existing workflows with gpt-image-2 before migrating.
GPT Image 1.5 supports image generation and editing, including text rendering, photorealistic images, and reference-based edits. Use this reference to maintain existing integrations. The prompting guide covers shared techniques for composition, text, reference images, and preserving details during edits. Test those techniques with your model and inputs; outputs can differ across models.
Model parameters
Use client.images.generate for generation and client.images.edit for edits. See the image generation guide for API setup and request examples.
| Parameter | GPT Image 1.5 |
|---|---|
model |
gpt-image-1.5 |
quality |
low, medium, high, or auto |
size |
1024x1024, 1024x1536, 1536x1024, or auto |
output_format |
png, jpeg, or webp |
output_compression |
0 to 100, for JPEG or WebP output only |
background |
Set transparent explicitly for transparent output; use PNG or WebP |
input_fidelity |
low or high; high preserves input details, while quality controls output generation. Omit this parameter when migrating to GPT Image 2, which always uses high input fidelity. |
GPT Image 1 reference
Legacy request settings for migrating GPT Image 1 workflows.
Overview
Retired model. gpt-image-1 was shut down on October 23, 2026. Use
gpt-image-2.5-sunburst or gpt-image-2.5-flare instead. See the
deprecation
notice for
migration details.
GPT Image 1 supported image generation and editing with reference images and masks. Use this reference when migrating existing integrations. For shared techniques such as describing a scene, preserving details, and refining an edit, see the prompting guide.
Model parameters
These settings describe legacy GPT Image 1 requests. See the image generation guide for supported models, API setup, and current request examples.
| Parameter | GPT Image 1 |
|---|---|
model |
gpt-image-1 |
quality |
low, medium, high, or auto |
size |
1024x1024, 1024x1536, 1536x1024, or auto |
output_format |
png, jpeg, or webp |
output_compression |
0 to 100, for JPEG or WebP output only |
background |
Set transparent explicitly for transparent output; use PNG or WebP |
input_fidelity |
low or high; high preserves input details, while quality controls output generation. High input fidelity uses more image input tokens. Omit this parameter when migrating to GPT Image 2, which always uses high input fidelity. |